Apache configuration file. Apache configuration overview on Ubuntu
Let’s set the minimum attributes required for work; to do this, open the file for editing /etc/httpd/conf/httpd.conf
Apache can run with one of three available multiprocessing modules (mpm):
- prefork— one process per request, the most frequently used module;
- worker— several processes with several threads each;
- event— a new experimental version of the standard worker multiprocessor module.
To view information about modules, run:
# httpd -V | grep "Server MPM"
Example configuration for Apache 2.4
ServerLimit 256
StartServers 20
MinSpareServers 20
MaxSpareServers 20
MaxRequestWorkers 256
MaxConnectionsPerChild 4000
Set MaxRequestWorkers to a value equal to ServerLimit.
Example configuration for Apache 2
In section
StartServers 5
MinSpareServers 10
MaxSpareServers 10
MaxClients 30
ServerLimit 30
StartServers— the number of processes launched, calculated as (Total memory - Memory for server, MySQL, Memcache, etc.) / process size. For example, 64Gb - 32Gb / 0.256Gb = maximum 125 processes.
MinSpareServers— minimum number of idle processes.
MaxSpareServers— the maximum number of idle processes.
MaxClients— process limit.
ServerLimit— set to the same value as MaxClients.
It is necessary to approach the calculation of MaxClients carefully, because when setting a small value, the number of web server refusals to service a client request may increase. Setting the value too high can result in swapping and a significant increase in web server response time.
When using a single-level and two-level VTB server configuration, the limits are set differently. By giving the generated pages to a lighter WTB server (for example, nginx), the limits can be lowered. Specific values are calculated individually for each web server.
KeepAlive
When you request a page from a web server, the browser makes many requests to download CSS styles, images, etc. Using KeepAlive allows you to request a page and its accompanying files during a single connection.
- We enable KeepAlive, for this line Keep Alive Off replace with KeepAliveOn.
- MaxKeepAliveRequests set it to 100.
- KeepAliveTimeout Most often it is set in the range of 2 - 10. We recommend setting it to 5 seconds.
Apache is a whole family of different projects, the first of which was a Web server. The Web server is represented by the httpd daemon, so the Apache Web server project is called httpd.
Configuration files httpd web servers in GNU/Linux in different distributions are located in different directories: /etc/httpd/conf/, or /etc/apache2, or others. The main configuration file is called httpd.conf, and often individual configuration files allocated for certain groups of settings are connected to httpd.conf using the include directive.
In general, httpd settings can be divided into three main categories:
r global settings section;
r settings for the main server;
r settings for virtual nodes.
In addition to these sections, you can select settings for processing specified file types, MIME extensions and specifications for processing national languages.
Global server settings include those that affect the operation of the Apache server as a whole. The following are the main global settings:
r ServerRoot - the base installation directory, relative to which the Apache configuration files, as well as some files necessary for its operation, are located in the GNU/Linux file system;
r PidFile - a file in which the PID is entered when the Apache server starts
main server process;
r LoadModule - command to load an Apache extension module compiled as a shared library;
r Timeout - number of seconds before sending a signal about connection loss;
r KeepAlive - enable or disable support for long-lived connections available within the HTTP/1.1 protocol, allowing the connection to be left unbroken after the server sends the required information;
r KeepAliveTimeOut - the number of seconds to wait for the next request, after which the long-lived connection will be closed;
r MaxKeepAliveRequests - the maximum possible number of requests allowed for long-lived connections;
r StartServers - the number of httpd child processes that start when the Apache server starts;
r MinSpareServers - the minimum number of httpd child processes waiting for connections (when connections appear, so many copies of httpd are launched so that the number of child processes waiting for connections is not less than this value);
r MaxSpareServers - the maximum number of httpd child processes waiting for connections (extra processes are stopped);
r MaxClients - limit on the maximum number of httpd child processes, which determines the possible number of connections;
r MaxRequestsPerChild - the maximum number of requests that one httpd child process is allowed to serve, upon reaching which it is guaranteed to stop to avoid possible memory leaks.
ServerRoot "/etc/httpd" PidFile run/httpd.pid Timeout 120
KeepAlive Off MaxKeepAliveRequests 100
KeepAliveTimeout 15
| StartServers | |
| MinSpareServers | |
| MaxSpareServers | |
| ServerLimit | |
| MaxClients |
MaxRequestsPerChild 4000
Listen 80
LoadModule auth_basic_module modules/mod_auth_basic.so LoadModule auth_digest_module modules/mod_auth_digest.so LoadModule authn_file_module modules/mod_authn_file.so LoadModule authn_alias_module modules/mod_authn_alias.so LoadModule authn_anon_module modules/mod_au thn_anon.so
User apache Group apache
It should be noted that modules can not only be connected using the LoadModule directive, but also installed directly into the Apache code at the stage of its compilation and assembly. To determine which modules were installed into the code at compilation stage, run the command httpd –l (Example 28.2).
$ /usr/sbin/httpd -l Compiled in modules:
core.c prefork.c http_core.c mod_so.c
Note that the prefork.c module is one of several different MPM (Multi-Processing Modules) modules available for Apache v2. These modules are aimed at different OS or to different models of multitasking processing. For example, the prefork.c module is focused on the traditional UNIX model of spawning child processes, and worker.c is focused on working with threads.
Among the main server settings, the most important are the following:
r Listen - forces Apache to listen only to the specified port;
r User - the user on whose behalf the httpd processes will be launched;
r Group - the group on behalf of which child processes will be launched
r DocumentRoot - directory for storing Web site files;
r UserDir - name of the directory for placing personal Web pages of users;
r DirectoryIndex - a list of file names that will be viewed when trying to access the root document of the directory;
r AccessFileName - name of the file containing directory access control directives;
r TypesConfig - specifies the location of the MIME configuration file;
r DefaultType - sets the default MIME type of the document;
r MimeMagicFile - specifies the location of the magic number file to determine the MIME type of the document;
r HostnameLookups - specifies the type of entering information about client requests either by IP address or by host name;
r ErrorLog - a log file where any errors will be logged
(messages) encountered in the process Apache works;
r LogLevel - logging information level;
r LogFormat - directive that defines the format for outputting information to the log;
r CustomLog - specifies the location of the log file;
r ServerSignature - allows information about the version, virtual node, etc. to be displayed in pages generated by the Apache server;
r Alias - sets aliases for access paths to server directories (the length of the alias line is less than the length of the access path line);
r ScriptAlias - does the same as Alias, but for directories with CGI-
scripts;
r IndexOptions - determines the type of directory indexing;
r AddIcon - specifies an icon file to display in specific situations, for example, when displaying a page with the contents of a directory, different types of files are associated with different icons;
r AddIconByEncoding - sets icons for specific MIME encodings;
r AddIconByType - sets icons for specific MIME document types;
r DefaultIcon - default icon;
r AddDescription - adds a comment line to certain document types (for example, .gz - gzipped document);
r ReadmeName - specifies the name of the README file added to the end of the list of files in the directory index;
r HeaderName - specifies the name of the HEADER file added to the beginning of the list of files in the directory index;
r IndexIgnore - names of files that will be ignored during indexing;
r AddEncoding - allows browsers to process information on the fly in a specified way (for example, display the contents of compressed gzip files);
r AddLanguage - displays specified file name extensions into a specific document language (for example, AddLanguage ru .ru);
r AddCharset - sets the mapping of a specific file name extension to a specific encoding;
r LanguagePriority - language order;
r AddType - sets the mapping of file name extensions to the MIME type;
r AddHandler - sets the type of processing by file name extension;
r ErrorDocument - allows you to customize error messages;
r BrowserMatch - specifies information output features for browsers.
In the httpd.conf configuration file, you often find conditional directives like
Alias /doc /usr/share/doc
This example sets the alias doc to the /usr/share/doc directory. However, such an alias will only be set if the mod_alias.c module is present. With this alias (if you have the appropriate permissions), you can access the contents of the /usr/share/doc directory using a Web browser using the URL http://localhost/doc.
Another type of conditional directive is
Apache often comes with quite extensive documentation in HTML format. For example, in Fedora distributions, Apache documentation is traditionally available after launching Apache from the URL http://localhost/manual.
Apache is the most popular free web server. As of 2016, it is used on 33% of all Internet sites, which is approximately 304 billion sites. This web server was developed back in 1995 as a replacement for the popular NCSA that server and fixed many of its problems. Rumor has it that his name comes from a patchy, as he was fixing NCSA errors. Now, it is a cross-platform program that supports Windows, Linux and MacOS and provides sufficient flexibility, customization and functionality. The program has a modular structure, which allows you to expand its functionality almost indefinitely using modules.
Installing Apache on Linux can be done with a few commands, but the program provides very a large number of settings that can be changed, as well as modules, after enabling which it will work better. This article will cover installing and configuring Apache, we will use Ubuntu as the main system, but you can repeat these steps in any other distribution. We will look at not only installing the program itself, but also how to configure it, setting up apache virtual hosts, as well as the most useful modules.
On this moment, the newest version of the program is 2.4, so setting up apache 2.4 will be considered. As I already said, in Linux program installs in literally a couple of commands. To install on Ubuntu, first update the system to the latest version:
sudo apt update
$ sudo apt upgrade
Then install apache2:
sudo apt install apache2
In other distributions, the program package is called either this or httpd and installing it will not cause you any difficulties.
After installation is complete, you need to add the web server to startup so as not to start it manually after turning on the computer:
sudo systemctl enable apache2
Apache setup
Gone are the days when Apache configuration was stored in a single file. But it’s correct: when everything is distributed in its own directories, it’s easier to navigate the configuration files.
All settings are contained in the /etc/apache/ folder:
- File /etc/apache2/apache2.conf responsible for basic settings
- /etc/apache2/conf-available/* - additional settings web server
- /etc/apache2/mods-available/*- module settings
- /etc/apache2/sites-available/*- virtual host settings
- /etc/apache2/ports.conf- ports on which apache runs
- /etc/apache2/envvars
As you noticed, there are two folders for conf, mods and site. These are available and enabled. When you enable a module or host, a symbolic link is created from the available folder to the enable folder. Therefore, it is better to perform settings in the available folders. Generally speaking, you could do without these folders, take everything and dump everything into one file the old fashioned way, and everything would work, but no one does that now.
First let's look at the main configuration file:
vi /eta/apache2/apache2.conf
Timeout- indicates how long the server will try to continue the interrupted transmission or reception of data. 160 seconds will be enough.
Keep Alive On- a very useful parameter, it allows you to transfer several files in one connection, for example, not only the html page, but also images and css files.
MaxKeepAliveRequests 100- maximum number of requests per connection, the more, the better.
KeepAliveTimeout 5- connection timeout, usually 5-10 seconds are enough to load a page, so you don’t need to set any more, but you also don’t need to break the connection before all the data has loaded.
User, Group- user and group on behalf of which the program will run.
HostnameLookups- write to logs instead of IP addresses domain names, it is better to disable it to speed up the work.
LogLevel- level of error logging. By default, warn is used, but to make the logs fill out more slowly, just enable error
Include- all include directives are responsible for connecting the configuration files discussed above.

Directory directives are responsible for setting access rights to a particular directory in file system. The syntax here is:
Parameter value
The following basic options are available here:
AllowOverride- indicates whether .htaccess files should be read from this directory; these are the same settings files and have the same syntax. All - allow everything, None - do not read these files.
DocumentRoot- sets from which folder documents should be taken to be displayed to the user
Options- indicates which web server features should be allowed in this folder. For example, All - allow everything, FollowSymLinks - follow symbolic links, Indexes - display the contents of the directory if there is no index file.
Require- sets which users have access to this directory. Require all denied - deny everyone, Require all granted - allow everyone. You can use the user or group directive instead of all to explicitly specify the user.
Order- allows you to control access to the directory. Accepts two values: Allow,Deny - allow for everyone except those specified or Deny,Allow - deny for everyone except those specified..ru.
All these directives are not used here, since we are happy with the default values, but in .htaccess files they can be very useful.
We are left with the /etc/apache2/ports.conf file:
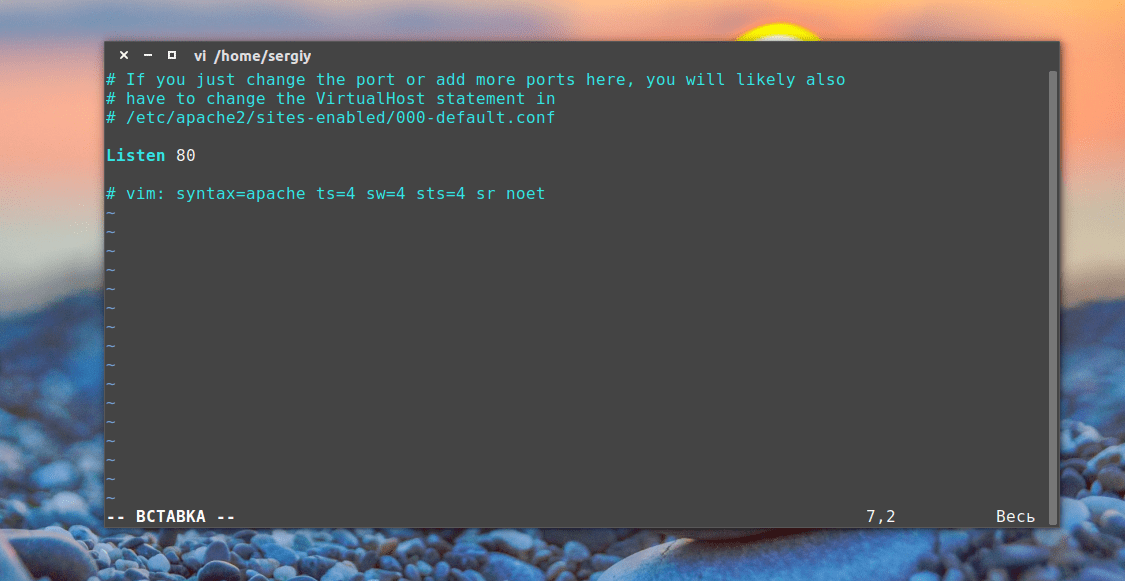
It contains only one directive, Listen, which tells the program which port it should work on.
The last file is /etc/apache2/envvars, you are unlikely to use it, it contains variables that can be used in other configuration files.

Setting up an Apache server via htaccess
.htaccess files allow you to configure your Ubuntu web server to behave in a specific directory. All instructions specified in this file are executed as if they were wrapped in a tag
It is important to note that in order for the server to read instructions from .htaccess, the settings for this folder in the main or virtual host file must not contain AllowOverride None for all settings to work you need AllowOverride All.
Otherwise, any configuration of the Apache server can be done here, from enabling modules to simply changing folder access. Since we have already considered all the parameters, let’s just give a couple of examples:
Order Deny,Allow
Deny from all
Denies everyone access to this folder, important to apply for configuration folders. Most often, .htaccess is used to work with the mod_rewrite module, which allows you to change requests on the fly:
RewriteEngine on
RewriteRule ^product/([^/\.]+)/?$ product.php?id=$1 [L]
But this is a very broad topic and is beyond the scope of this article.
Configuring Apache Modules
As I already said, Apache is a modular program, its functionality can be extended using modules. All available loader modules and module configuration files are located in the /etc/apache/mods-available folder. And activated in /etc/apache/mods-enable.
But you don't have to analyze the contents of these folders. Apache setup 2.4 by adding modules is performed using special commands. You can view all running modules with the command:

You can enable the module with the command:
sudo a2enmod module_name
And disable:
sudo a2dismod module_name
After enabling or disabling modules, you need to restart apache:
sudo systemctl restart apache2
When one of these commands is executed, a symbolic link to a module file with the extension load is created or deleted in the mods-available directory. You can look at the contents of this file, there is only one line. For example:
vi /etc/apache2/mods-available/deflate.load

This means that the module could be activated simply by adding this line to the apache2.conf file. But it is customary to do just that to avoid confusion.
The module settings are located in the same folder, only in a file with the .conf extension instead of load. For example, let's look at the settings of the same module for deflate compression:
vi /etc/apache2/mods-available/deflate.conf

The files in the conf-available folder are the same modules, only they are installed separately from apache, these can be configuration files to enable the php module or any other programming language. Everything works exactly the same here, only the commands for enabling and disabling these modules are slightly different:
a2enconf module_name
a2disconf module name
As you have seen, enabling modules is very simple. Let's enable a few necessary but not enabled by default modules:
sudo a2enmod expires
$ sudo a2enmod headers
$ sudo a2enmod rewrite
$ sudo a2enmod ssl
The expires and headers modules reduce the load on the server. They return a Not Modified header if the document has not changed since the last request. The expiries module allows you to set the time for which the browser should cache the received document. Rewrite allows you to change requested addresses on the fly, very useful when creating CNC links, etc. And the last one to enable support for SSL encryption. Don't forget to restart apache2 after completing the settings.
Configuring Apache Virtual Hosts
It would not be entirely convenient if only one website could be hosted on one physical machine. Apache can support hundreds of sites on a single computer and serve the correct content for each one. Virtual hosts are used for this. The server determines which domain the request is coming to and serves the required content from the folder of this domain.
Apache hosts settings are located in the /etc/apache2/hosts-available/ folder. To create a new host, just create a file with any name (it’s better to end with the host name) and fill it with the necessary data. You need to wrap all these parameters in a directive VirtualHost. In addition to the parameters discussed here, the following will be used:
- ServerName- primary domain name
- ServerAlias- additional name by which the site will be accessible
- ServerAdmin - Email administrator
- DocumentRoot- folder with documents for this domain
For example:
vi /etc/apache2/sites-available/test.site.conf

DIY Linux server Kolisnichenko Denis Nikolaevich
12.2.2. Configuring Apache using netconf
Almost all Apache Web server parameters can be set using the netconf (or linuxconf) configurator. To do this, run netconf and go to the tab Server Tasks and then click on the “Apache Webserver” button (see Figure 12.2).
Rice. 12.2. Configuring Apache using netconf
With netconf, you can easily set basic Apache parameters (see Figure 12.3), define virtual hosts, set subdirectory parameters, define directory and module specifications, and set parameters for the mod_ssl module (see Figure 12.4), the configuration of which is discussed below in this chapter.
Rice. 12.3. Apache Basic Options
Rice. 12.4. Configuring the mod_ssl module
From the book Boost your website author Matsievsky Nikolay From the Linux for the User book author Kostromin Viktor AlekseevichConfiguring Apache 2 For Apache 2, the described steps look much simpler.# add Content-Type for all files with the extension .gzAddEncoding gzip .gz# enable compression for HTML and XML filesAddOutputFilterByType DEFLATE text/htmlAddOutputFilterByType DEFLATE text/xml# and for icons ( more on this below)AddOutputFilterByType DEFLATE image/x-icon#
From the book DIY Linux server authorConfiguring Apache Tests under Konqueror have shown that this browser does not understand archived files (CSS and JavaScript), so to save the tenth of a percent of visitors from a heart attack (when they see a site without the appropriate styles), it is worth adding it to this set
From the Linux book: Complete Guide author Kolisnichenko Denis Nikolaevich From the Ubuntu 10 book. Quick Guide user author Kolisnichenko D. N.Apache 2 configuration # set the Content-Encoding header: gzipAddEncoding gzip .gz# from the very beginning enable gzip for text filesAddOutputFilterByType DEFLATE text/htmlAddOutputFilterByType DEFLATE text/xml# and for favicon.icoAddOutputFilterByType DEFLATE image/x-icon# also for CSS and JavaScript -filesAddOutputFilterByType DEFLATE text/cssAddOutputFilterByType DEFLATE
From book Linux through the eyes hacker author Flenov Mikhail Evgenievich13.2.6. The netconf utility In the previous sections, I tried to describe in detail and consistently how you can configure network access by directly editing configuration files. However, the settings local network can also be done using special utilities
From the author's book12 Apache Server This chapter is dedicated to the popular WWW server Apache. Apache Server is developed and maintained by the Apache Project. Originally, the Apache server was a variant of the NCSA Web server developed in National Center supercomputer development at the University of Illinois
From the author's book12.1. Installing Apache To install the Apache server, you must install the apache and apache-docs packages. The first of them contains the server itself, and the second contains the documentation. It is advisable to install the most new version. IN latest versions you also need to install the apache-common package containing
From the author's book12.5. SSL and Apache 12.5.1. Installing SSL SSL (Secure Sockets Layer) is an encryption method developed by Netscape to provide Internet security. This method supports multiple encryption methods and provides both client-level and client-level authentication.
From the author's book12.5.2. SSL connection to Apache Now all that remains is to connect mod_ssl to Apache. Please note that you need a version of mod_ssl that is compatible with your version of Apache. Otherwise, the mod_ssl module will not work correctly or will refuse to do anything at all. Last numbers in the title
From the author's book16.1. Installing Apache Depending on the distribution, the package from which the Apache web server is installed may be called apache or httpd, and the documentation package may be called apache-docs or httpd-manual, respectively. In the first case, you will need to install the apache-common package containing
From the author's book16.10. SSL and Apache 16.10.1. Installing SSL SSL (Secure Sockets Layer) is an encryption method developed by Netscape to ensure secure data transmission. This method supports multiple encryption methods and provides authentication at both the client and client level.
From the author's book16.10.2. Connecting SSL to Apache The version of mod_ssl you need to install must be compatible with your version of Apache, otherwise the mod_ssl module will not work correctly or will refuse to do anything at all. The last digits in the module name indicate compatibility with a specific
From the author's book16.13. Protecting the Apache server After setting up the server, we will prohibit changing and deleting the configuration file: # chattr +i /etc/httpd/conf/httpd.conf After this, you (and no one else) will be able to change this file even using the configurator. It is also advisable to set permissions to 511 For
From the author's book26.2.1. Installing Apache and PHP Launch the Synaptic manager. In the Quick search field, enter apache. Right-click the apache2 package and select Mark for Installation. The package manager will tell you what to install additional packages(Fig. 26.1). Click the button
From the author's book5.1.1. netconf This command starts the network configurator (Figure 5.1). The netconf program has a convenient GUI and allows you to configure network settings without worrying about configuration files. Rice. 5.1. Program window


