Nano how to save a file. How to use Nano on Linux? (nano text editor)
Probably every one of those who visited Linux consoles, I used the hero of today’s article at least once. It's hard to imagine any Linux distribution without it. It is mentioned in many articles on setting up any Linux software. Its simplicity allows beginners to quickly solve problems. The administration pros grin at the sight of him. Those who have become a little stronger in the field of administration consider its use bad manners and a sign of insufficient professionalism. But we know that they themselves use it when others do not see.
So, the hero of our review today is the console text editor GNU nano.
Of all the console text editors, nano is probably the most popular. After all, even users of vim, emacs and other powerful text processing tools still regularly turn to nano for help. There are, of course, individuals who boycott its use, but of all my friends, only one fundamentally refuses to enter the coveted four letters into the terminal.
It would seem, why talk about using such a simple product? The goal is the same - we all get used to standard scenarios of interaction with software products, as a result, some of the functionality escapes.
Let's get started. To install nano, if it suddenly doesn’t work, you need to run the command:
apt-get install nano
Launched by nano command
nano filename
or with additional options:
nano –Option1 Option2 … OptionN + line, column filename
Nano launch keys allow you to use useful features of the utility immediately after start.
Let's create a text file and play with it a little.
nano ~/test. htm |
Like other editors, nano will create a new file after attempting to save if it did not exist before.
![]()
We were presented with a minimalistic editor interface. We can write text, navigate the file using standard methods by clicking the arrows. This scenario is probably where 99% of the examples of use are exhausted. But I strongly recommend exploring all its functionality. Otherwise, most people think that nano is an analogue of Notepad in Windows.
All the editor’s capabilities are reflected in a table I specially prepared. Basic commands are executed using the Ctrl+key key combinations. Hotkeys with the Meta key, which is usually assigned to Alt or Win, are also actively used.
nano capabilities table:
| Fn | ctrl+ | Meta+ | Config. file | Start key | Description |
|---|---|---|---|---|---|
| F1 | Ctrl+G | Calling help | |||
| F2 | Ctrl+X | Exit the program. If the file has been modified, the program will ask if the buffer should be saved. The answer will be the standard Y/N. If you confirm the save, the utility will ask for the file name and path. | |||
| F3 | Ctrl+O | Write file to disk | |||
| F4 | Ctrl+J | Align paragraph. Paragraphs are separated by blank lines. If alignment is not required, the cursor will move to the next one. It is important that the alignment will match the width of the current terminal | |||
| F5 | Ctrl+R | Inserting another file into the current one. One of my favorite features. After clicking, you will be offered a choice. Either specify the path to the file (TAB works great), or use Ctrl+T to select a file, or paste the output of an external source (for example, nslookup site). Ctrl+C will stop the execution of looped commands, so you can safely try ping 8.8.8.8 | |||
| F6 | ctrl+w | Search text. Can be used regular expressions | |||
| F7 | ctrl+y | Page forward | |||
| F8 | ctrl+v | Page back | |||
| F9 | Ctrl+K | Cut the current line and save it to the clipboard | |||
| Meta+Crtl or Meta+6 | Copy the current line and save it to the clipboard | ||||
| F10 | Ctrl+U | Insert Row | |||
| F11 | Ctrl+C | Show current cursor position | |||
| F12 | ctrl+t | Check spelling. An external speller is required for operation. The speller is specified in the nano config in the set speller "Speller" parameter | |||
| F13 | Crtl+_ | Meta+G | +row, column | Go by line and row number. In the menu that appears, you must specify the number, row, separated by commas. | |
| F14 | Crtl+\ | Meta+R | Replace text or regular expression | ||
| F15 | Crtl+Crtl | Meta+A | Mark text at current cursor position | ||
| F16 | Meta+W | Repeat last search | |||
| Meta+) | Increase line indent | ||||
| Meta+( | Decrease line indent | ||||
| Crtl+F | Forward one character | ||||
| Crtl+B | Back one character | ||||
| Crtl+Space | One word forward | ||||
| Meta+Space | Back one word | ||||
| Crtl+P | To previous line | ||||
| Crtl+N | To next line | ||||
| Crtl+A | To the beginning of the current line | ||||
| Crtl+E | To the end of the current line | ||||
| Meta+(or Meta+9 | To the beginning of the current paragraph, then the next paragraph | ||||
| Meta+) or Meta+0 | At the end of the current paragraph, then the next paragraph | ||||
| Meta+- or Meta+_ | Scroll up one line without moving the cursor | ||||
| Meta++ or Meta+= | Scroll down one line without moving the cursor | ||||
| Meta+ | Switch to previous buffer | ||||
| Meta+> or Meta+. | Switch to next buffer | ||||
| Meta+V | Paste the following key combination as is | ||||
| Ctrl+I | Insert tab at cursor position | ||||
| Ctrl+M | Insert line at cursor position | ||||
| Ctrl+D | Delete the character under the cursor | ||||
| ctrl+h | Delete the character to the left of the cursor | ||||
| Meta+T | Cut from current position to end of file | ||||
| Meta+J | Align entire file | ||||
| Meta+D | Count the number of words, lines and characters | ||||
| Ctrl+L | Refresh current screen | ||||
| ctrl+z | Pause editor | ||||
| Meta+X | Help mode enable/disable | ||||
| Meta+C | Permanent display of enable/disable position | ||||
| Meta+O | Using an additional line to edit enable/disable | ||||
| Meta+S | set smooth | -S --smooth | Smooth scrolling enable/disable | ||
| Meta+P | Display spaces enable/disable | ||||
| Meta+Y | Syntax highlighting enable/disable. The backlight types are configured in the config file. | ||||
| Meta+H | set smarthome | Smart home button enable/disable | |||
| Meta+I | set autoindent | -i --autoinden | Allow/disable auto-indents | ||
| Meta+K | set cut | Cut to the end enable/disable | |||
| Meta+L | -w --nowrap | Automatic line splitting allow/deny | |||
| Meta+Q | set tabstospaces | Convert tabs to spaces input allow/disable | |||
| Meta+B | Allow/deny make backups | ||||
| Meta+F | set multibuffer | Multiple file buffers enable/disable | |||
| Meta+M | set mouse | Mouse support enable/disable | |||
| Meta+N | set noconvert | Without conversion from DOS/Mac format, allow/disable | |||
| Meta+Z | Suspend allow/deny | ||||
| Meta+$ | Soft line breaks enable/disable | ||||
| set undo | -u --undo | Allow undo function | |||
| Meta+U | Undo if allowed | ||||
| Meta+E | Redo if allowed | ||||
| set view | -v --view | View mode | |||
| -x --nohelp | Don't show two help lines at the bottom | ||||
| set backup | -B --backup | Keep backups existing files. For example, if you run the command nano –B file.txt at the time of saving, 2 files will be created: file.txt - the edited file and file.txt~ - will have the contents of file.txt before the last save. | |||
| set historylog | Enable historylog |
Despite the fact that most actions in the Linux operating system can be done through GUI, if you want more control over the process and more flexibility, you will have to resort to manual editing configuration files.
This way you can fine-tune each parameter and know what each line is responsible for. You can use different editors to work with configuration files. Beginners most often use Gedit, more experienced users who are already accustomed to the terminal prefer the nano editor, and many professionals want to use only Vim.
We already looked at how to use Vim in one of the previous articles, it is very flexible, but this flexibility came at the cost of complexity and a vertical learning curve. In this article I want to look at how to use the Nano text editor on the Linux operating system. This is a very simple editor and any beginner can handle it. But, in turn, this will be an excellent step towards the development of the terminal.
The Nano text editor is included in the GNU suite of programs and is the standard console editor for many Linux distributions. The development of the program, like many other programs from the GNU suite, began in the nineties.
In those days there was a program for sending and receiving Email- Pine. Part of it was a text editor called Pico, which you could use to write your messages. Many beginners liked Pico for its simplicity and intuitive interface. But Linux distributions, including Debian, could not include private binaries for Pine and Pico in their repositories.
Taking all this into account, it was decided to create a TIP or Tip Isn't Pico editor. But then, due to a name conflict with another utility, the editor was renamed nano.
The main advantage of nano is its ease of use. It's as easy to use as OpenOffice or Gedit. Therefore, it is very easy to learn how to use the program. Now let's move on to the question of how to use nano.
How to use the Nano editor?
First of all, it must be said that nano is a console text editor, which means that it is customary to execute it from the terminal. The following syntax is used for this:
$nano options /address/file/file
Use options command line It's not necessarily enough to just specify the file name, but in some cases the options can be very useful. Let's look at them in more detail:
- +number- specify the line in the file from which editing should begin;
- -B- create a backup copy of the file when saving;
- -WITH- backup folder;
- -D- display text in bold;
- -E- convert tabs to spaces;
- -F- enable support for editing multiple files;
- -H- save search and replacement history;
- -I- do not read configuration from nanorc files;
- -P- remember and restore the cursor position during the last edit;
- -T- tab size in spaces;
- -m- enable mouse support;
- -v- read-only mode, you cannot save the file.
We have considered only the most important options of the program; naturally, there are actually many more of them, but these will be quite enough to get started. Next we will look at how to work with the program itself, its appearance and keyboard shortcuts.
To open a file, just pass it in the parameters to the nano command. If such a file does not exist, a new one will be created. For example:
The main window of the program looks very simple, in the top line there is the editor version and file name, as well as a notification whether the file has been changed. Next comes the text itself, and at the very bottom there is again the file name and the basic keyboard shortcuts that you can use to work with the program.

To move through the text, you can use the mouse, keyboard arrows, or special keyboard shortcuts. There is no menu in the program, and all actions are performed using hot keys. Perhaps some of them will not be easy to remember the first time, but after several times of practice everything will work out. Moreover, everything you need is displayed at the bottom of the screen. To activate a particular action, just press Ctrl and the specified letter. Shift key not used anywhere.
Basic keyboard shortcuts
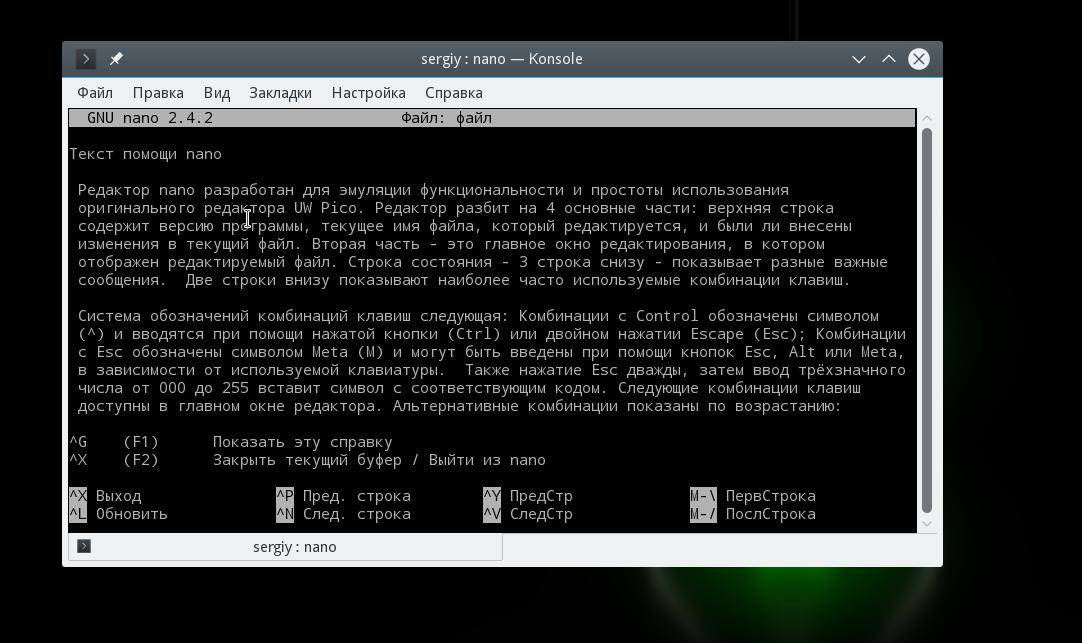
Now let’s take a closer look at what keyboard shortcuts the nano linux text editor offers. To open more detailed information about keyboard shortcuts press Ctrl+G:
When you finish working with the editor and save your changes, click Ctrl+X To exit if the file was not saved, the program will prompt you to do this:

Before closing the program, you need to save the changes to a file on disk. To do this, use the combination Ctrl+O. If you ran nano without parameters, you will need to enter a file name.

You can paste the contents of another file at the cursor position by clicking Ctrl+R and enter the target file name:

To cancel last action click Alt+U. And you can repeat the last action again using Alt+E. To search by string or regular expression, click ctrl+w, you can use standard perl regular expression syntax:

Using a keyboard shortcut Alt+R you can use search and replace:

We looked at the main key combinations that are used to control the editor functions. They may seem complicated to you, but to get started, it’s enough to just know Ctrl+O And Ctrl+X, everything else will come later.
Keyboard shortcuts for navigation
Let's now look at the hotkeys for quickly moving through text in the nano editor. Of course, you can always use the keys you are already familiar with PageUP, PageDown, Home, End and arrow keys, but this is not entirely convenient considering that nano has its own shortcuts. Although they are not as practical as Vim's, you can still use them.
To move the cursor forward or backward, press ctrl+f And Ctrl+B and to move up/down one line use Ctrl+P And Ctrl+N.
To move to the beginning of the line use Ctrl+A, and at the end - Ctrl+E. There are also shortcuts for moving through pages, ctrl+v moves one page down and ctrl+y- up the page.
But that is not all. You can navigate through words using Ctrl+Space And Alt+Space, and also press Ctrl+_ and enter the number of the desired line, and even a symbol separated by a comma.
To see where the cursor is now, click Ctrl+C.
Copy cut and paste
You can copy text with your mouse, but that's only if you're working in a GUI. But if you are using the program in a clean terminal, this option will not work. For such cases, nano has its own selection and copy tools.
To select a section of text, click Ctrl+^ move the cursor to the end of the desired section and press the same key combination again. All text between the start and end points, not including the cursor position, will be highlighted and you can copy or cut it.
To copy selected text, click Alt+^ and to cut it out - Ctrl+K. To insert cut text, move the cursor to the desired position and click Ctrl+U.
To cut an entire line of text, just click Ctrl+K, sometimes this is very convenient when editing configuration files.
Multiple files in Nano
Not everyone knows, but the nano linux text editor supports opening multiple files. You can't open them on the same screen, but you can freely switch between editing each of them.
To do this, pass several files to the utility when starting:
nano file1 file2
And then use keyboard shortcuts to move between them Alt+> And Alt+< . To close unnecessary more file click Ctrl+X. Not the entire program will close, but only the active buffer with the file.
conclusions
In this article we looked at how to use the nano linux editor. Although it is very simple and aimed primarily at those new to Linux, there are a huge number of features that make the program a very powerful editor. If you have any questions, ask in the comments!
Finally, a short comparison between nano and vim:
For newbies who are just starting to learn Linux, the terminal is a lot of stress, but when it comes to the nano command...
Almost all servers running on Linux, including Ubuntu Server, do not use a graphical shell; all settings are made using the terminal. On desktop Linux distributions, the situation is slightly simpler, but still, if you want to fine-tune the system, then getting to know the terminal is inevitable. One of the most difficult “commands” to master is Nano Linux. This command, " nano ", nothing more than a console text editor.
How to Use Nano Text Editor in Linux Terminal
In this article we will try to clearly tell you how to use this text editor so that Linux does not seem such a complex operating command.
Installing Nano on Linux
If the terminal does not respond in any way to the nano command, then this text editor is not installed. To install it, enter the command:
sudo apt install nanoEverything is ready to launch!
Launch of the Nano
Text editor nano only works in the terminal. One more clarification before we begin, operating system Linux is case sensitive if a word or part of a command is written with capital letters, then you need to print it that way, otherwise you will get an error.
If you are in the directory (folder) where the required text file is located, then, in order to start editing it using nano you need to write in the terminal like this:
Nano index.html
By the way, the team will help you find out which directory you are in now pwd
, and what files are located nearby? ls
.
If we are editing a file that is located in another directory (folder), then you need to specify the full path in the terminal:
Nano /var/www/html/index.html
If you suddenly edit a file sensitive to word wrapping, then enter the command in the terminal nano with additional key -w :
Nano -w/var/www/html/index.html
In order to open a document on a specific row or column nano + row, column file_name
For example nano +3,2 /etc/hosts
Nano hotkeys for control in a text editor
With text information entered into nano no one should have any problems. But how convenient it is to manage text data, delete it in bulk, move it, and most importantly, how to save it in nano, many people have problems with this.
| Action name | nano hotkeys |
| Open a file on a specific line |
+ line_number For example: nano +25 log.txt |
| “Slow” movement to the sides - up, down, left, right | Keys ↓ or Ctrl F And Ctrl B ←→ or Ctrl P And Ctrl N |
| Move to the beginning of the file | Alt | or Alt\ |
| Move to the end of the file | Alt / or Alt? |
| Move forward one word | Ctrl Space |
| Move to the beginning of the line | Ctrl A |
| Move to the end of the line | Ctrl E |
| Move back a word | Alt Space |
| Move to line by number | Alt G or Ctrl - |
| Next page (if long text file) | Ctrl Y |
| Previous page (if long text file) | Ctrl V |
| Cut "delete" entire line | Ctrl K |
| Erase everything from the cursor to the end of the file | ALT T |
| Paste a previously cut or copied line | Ctrl U |
| Select part of the text, copy or cut it (or delete) | Move to the required section of text Clamp ALT A and move the keys ↓←→ Copy Alt-6 Cut or delete Ctrl K |
| Insert Tab | Ctrl I |
| Paste text information from another file | Ctrl R
indicate the path to the file |
| In nano show row and column number | CTRL C |
| Find the required word in a text file | Ctrl W
write the search word |
| Find next | Ctrl W |
| Saving changes to a file | Ctrl O
press Enter |
| Saving changes to a file and exiting the nano editor | Ctrl O
press Enter |
| Do not save changes made | Ctrl Z |
| Save changes and rename file | Ctrl X
press Y enter a new file name press Enter |
I hope using the nano terminal text editor will no longer be such a big headache as before!
Do you still have additional questions? Write them in the comments about what you did or vice versa!
That's all! Read more articles and instructions in the section. Stay with the site, it will be even more interesting!
,The times when the Linux OS seemed like a puzzle to newbies are long gone. Most popular now linux-distributions have a convenient and intuitive graphical interface, as well as the standard programs supplied with them. But there are exceptions. Text editor Nano, for example, does not have GUI, using the command line interface instead. What is this for if there is gedit?
Nano mainly used in server rooms linux, it is convenient when editing configuration files and, if you decide to master the terminal, along the way it would be highly advisable to master Nano. There is nothing particularly complicated about this, of all console text editors Nano is the simplest, to use it, it is enough to know the basic key combinations with which you work with files and text.
Installation and launch
IN latest versions Ubuntu editor Nano is present by default and therefore does not need to be installed.

To run it, you need to open a terminal and run the command nano. If the terminal responds with the message "command not found" or something like that, then it will mean that the editor is not installed. In this case, you will need to install it by running the following command in the console:
sudo apt-get install nano

To launch the editor, one command is enough - nano. This will create a new file in the current directory. You can determine which folder is the current one using the command pwd in the terminal. If you need to open a specific file, specify its name, and if it is located in a folder different from the current one, add the full path to it, as shown in the example of the second command:
nano hello.thxt
nano /home/kompick/hello.thxt


As for configuration files, when opening them after nano should add a key -w, this is important because it disables line breaks, which is not used in system files. The editor interface is represented by a console window, at the top of which the program version and the name of the current file are indicated, as well as the status (whether it was changed or not) . At the bottom of the window there are two lines showing the most commonly used key combinations. There is also a status bar at the bottom, which displays various messages and command fields, for example, the F6 button starts a text search.
Basic principles of working with the Nano editor
The hotkey designations may be somewhat confusing for a novice user, but this is only at first. Symbol (^) means the Ctrl key, and (M)Meta- Alt or Esc key. All this can be found in the built-in help. nano called by pressing ^+G, that is, Ctrl + G .


To move through the content you can use the arrow keys, to save changes - Ctrl + O followed by typing Y for confirmation and N to cancel. At the time of saving, the editor asks for a file name, which must be entered in a special field at the bottom of the window.

To undo changes made to an unsaved file, you need to press Ctrl + C. For cutting out entire lines and paragraphs in nano the combination Ctrl + K is responsible, for their insertion - Ctrl + U. To highlight certain elements lines use Ctrl + 6 or Alt + A, to call the search line - Ctrl + W or F6. The Ctrl + A and Ctrl + E commands allow you to quickly move to the beginning and end of a line, the Ctrl + Y and Ctrl + V commands allow you to scroll the contents of a text file down and up. Finally, Ctrl + X is used to exit the editor to the terminal.
But this is all just part functionality nano. The editor supports counting words, lines and characters, working with several files at once, creating backup copies edited documents, using the mode "only for reading", enable partial mouse support, describe syntax for highlighting, change tab width, enable auto-save file on exit, and much more. Additional parameters are set mainly when starting the editor, but some, for example, those responsible for backup key -b can be used when saving a file.
From additional features nano It's worth noting the setting appearance console window.
List of hotkeys for nano. It is incomplete - it is missing some combinations that I was not able to test in action. Either because I don’t do yoga, or Gnome’s settings are such that some combinations or individual keys are intercepted by it - for example, combinations like Alt-( and Alt-). When typing them, you need to use Shift (i.e. Alt-( on a regular keyboard is converted to Alt-Shift-[). And in my system, Alt-Shift is linked to changing layouts. This is what overrides those hot keys that which I send to nano. But these are all lyrics and lack of time, but here is the list
- Home= Ctrl-a
- End= Ctrl-e
- PgUp= Ctrl-y
- PgDn= Ctrl-v
- Cursor keys= Ctrl-(f,b,n,p)
- Tab= Ctrl-i
- backspace= Ctrl-h
- Delete= Ctrl-d
- Return= Ctrl-m
- Help- Ctrl-g
- Exit- Ctrl-x
- Save file- Ctrl-o
- Toggle syntax highlighting- Alt-y
- Go to next word- Ctrl-Space
- Go to previous word- Alt-Space
- Go to start of line- Home
- Go to end of line-End
- Go to next paragraph-Alt-0
- Go to previous paragraph-Alt-9
- Next page-PgDn
- Previous page-PgUp
- Go to line no.- Ctrl-_
- Go to end of file-Alt-/
- Go to the beginning of the file-Alt-\
- Go to matching bracket-Alt-]
- Rewind down-Alt-=
- Rewind up-Alt–
- Switching text selection mode- Ctrl-6 (Ctrl-^). One of the few combinations in which both 6 and ^ are unambiguous (i.e., you don’t need to press shift for ^). To select text after turning on the selection mode, you must use the cursor keys.
- Copy current selection- Alt-6 (Alt-^ or Ctrl-k Ctrl-u). Another combination that doesn't require pressing Shift for ^.
- Cut current selection- Ctrl-k
- Insert- Ctrl-u
- Paste the contents of a file into a new buffer- Ctrl-r<имя файла>. If you need to insert the contents of the file into the current buffer in a place after the cursor, then you first need to turn off Multi-buffer mode for nano. This is done using the Alt-f combination.
- Paste command output- Ctrl-r Ctrl-x
- Search- Ctrl-w
- Find next occurrence (Find Next...)- Alt-w or Ctrl-w Enter
- Find-replace- Ctrl-\ or Alt-r
- Search help- Ctrl-w Ctrl-g
- Align the width of the current paragraph (where the cursor is located)- Ctrl-j
- Align the width of the entire document- Alt-j
I mentioned Multi-buffer mode - this is the nano operating mode in which you can edit several files at the same time. Switching between several buffers is done using combinations Alt-, and Alt-. .
I also mentioned syntax highlighting.
Syntax highlighting, like other nano settings, must be written in the nanorc file. For the current user, this file is usually located here ~/.nanorc, and an example with the configuration can be taken from /usr/share/doc/nano/examples/nanorc.sample.gz
In Ubuntu, you can find ready-made configurations with syntax highlighting at /usr/share/nano/ . This directory contains nano configuration files, one for each backlight type. They are enabled by default.
If you need to change colors and other backlight settings, you can also look at ready-made configurations with syntax highlighting. You can change files both in /usr/share/nano and in your home directory in the .nanorc file. In the first case, the changes will be global, in the second - only for the current user.


