In which folder are the android sounds? Set your own SMS and alarm ringtones in Android
On many Android devices, the ability to set your own signal melody (call, SMS, alarm, etc.) is limited. Or, to put it simply, it doesn’t exist at all! Only a short list of various already built-in melodies is given (not boasting a variety of sounds!).
And as you know - restrictions no one loves! And we began to look for a way to get around them... and whoever searches will always find!
And as it turned out, the method is quite simple (but we decided to describe it in sufficient detail anyway)!
On in this example we will show you how to set your own melody to SMS, but it is also suitable for “personalizing” the call, alarm clock and interface (THL W200 is used as an “experimental” smartphone, OS - Android 4.2 Jelly Bean)
For clarity, we will post a few screenshots standard list melodies (before “our intervention”).


1) Connect the device to the PC (you don’t have to connect, but create folders directly in the device, but in my opinion, if you have a computer at hand, it’s more convenient to connect). Next you need to find the folder DCIM(wherein Usually photos from the camera are stored)

2) B DCIM creating a new folder...

3) Rename the new folder to media(as indicated in the screenshot below)

4) In a folder media, create another folder which we “call” audio...

5) And in the folder audio create a new folder in the same way, but call it notifications.
As a result, the location path is like this: DCIM/ media/audio/notifications

6) And into this folder (notifications) we put the melody we need (in this case, which we would like to see on SMS).

Pay attention to the title of the melody" Sunstroke Proj"

7) Reboot the device (required!). We go to the list of SMS tones and at the very top we see our " Sunstroke Proj". We put it on the SMS signal and enjoy the result! :)

Folder " notifications" is used for notifications (which include SMS). If you need to set a melody for a call, an alarm clock, or use it in the interface, you will need to create other folders:
"alarms" - for an alarm clock
Path: DCIM/ media/audio/alarms
"ringtones" - for calling
Path: DCIM/ media/audio/ringtones
"ui" - for the interface
Path: DCIM/ media/audio/ui
(folders are created without quotes)

If for some reason, after the steps you have taken, the melody still does not appear, you can try a few more options, such as:
1) Do all of the above directly in the media folder (if for some reason it is not on the phone, then you need to create it)
Path: media/audio/notifications

2) Do all of the above on the memory card, there is a similar DCIM folder there
Path: sdcard/ DCIM/media/audio/notifications
3) Do all of the above on the memory card in the media folder (if for some reason it is not on the memory card, then you need to create)
Path: sdcard/ media/audio/notifications
P.S. We have done all 4 methods (on a smartphone with DCIM/media folders and on a memory card with DCIM/media folders) and each one works for us! As a result, in the list of melodies at the top we found 4 identical “Sunstroke Proj”
Don't forget to reboot your device! And make sure to name the folders correctly!
Tired of the standard ringtone on your phone? Read our instructions and you will learn how to set your favorite song to the ringtone of your Android.
Millions of people own devices running Android OS, but not everyone knows how to change the standard ringtone. In this article we will look at several ways to set any song as a ringtone.
The standard way to change the ringtone
This method is carried out through the general settings menu. Go to settings, then click on the “Sound” section, then click the “Ringtone” button.
A list of melodies that were installed by the manufacturer opens. Some smartphones and tablets allow you to set your own composition in the same menu. To do this, there is a “+” button at the top.


If there is no such button, we use a little trick. You will need to put the audio file in the desired folder with ringtones. After this, the composition will automatically appear in the general list in the sound settings described above.
To do this:
1. We connect the phone with via USB- cable to the computer. Click the “Start” button on your computer desktop and select “My Computer.” Next, you will see an icon for your connected mobile device. It needs to be opened.

2. Find and open the “Media” folder. Next, click on the “Audio” folder located there, and already in it on “Ringtones”. The path to this folder will look something like this: \Media\Audio\Ringtones. This is where you should move the desired music file. If there are no folders with the same name on your device, you can look for where existing ringtones are stored on your mobile device. To do this, remember the name of any and enter it in the search bar. Select your object as the object to search for the file. mobile device. Having found a file with the name of this ringtone, we place our composition in the same folder where this file is stored.
3. After placing the music file in “Ringtones”, we reboot the device.
After the completed actions, the composition appears in the general list of ring tones. Then everything is done according to the usual scenario. Go to the device settings, then to the “Sound” and “Ringtone” sections. The song you downloaded will be added to the standard sounds from the manufacturer. Click on it and confirm its installation as a call. This procedure will take you no more than 3 minutes.
Simplifying the process of installing your own ringtone on Android versions 5 and 6
Owners of new devices are very lucky. Manufacturers have greatly simplified the process of setting your own ringtone. Now everything is done through the device settings, without using a computer.
1. Go to the device menu and select “Settings”.
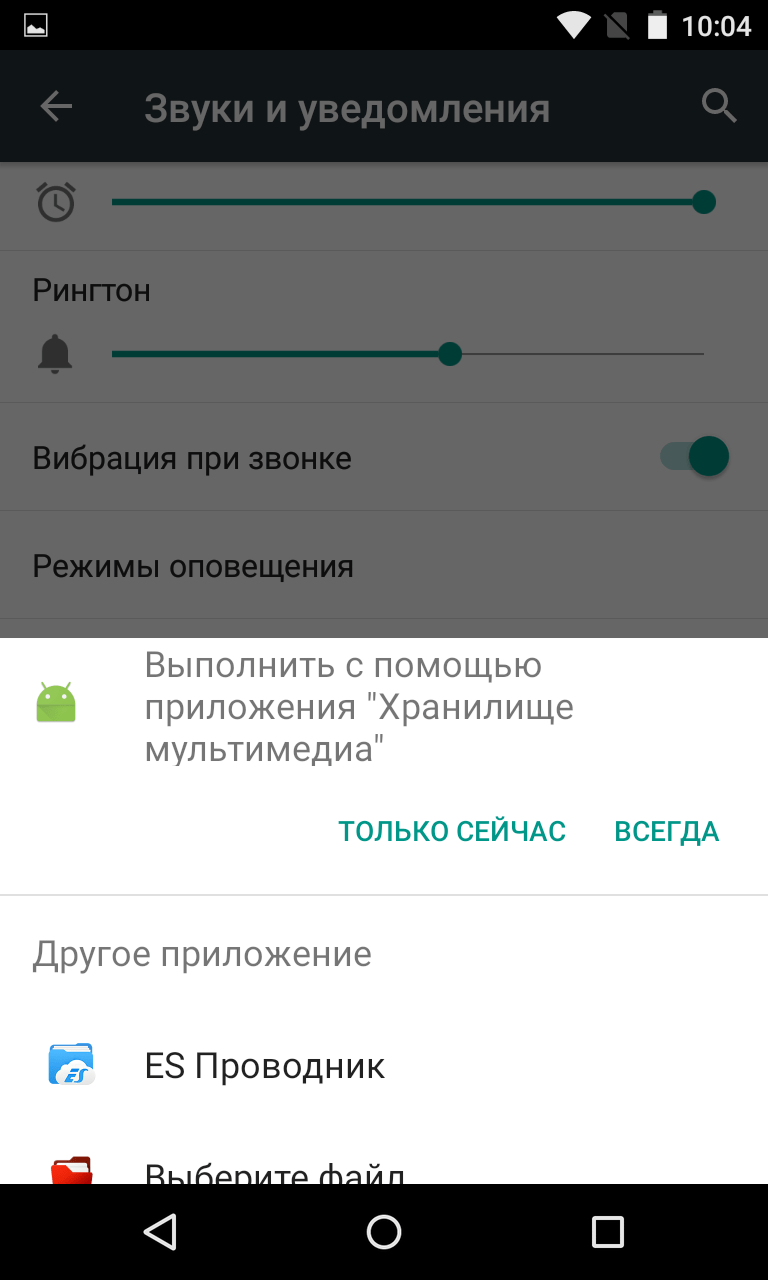
2. In this window we are interested in “Sounds and vibration”.

4. Click “Ringtone” again (in some versions of Android the item is called “Ringtone”). If the device supports two SIM cards, you must first select the one on which you want to change the call. A window with preinstalled musical compositions appears in front of us.

5. Scroll the list of songs to the very end and select the button that says “From device memory.”
 Photo: Changing the ringtone
 Replacing the standard ringtone with your own on your Android device is as easy as shelling pears. Choose music according to your mood, let everyone incoming call brings only joy!
Dear readers! If you have any questions or comments on the topic of the article, please leave them below.
When a user first encounters a new type of smartphone, they need to quickly figure out how to use some basic functions. In this article we will look at one of these basic functions, namely setting ringtones. In this article you will learn how to set a ringtone on an Android smartphone with a standard shell and a Samsung shell.
Setting a ringtone using the example of an Android smartphone Google Nexus
First, we'll tell you how to set a ringtone if you have a smartphone with a standard Android shell. As you might guess, first go to the Android settings. To do this, open the top curtain and click on the gear button, or find the Settings application in the list of applications or on the desktop. Once you have opened Settings, you need to go to the “Sound” section (the “Device” settings group).
And then you need to open the subsection called “Ringtone”.

This way you will open a list of ringtones that are already present on your Android smartphone and that you can use. To install one of these ringtones, select it and click on the “OK” button. After this, the selected ringtone will be set as the standard one and will be played when there is an incoming call.

If you are not satisfied with standard ringtones and want to use your own melody, then this melody must first be loaded into the device memory and placed in the /media/audio/ringtones/ folder. This can be done in different ways, but the easiest way is to connect your Android smartphone to your computer using USB cable. We will consider this option below.
Connect your Android smartphone to your computer using a USB cable and open the “My Computer” window. After connecting, the icon of your smartphone should appear there. If there is such an icon, then just open it.

If the smartphone icon does not appear, then you need to change the operating mode of the smartphone from USB connection. To do this, you need to open the top curtain on your smartphone, click on connection notifications and select “File transfer” in the menu that opens.

After opening the smartphone on the computer, you need to go to the “Internal storage” section, and then to the /media/audio/ringtones/ folder. If the /ringtones/ folder is missing, you can create it yourself.

Copy the desired ringtones to the /media/audio/ringtones/ folder and you can install them on your smartphone through the settings.
Setting a ringtone using the example of an Android smartphone from Samsung
If you have a Samsung smartphone, then the process of setting a ringtone will be a little easier. First, you need to open the Settings app and then go to the Sound section (Device tab).


As a result, a menu with standard ringtones will open. If one of the standard ringtones suits you, you can simply select it and click on the “Yes” button. If you want to set your own non-standard ringtone, then you need to click on the “Add” button.

Next will open file manager, with which you can select any ringtone that is located in any folder on your smartphone. As you can see, in the case of a Samsung smartphone, you do not need to specifically connect the device to the computer and download the ringtone to a specific folder. Here everything can be done through the smartphone interface.
Having acquired a brand new smartphone or tablet in the operating room Android system, the happy owner immediately begins to customize the system “for himself.” And the first desire that most users have is the desire to set their own melody for an incoming call. In addition, many users want to know who is calling us even before the phone is picked up. Often this is convenient, at a minimum, so that, without taking the phone out of your pocket or purse, you already know whether it’s worth picking up the phone at all, and what you need to talk about with the person calling you.
The Android operating system allows you to flexibly configure custom signals and set your own melody to incoming call or SMS in several very simple ways. Even if you are still new to this operating system, our article will tell you in an accessible form about how to set a ringtone or text message on Android.
How to set a ringtone for calls or SMS in Android settings
In the most Android firmware There is already built-in functionality that allows you to set and change your ringtone for a call or text message. To do this, go to "Settings" through the main Android menu, select the “Sound” item, and in it find the items that match the name for your purpose. The names of the items may vary depending on the version and manufacturer of the firmware, in general case look for something similar to “Vibrate and ringtone”, “Melody”, etc. In my firmware, the menu items responsible for setting the call tone are called “Phone ringtone” and “Notification ringtone”.
By going to this item, you will be able to set your own melody for incoming calls or SMS and mms messages.
Many firmwares in this way allow you to choose only from the standard melodies built into the Android operating system by developers. For those who do not want to be content with this and want to have a melody from their collection as a ringtone, there is a simple solution - the Rings Extended application. It is free to download at Google Play, and during installation adds the ability for the user to select a melody from all audio files that are present in the system.

How to set a ringtone using the built-in player
Second in a simple way, which easily allows you to set any of your own melody for a call in the Android OS, is to use an audio player. This can be either an audio player built into the system or an application installed by the user himself. The operating principle remains the same. Let's look at setting your own ringtone using the example of the one installed on my system. Player Pro.
Having entered the application and going to the list of music tracks, you just need to select the audio file that you would like to set for an incoming call and long press on it. In the context menu that appears after this, you must select the “Use as ringtone” item. Everything is done, after that the melody you selected became the melody of the incoming call.

How to set a ringtone using a file manager
Another simple way to set your own ringtones is to use a file manager. Open it and go to the folder where you have your music. Make a long press on the name of the music file that you want to set as a melody, and among the items that appear context menu select "Use as a signal" or, if there is a difference in the firmware, a suitable name that sets the audio file as a ringtone. This method does not work in all file managers; in some, this context menu item may not be available. In this case, just use any other method of selecting a ringtone.
How to set your own ringtone for a contact on Android
What should be done if the user wants to know the name of the caller without yet seeing the screen of his smartphone? Those wishing to set their own ringtone to favorite contacts, which would differ from the general signal installed in the system, the Android operating system offers a very simple solution. To assign your own signal to a specific contact, follow these steps:
1. Go to your contacts list;
2. Click on the contact for which you want to set a ringtone (note that you need to click on the contact name itself, and not on the call button);

3. Go to options this contact, for example, by pressing the "Menu" button on your smartphone;
4. In the window that opens, you will see an item that allows you to set a custom ringtone for the contact you have selected;

5. Select a melody. If you have an application like Rings Extended installed, you can choose not only among the standard audio files of the Android OS, but also among your entire audio collection.
How to set a ringtone for SMS on Android
There is another way that allows the user to change the melody played when receiving a message to their own. This is done from the messaging program. To put your own audio file on a message instead of the standard one, do the following:
1. Go to "Messages";
2. Press the "Menu" button on your smartphone, and in the menu that appears, select "Settings";
3. Go to "Notification settings";

4. In the selected menu item, you will be able to set your own melody when receiving a message.

Ways to set your own ringtone or SMS in Android for advanced users
If you are an advanced user of your smartphone, or at least know what root access rights are and managed to get them, there are more exotic ways for you to set your own ringtones for calls or messages.
All signals hardwired into the Android operating system are stored in it at the address system/media/audio. Going into this folder Using a file manager that can work with the system area (for example, Root Manager), you will find the “alarms”, “notifications”, “ringtones” and “ui” folders there. As the names suggest, they store alarm tones, messages, incoming calls and interface events. Copy your audio tracks to these folders, and they will appear in your melodies selection list in a standard way through the sound settings.

In addition, you can create a “media” folder in the root directory of the SD card of your phone or tablet (sdcard), inside it - a “audio” folder, and then, as in the previous paragraph, four more directories “alarms”, “notifications”, “ringtones” " and "ui", where you will copy the necessary audio files. In Android devices from some manufacturers, the built-in memory is already called sdcard, and an external flash memory card installed by the user will in this case be called sdcard-ext. Don’t get confused when creating your folders; you need to do this in the root directory of the sdcard.
In this article, we looked at various ways to set custom ringtones for calls and messages in the Android operating system. As you can see, everything is done quite simply, and even an inexperienced user can easily cope with the task. Set up your smartphone and follow the updates on the portal.
Nowadays, many people are switching to smartphones from regular push-button phones. Such users often do not understand the functionality at all. operating system. Often they don’t even know how to set a ringtone. It's interesting that on early stage Android development was really very difficult, almost impossible. But now you can change the call in a couple of finger movements.
There are several ways to set a ringtone for a call on Android. The simplest one is to use a music player for this purpose. However, a third-party solution will not work! You need to launch the pre-installed player, which is usually called " Music».
1. Launch the application and select the song you want to set to ringtone.

2. Hold your finger on this song until the context menu appears.
3. Select " Use as ringtone" or " Put on call».
Attention: this method may not work on new smartphones. It all depends on the specific branded shell. In many of them, you can install music on a call only in other ways - the player is not suitable for these purposes.
Setting the melody through the “Settings” section
This method works on the vast majority of smartphones. In order to put a song on a call, you need to do the following:
1. Go to " Settings».

2. Go to the section " SoundSounds and notifications».

3. Here click on the item “ Ringtone" It may also be called " Phone ringtone», « Ringtone" etc.

4. At this step, you may need to select an application with which to view your media library. For example, you can use a file manager for this ES Explorer .
5. Select the song you want to use as a ringtone.

That's all! In the same way, you can set a melody for SMS on Android - in this case, you should be interested in the item “ Default notification ringtone».
Using the Contacts app
At one time, even Symbian-based smartphones allowed you to set a specific melody for each contact. You can do this on Android as well. To do this, you must follow these instructions:
1. Go to the section " Contacts».

2. Select the contact you are interested in.

3. Here you need to click the button “ Change" It may look like a pencil or hide under the ellipsis located in the upper right corner.

4. Now you definitely need to click on the three dots. In the pop-up menu, click on the item " Set ringtone».

5. Select the application that will be used to view the list of songs stored on the device.

6. Select the folder with MP3 songs, and then the song itself.

7. Save the result by clicking on the checkmark.
Note: On some smartphones, the ringtone setting process may differ. Everything, again, depends on the branded shell - each manufacturer is sophisticated in its own way. Our example is given for “pure” Android installed on devices of the Nexus family.
Using Third Party Applications
You can also use third-party utilities to change ringtones. They often make the process a little more convenient. We recommend trying it Rings Extended , GO SMS Pro and RingTone Slicer FX. They all differ in their functionality, providing more advanced options for installing ringtones.
When a user first encounters a new type of smartphone, they need to quickly figure out how to use some basic functions. In this article we will look at one of these basic functions, namely setting ringtones. In this article you will learn how to set a ringtone on an Android smartphone with a standard shell and a Samsung shell.
Setting a ringtone using the example of an Android smartphone Google Nexus
First, we'll tell you how to set a ringtone if you have a smartphone with a standard Android shell. As you might guess, first go to the Android settings. To do this, open the top curtain and click on the gear button, or find the Settings application in the list of applications or on the desktop. Once you have opened Settings, you need to go to the “Sound” section (the “Device” settings group).
And then you need to open the subsection called “Ringtone”.
This way you will open a list of ringtones that are already present on your Android smartphone and that you can use. To install one of these ringtones, select it and click on the “OK” button. After this, the selected ringtone will be set as the standard one and will be played when there is an incoming call.

If you are not satisfied with standard ringtones and want to use your own melody, then this melody must first be loaded into the device memory and placed in the /media/audio/ringtones/ folder. This can be done in different ways, but the easiest way is to connect your Android smartphone to your computer using a USB cable. We will consider this option below.
Connect your Android smartphone to your computer using a USB cable and open the “My Computer” window. After connecting, the icon of your smartphone should appear there. If there is such an icon, then just open it.

If the smartphone icon does not appear, then you need to change the operating mode of the smartphone with a USB connection. To do this, you need to open the top curtain on your smartphone, click on connection notifications and select “File transfer” in the menu that opens.
After opening the smartphone on the computer, you need to go to the “Internal storage” section, and then to the /media/audio/ringtones/ folder. If the /ringtones/ folder is missing, you can create it yourself.
Copy the desired ringtones to the /media/audio/ringtones/ folder and you can install them on your smartphone through the settings.
Setting a ringtone using the example of an Android smartphone from Samsung
If you have a Samsung smartphone, then the process of setting a ringtone will be a little easier. First, you need to open the Settings app and then go to the Sound section (Device tab).

As a result, a menu with standard ringtones will open. If one of the standard ringtones suits you, you can simply select it and click on the “Yes” button. If you want to set your own non-standard ringtone, then you need to click on the “Add” button.

Next, a file manager will open, with which you can select any ringtone that is located in any folder on your smartphone. As you can see, in the case of a Samsung smartphone, you do not need to specifically connect the device to the computer and download the ringtone to a specific folder. Here everything can be done through the smartphone interface.
Tired of the standard ringtone on your phone? Read our instructions and you will learn how to set your favorite song to the ringtone of your Android.
Millions of people own devices running Android OS, but not everyone knows how to change the standard ringtone. In this article we will look at several ways to set any song as a ringtone.
The standard way to change the ringtone
This method is carried out through the general settings menu. Go to settings, then click on the “Sound” section, then click the “Ringtone” button.

A list of melodies that were installed by the manufacturer opens. Some smartphones and tablets allow you to set your own composition in the same menu. To do this, there is a “+” button at the top.
If there is no such button, we use a little trick. You will need to put the audio file in the desired folder with ringtones. After this, the composition will automatically appear in the general list in the sound settings described above.
To do this:
1. We connect the phone using a USB cable to the computer. Click the “Start” button on your computer desktop and select “My Computer.” Next, you will see an icon for your connected mobile device. It needs to be opened.

2. Find and open the “Media” folder. Next, click on the “Audio” folder located there, and already in it on “Ringtones”. The path to this folder will look something like this: \Media\Audio\Ringtones. This is where you should move the desired music file. If there are no folders with the same name on your device, you can look for where existing ringtones are stored on your mobile device. To do this, remember the name of any and enter it in the search bar. Select your mobile device as the object to search for the file. Having found a file with the name of this ringtone, we place our composition in the same folder where this file is stored.
3. After placing the music file in “Ringtones”, we reboot the device.
After the completed actions, the composition appears in the general list of ring tones. Then everything is done according to the usual scenario. Go to the device settings, then to the “Sound” and “Ringtone” sections. The song you downloaded will be added to the standard sounds from the manufacturer. Click on it and confirm its installation as a call. This procedure will take you no more than 3 minutes.
Simplifying the process of installing your own ringtone on Android versions 5 and 6
Owners of new devices are very lucky. Manufacturers have greatly simplified the process of setting your own ringtone. Now everything is done through the device settings, without using a computer.
1. Go to the device menu and select “Settings”.
2. In this window we are interested in “Sounds and vibration”.

4. Click “Ringtone” again (in some versions of Android the item is called “Ringtone”). If the device supports two SIM cards, you must first select the one on which you want to change the call. A window with preinstalled musical compositions appears in front of us.
5. Scroll the list of songs to the very end and select the button that says “From device memory.”
 Photo: Changing the ringtone
 Replacing the standard ringtone with your own on your Android device is as easy as shelling pears. Choose music according to your mood, let every incoming call bring only joy!
Dear readers! If you have any questions or comments on the topic of the article, please leave them below.


