How to use MSI Afterburner. How to find out the temperature of the processor and video card Afterburner does not show the temperature
After support ended, a program was released based on it.
Its functions include: overclocking GPUs by increasing voltage key elements, increasing the frequency of memory operation and , regulating the speed of rotation of the cooler and monitoring the current state of the graphics card.
How to use MSI Afterburner, and what it is, we will consider below.
Note! It is very important to closely monitor the temperature when using the application. GPU so as not to overheat the device and damage it. When using a powerful gaming video card, it is better to take care of new system cooling.
The utility monitors the temperature dynamics of the device and is able to display warnings when a critical value (set by the user) is exceeded.
Content:Install MSI Afterburner
- After clicking on it, click “Download Afterburner” and wait for the archive with the installer to download.
- Unpack the compressed file using .

Rice. 2 – Unpacking the archive via 7Z
- Specify the interface language and click “OK”.

Rice. 3 – Select interface language
- In the remaining windows, click “Next”, indicating the installation path of the program.

Rice. 4 – Specify the installation path
- After copying and registering files is complete, launch Afterburner.

Rice. 5 – Launch Afterburner after installation
After starting the program, its interface with basic data will appear on the display: current operating parameters and its status.
Stylish Afterburner design
The default skin for the program is not very convenient to use, so many users immediately change it to be more friendly.
To do this, call up “Settings” by clicking on the gear icon in the center of the window.

Rice. 6 – Button for calling application settings
Then go to the “Interface” tab and in the third subsection "Properties of skins..." choose a more suitable type of application design.
Its language, temperature format (Celsius/Fahrenheit) and time are also indicated here.
In the “Basic” tab, select the graphics processor to be configured if a pair of video cards are used or, in addition to the integrated one, a discrete one is installed.
If there are two identical devices working in conjunction, check the option to synchronize their settings.

Fig.7 - Selecting the default video card
The left panel contains data with numbers about the current value of the GPU frequency and .
To the right the current temperature and voltage are visualized.

Rice. 8 – Information panel
The central part of the interface is occupied by a frame with sliders, with the help of which regulation is carried out:
- core voltage;
- power limitation;
- limit temperature;
- graphics core frequency;
- memory frequency;
- cooler speed.

Rice. 9 – Frame for overclocking a video card
Under the frame, next to the button to open the settings window, there is a reset button to factory settings.

Rice. 10 – Button to reset settings
The lower part of the MSI Afterburner interface is occupied by a monitoring window with graphs of temperature and other operating parameters of the graphics card.

Rice. 11 – Monitoring window for key indicators
The last important element of the interface is a panel for managing overclocking profiles and switching between them.

Rice. 12 – Preset management
Simple Rules for Voltage Control
The program allows you to adjust the voltage on the host graphics adapter.
Depending on its microarchitecture and the chip used, the parameter may be displayed in millivolts or as a percentage of the original value.
By default, the option is deactivated on all devices except branded ones (from MSI). To activate it, you need to go to the main application settings and enable the appropriate option.
There are several modes available here: for reference chips, for chips from MSI and third-party graphics adapters.

Rice. 13 – Unlocking the supply voltage control function
If after activating the setting it is still grayed out, refer to your GPU manual.
Most likely, Afterburner does not support the programmable microcontroller installed on the device, even if it supports voltage control.
You should increase the parameter value gradually, by several percent each time, and closely monitor the temperature and stability of the video card after each change in value.
With a significant increase, the device will overheat faster and make more errors in calculations, which will most likely lead to malfunctions of the entire system, the appearance of artifacts, etc.
After reprogramming the controller, which is done by clicking on the button with a check mark, it is best to do this, for example, using proprietary utility Kombuster.
If no deviations are noticed within a couple of hours, the indicator can be increased by another few percent or tens of units.

Rice. 14 – Applying the new configuration
If after saving the core voltage value changes to the standard value, try going to the settings and selecting a different voltage control method, but most likely you will not be able to adjust the value through MSI Afterburner.
Changing the peak energy consumption value
The option is not active on all devices; it only works when the technology for managing electrical energy consumption is implemented in the graphics adapter.

Rice. 15 – Slider for changing the maximum power consumption
Core and video memory frequency
Core Clock will help you change the maximum operating frequency of the GPU. The higher it is, the more information is processed per clock cycle.
Memory Clock – a parameter that provides access to programming the video memory frequency.
Depending on the device, the values may be presented explicitly or as a percentage of the original.
It costs to increase/decrease parameters by a few percent or a couple of tens of units at each step, conducting stress tests after each saving of settings or launch.
The program in overlay (overlay) mode visualizes the current number of frames produced by the video card in the game.

Rice. 16 – Adjusting the graphics core frequency
Efficient cooling
To activate manual change of a variable, click on the gear icon next to the slider.

Rice. 17 – Enabling manual cooler speed control mode
If you want the system to independently adjust the fan speed based on the current temperature of the video card, switch to automatic value control by clicking on the Auto icon.

Rice. 18 – Activate automatic fan speed control
In the “Cooler” settings section, you can specify the update frequency of the parameter and achieve maximum cooling efficiency, minimizing fan rattling.

Rice. 19 – Changing the period for updating data on the current fan speed
Monitoring
In the Afterbuner settings tab of the same name, you can disable visualization and indicate the peak values of all indicators that are read by the program from sensors.
When the specified value is reached, the application will warn the user that it has been reached.

Rice. 20 – Remove unnecessary graphs from the monitoring window
Profiles
For various situations ( modern games, video processing, very graphically demanding games, working with 2D graphics) MSI Afterburner has the ability to save five different overclocking options.
For games, for example, the indicators responsible for the performance of the device should be increased, and for watching movies, surfing the Internet, you can reduce the power consumption of the video card.
What is noteworthy is that switching between profiles is carried out “on the fly” by clicking on a single icon or using the keys assigned to it.
To add a preset, change the required overclocking settings in the central window and click on the “Save” icon.

Rice. 21 – Saving new settings in a separate profile
Then click on one of the flashing numbers to assign the current configuration to the corresponding cell.
In the “Profiles” settings tab, the activation of each of the presets can be assigned to a combination of hot keys that are not used in the system.

Rice. 22 – Assigning a hotkey combination to activate a list of settings
Previously, the application was equipped with functions and videos and supported various profiles for working in 3D and 2D modes, which allowed saving energy, but in latest versions the developers abandoned these functions.
This concludes the guide on the topic: “How to use MSI Afterburner.”
And remember: overclocking a video card not only increases the risk of its premature failure, but also reduces its working life (accelerates wear).
In order to bring back all the colors of life and once again feel how your computer runs a new game at high settings, you need to overclock it with a program such as MSI Afterburner. "How to use it?" - a completely logical question. The answer requires a little explanation.
Why can video cards be overclocked?
After manufacturing a small batch of graphics cards, a company (relatively Nvidia) conducts a test for stress resistance and overclocking limits, and then simply sets the same stable values for all released video cards.
The manufacturer simply cannot test every video card they make for resistance to overclocking. It simply sets the bar at the value at which the tested video cards work flawlessly. And it may well be that the video card installed in your PC is capable of demonstrating high overclockability rates. The FPS increase after overclocking varies from game to game: sometimes it barely reaches 10%, and sometimes it increases by 50%. It also depends on whether you know
Safety
The natural question is whether this is dangerous. After all, we increase the indicators tested and recommended by the manufacturer. This is not entirely true. Sometimes it happens that manufacturers themselves recommend overclocking the video card a little when they realize that they have “cheaped up” and set the values too low.
Even when overclocking is not recommended by the manufacturer, it can still be done. All modern video cards are protected by various technologies, the meaning of which boils down to the following: when it overheats, it simply turns off and resets the overclocking values to the original level. The same thing will happen if you overdo it and set the acceleration values too high. The computer will restart and reset the video card settings you made.
Downloading and installing the program
This article will talk about MSI Afterburner 2.3.1, how to use it and other aspects of its operation.
You can download the program on the official website, on the program page, by first going to the Downloads tab.
And then click on the button next to the first program presented on the page.

During the download process, you will need to select a language, installation folder, and components to install. It is recommended to install RivaTuner Statistics Server, a program that will expand the capabilities of monitoring the operation of your computer.

Interface
In order to understand how to use MSI Afterburner, you need to familiarize yourself with the interface. It consists of four main elements:

- Highlighted with the number 1 shows the current clock of the video adapter.
- Under number 2 you can observe temperature and voltage indicators without even delving into the statistics window.
- The number 3 marks the main part of the program, which is responsible for overclocking.
- The area marked with number 4 is the statistics center.
But still, the main question when using MSI Afterburner is: “How to overclock a video card?” Therefore, let’s take a closer look at the overclocking sliders:
- Core Voltage (mV) - (English "core voltage") - this parameter is responsible for The more energy supplied, the higher the temperature and the more you can raise the frequencies of the video card.
- Power Limit (%) - this setting sets the threshold for enabling the protective technology - throttling. During the game, if suddenly the video card begins to exceed this parameter, throttling turns on and resets the frequencies to standard, and sometimes even lower levels. People asking how to use MSI Afterburner and just getting acquainted with the program should know that excessively exceeding the permissible limits (which can be read about on the official websites of the video card manufacturer) leads to problems, although Power Limit is often blocked and inaccessible for editing.
- Temp Limit - the parameter sets the temperature threshold, after which the video card will turn on throttling, that is, it works like Power Limit, only with temperature, not power.
- Core Clock (MHz) - (English "core frequency") - the most important slider for overclocking. It is worth increasing its values carefully, by 10-15 points, each time saving and checking the functionality of the new frequencies in graphic applications.
- Memory Clock (MHz) - (English "memory frequency"). When taking on overclocking, it is worth remembering that overclocking Memory clock is almost useless - this parameter does not affect performance without overclocking, and the same goes for Core clock.
- Fan speed (%) - slider for adjusting the cooler on the video card.
Useful features
It is possible to change the MSI Afterburner interface in the program. Many people like the old style of the program:

The interface of Default MSI Afterburner v2 Skin is shown below.

It may seem inconvenient that you have to open the program every time to apply overclocking. In this case, you can apply the Apply overclocking at system startup setting. But you should do this only if you are sure that the frequencies are working.

Also very convenient is the ability to save settings into profiles and then apply them as needed. To do this, under the Profile inscription, click on the icon and select the profile number.

Later, to apply the settings, simply click on the number.
Under the Start Up inscription is located Windows icon. If you put it in active mode, MSI Afterburner will start along with the operating system.

The Statistics Center creates a separate window with data when you click on the Detach button.

Conclusion
Of course, when the game produces 65-70 FPS, there is no point in overclocking your graphics chip and increasing the load on it. It’s another matter when the computer somehow pulls out 15-20 FPS. In this case, even an increase of 5-10 frames per second will already provide a significant improvement in the picture, and overclocking the video card can give this increase. Moreover, it is not dangerous (as it was some time ago, when a video card could literally be burned), and sometimes it is recommended, even if you do not know how to use MSI Afterburner.
MSI Afterburner is the best of its kind on this moment. It definitely needs to be used by most players - those who do not have 3 GTX 1080TI in combination. But the main thing is to remember that overclocking a video card in any case leads to its more quick exit out of order even if you know
If you need monitoring of the processor and video card in the game, and at the same time you would not refuse to display the frame rate (FPS) during the game, then the easiest way to get all this for free is - install MSI Afterburner.
The program is simple and intuitive, its only drawback is that the default interface buttons are very small.
MSI Afterburner can monitor all the parameters a player needs:
- GPU temperature.
- CPU temperature.
- The load level of both, to determine the “bottlenecks” of the system.
- Frame rate (FPS).
- Video card cooler rotation speed.
- As well as many other indicators that are not so necessary for the average gamer, such as frequencies and voltages, as well as information about the swap file. Of course, you decide what to monitor and display on the Overlay Screen Display (OSD).
- MSI Afterburner can also capture videos and screenshots, and overclock the video card. In general, complete stuffing!
Data can not only be monitored, but also displayed on the screen during the game to enjoy real-time numbers without minimizing the game every minute. By the way, along with all these statistics, you can also display a clock on the screen, which can be very convenient.
One of the features of the program is that peak values are displayed on monitoring graphs, so there is no need to scroll through the graphs - just glance at the red numbers above them.
Setting up MSI Afterburner
To begin, click the Settings button at the bottom of the program panel:

At the top of the window that appears:
- select the “Monitoring” tab;
- We check the boxes on the list items that we want to monitor. Drag the lines with your mouse in the order in which you want them to appear in the game;
- While a line item is selected, you can assign it whether it will be displayed in the OED during the game or not (and at the same time color, name, and other properties).
As you can see, in the screenshot Frame Rate is not checked, but usually it should be checked unless your FPS is displayed by the game itself or another program.

After this, I advise you to look at what is hidden in other tabs of this panel, especially in the far right - Interface.
Setting up the MSI Afterburner OED
So, to configure the display of FPS and monitoring data during the game, in the same settings panel, find the OED tab, and there the “Advanced” button. Click it!

The OED settings window has opened. In it you must do the following things:
- Make sure the OED display switch is in the ON position (if not, you know what to do!).
- Optional: turn it on if the anti-cheat suddenly swears in the game.
- Optional: affects the display method (roughly speaking, the font) of the OED. It is best to choose Raster 3D, where you can customize the font by clicking on the Raster 3D inscription again.
- It is better to turn on the shadow of the font (switch it to the ON position).
- Choose the OED font color to suit your taste!
- Squares at the corners of the monitor - quick way move the OED to the desired corner of the monitor. Or you can simply drag the OED with the mouse, or set its coordinates manually.

That's probably all about quick setup MSI Afterburner for monitoring the processor and video card in the game. If you need detailed review program features, see one of best videos on this topic from Artyom:
When overclocking a video card using MSI Afterburner, it requires periodic testing. In order to track its parameters, the program provides a monitoring mode. If something goes wrong, you can always correct the operation of the card to prevent it from breaking. Let's see how to set this up.
Monitoring tab
After starting the program, go to the tab "Settings-Monitoring". In field "Active Monitor Graphs", we need to decide which parameters will be displayed. Having marked the required schedule, move to the bottom of the window and put a tick in the box "Show in Overlay Screen Display". If we are going to monitor several parameters, then we add the rest one by one.

After these steps, on the right side of the window with graphs, in the column "Properties", additional inscriptions should appear "in OED".

OED
Without leaving the settings, open the tab "OED".
If this tab is not displayed for you, it means that when installing MSI Afterburner, you did not install additional program RivaTuner. These applications are interconnected, so its installation is required. Reinstall MSI Afterburner without unchecking RivaTuner and the problem will disappear.
Now let's set up hotkeys that will control the monitor window. To add it, place the cursor in the required field and press the desired key, it will be displayed immediately.

Click "Additionally". Here we just need the installed RivaTuner. We enable the necessary functions, as in the screenshot.

If you need to set specific color font, then click on the field "On-screen Display palette".

To change the scale, use the option "On-screen Zoom".

We can also change the font. To do this, go to "Raster 3D".

All changes made are displayed in a special window. For our convenience, we can move the text to the center by simply dragging it with the mouse. In the same way, it will be displayed on the screen during the monitoring process.

Now let's check what we got. Let's start the game, in my case it's "Flat Out 2".On the screen we see the video card loading item, which is displayed in accordance with our settings.

Overheating of components computer equipment leads to its unstable operation and unexpected failures. In case of problems, it is necessary to find out the temperature of the components, or better yet, constantly monitor it to prevent a critical condition.
The examples given in this article are applicable to various manufacturers of processors (Intel, AMD), video cards (NVIDIA, AMD, Intel), and disk drives. Also, the guidance applies to desktop computers, laptops and all-in-one PCs Windows control, and in some cases, Linux. Most of the programs in question have Russian translation or an intuitive interface.
Universal programs
The easiest way to determine temperature readings is to use a program that can show the temperature sensors of all devices. Below are examples of such programs.
1.Speccy
This is a free small program. You can download it from the official website.
After installation and launch, in the first window we will see all the information we need:
* 1) processor temperature. 2) motherboard(north bridge). 3) video cards. 4) disk media.
2.SpeedFan
The program is designed to control the speed of coolers, however, displaying temperatures is an integral part of it. You can also configure the program to autostart and constantly see temperature indicators in the tray.
We launch the program - in the first window we will see indicators from the sensors:

3. AIDA64 (everest)
This good program, but some functions are only available in paid version. Therefore, it is not advisable to use it only to determine temperature. However, if AIDA is already installed in the system, it is worth using it.
We launch the program - open the item Computer- click on Sensors. On the right we find Temperatures:

If we minimize the program, we will see all temperature indicators in the tray.
4.HWMonitor
IN different versions microprogram we will see different options for presenting information:


4. Various gadgets
You can also find various gadgets on the Internet for constantly displaying information about the temperature at work. Windows desktop, for example, IntelCoreSerie.
5. CPU-Z
It would seem that the CPU-Z program should show all the information about the processor. However, the developers have released a separate utility, HWMonitor (described above), which allows you to view the temperature of PC components.
Video card temperature
Without special programs, it is not possible to find out the temperature of the video card. Let's look at several utilities that will allow you to do this.
1.GPU-Z
A simple utility for displaying information about the video card, in particular, temperature. Good way, if you don’t want to install anything, you can run the program without installing it. You can download it from the official website.
After launch, go to the Sensors tab and in the GPU Temperature section we will see information about the current temperature:

By clicking on a section, you can select a display mode, for example, average temperature readings for the entire period:

2. GPU Temp
We go to the program website, download it and start the installation process. Then we launch and see the necessary indicators:

3. Gadgets
Like the processor, you can also find gadgets for the video card. For example, NVIDIA GPU Temp displays the temperature of a video card from the same manufacturer.
HDD or SSD temperature
Well, let’s look at programs that will allow you to find out the temperature of your hard drive.
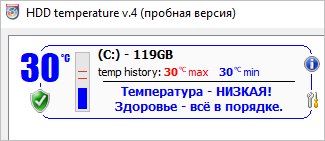
1.CrystalDiskInfo
The program is useful, first of all, for displaying disk health. But it also displays its temperature:

2.HD Tune
This utility allows you to diagnose the disk, view its indicators, including temperature:
3.HDD Temperature
This paid utility, therefore not interesting in the context of viewing temperature. However, if such a program is already in the system, you can use it:
4. HDD Life
The option is working, but also not the best the best choice to check the temperature - firstly, it is paid, and secondly, it does not support all equipment.
Normal temperature of components
Within what limits should the temperature be kept for various components?
CPU
- Up to 42 o C. Processor in idle mode.
- Up to 65 - 70 o C (depending on the model). Under load.
- Up to 61 - 72 o C (depending on model). Highly recommended.
- 94 - 105 o C. Enabling throttling - reducing performance.
- More than 105 o C. Turning off the computer to prevent combustion.
Please note that these figures are subject to constant change as technology changes. If you need to find out accurate information on a specific processor, you can use hints in various programs, for example, in the Core Temp presented above:

Thus, these figures are arbitrary - the norm depends on the manufacturer (Intel, AMD...) and specific model. Also, the norm for most laptop processors is lower. The best thing to do is go to the page of a specific processor and look at its temperature rating.
Video cards
To a greater extent, the operating temperature of a video card depends on its class - for an accurate determination it is worth studying the documentation. The averages are approximately as follows:
- Up to 45 o C. In idle mode.
- Up to 85 o C. Under load.
- Up to 100 o C. Maximum recommended.
Above 100 o C, the video card starts the throttling process and, if it does not help, turns off the computer.
Disk
- Up to 45 o C. In idle mode.
- Up to 53 o C. Maximum recommended.
At temperatures above 53 degrees, the depreciation of the disk increases significantly, which leads to an acceleration of its failure. Maximum allowed threshold SSD drives slightly higher and can reach 70 degrees.
The minimum operating temperature of the disk should be between 24-26 degrees. Lower readings may cause damage. Therefore, if we brought cold media from the street, we should not immediately use it for work. Thus, a comfortable temperature for the disk is from 25 to 45 degrees Celsius.
These figures are valid for both internal and external drives, since, in fact, the latter are the same drives placed in separate boxes.
Consequences of overheating
As mentioned above, overheating of components can cause various types of problems. You can judge possible overheating by the following symptoms:
- Slowdown of the computer. To prevent burnout and shutdown, the processor and video card start a throttling process. In fact, they begin to work with reduced performance, which leads, on the one hand, to a decrease in heat generation, and on the other, to a decrease in productivity.
- Excessive noise. Most often, controlled fans are installed in the computer, which begin to rotate faster when the temperature rises. Of course, this leads to increased noise levels.
- Spontaneous shutdown of the computer. To prevent final combustion, the device sends a signal to stop the power supply, which leads to an abrupt shutdown of the PC. This is a last resort.
- The appearance of colored figures (artifacts) on the screen. A typical symptom of an overheated video card.
- FPS drop in games. A special case of PC slowdown.
- Hot body. As a rule, this can only be noticed for all-in-one PCs and laptops.
- Blue screen of death (BSOD). In rare cases, the system issues a stop error.
Causes of overheating and how to reduce the temperature
Let's look at the reasons when the temperature of components begins to go beyond the permissible limits.
- Dust. Most often, dirt is inside system unit or laptop causes poor thermal conductivity and increased temperature. To solve the problem, we disassemble the computer and blow out the dust using a can of compressed air.
- Accumulation of hot air inside the case. First, you can try opening the side cover of the computer, if it helps, install an additional fan on the side wall. You can buy a cooling pad for your laptop.
- Thermal paste drying. We remove the processor cooler, wipe off the remaining thermal paste and apply a new layer.
- Poor fan operation. If they rotate weakly, the cooling efficiency will be lower than expected. You can measure the fan rotation speed using the above-mentioned programs, for example, SpeedFan. You can try cleaning the fans from dust, lubricating them, or replacing them.
- Close arrangement of components to each other. Iron can heat each other. If there is space, it is worth placing the disks at a large distance from each other, the same applies to video cards. Inside the case, all wires should be carefully bent around the edges, leaving plenty of space in the center for effective air circulation.
- High ambient temperature. In summer, you need to cool your computer more. It is also worth making sure that the computer is kept away from batteries or other heat sources.
- Power supply problem. If the power supply is too high, overheating will occur. You can measure the voltage using the utilities described above, for example, AIDA64 or HWMonitor. If the voltage indicators are exceeded, we will try to connect the computer to another source of electricity or replace the power supply.
- Windows power mode is inefficient. If the power supply mode is set to maximum performance, you should try setting it to balanced.
- Power supply overheating. Some power supply models have an exhaust fan towards the processor, which worsens the effect of the latter's cooling system.


