How to make a power bank from a battery. Do-it-yourself power bank: diagrams and drawings how to make a simple home-made device
In this episode of the “AlexGyver” channel, the master talked about how to make the simplest, most honest and, presumably, the most profitable and cheapest power bank with your own hands. The basis will be prepared by the Chinese module. The cost is 100 rubles. It produces 1.2 amperes of charging current, 10 ampere hours.
It has 2 USB outputs on board. Input for charging, display. There are many different Chinese modules. You can do the one you like best. All of them run on batteries connected in parallel. There are more powerful options. But they will be more difficult to work with, because they do not have an input for a charger and USB. Runs on batteries connected in series.
The battery in our power bank is 18,650 lithium batteries. You can use old laptop batteries. You can go to some service and beg or buy a dead battery from them, but they have a low capacity. So the project will turn out to be very cheap, but not very effective.
The technician will use Sanyo batteries. For maximum capacity, you need to take a green NSR. The price for 1 ampere hour is the same. So we lose nothing and pay purely for the capacity. 3 NSR batteries will give a capacity of exactly 10 amp-hours. Or 12 watt hours, respectively.
As a case, ready for 60 rubles. Three batteries fit into it with almost no gap. Two plastic racks need to be bitten off so that they do not interfere. The essence of the project is as follows. You need to connect the batteries in parallel and connect it to the power bank module. Lithium batteries can be connected in four ways. The best is contact welding. But it is not available to most viewers. The second one is more accessible, but at the same time it is a bit dangerous. This is soldering. Our task is to solder the wire as quickly as possible so that the battery does not have time to heat up. Because it is very harmful to lithium.

Attention! Before assembling the batteries into a battery, be sure to charge them all to the same voltage (or measure and make sure that this is the case). When assembled, they will begin to equalize the voltage, and with a large difference, a strong current will flow.
The second way is quite exotic, but at the same time simple and safe. This is a nickel tape and powerful neodymium magnets 8x1 mm.
The fourth one is even easier. This is the battery compartment. But it's bulky and inexpensive. Will have to work on it a little. To begin with, we remove the side walls right along the steps. They separate from everything else. You also need to cut off the ends. It turns out a very stylish, fashionable and thin holder. But even in this case, it is not very suitable, because you will have to sweat a lot to install the powerbank module. He doesn't fit right in here. Even if it can be placed, but quite back to back. Yes, and the body is deformed - it's ugly. The last two methods allow you to safely insert charged batteries or simply take them out. So it will be cheaper and more convenient to use tape and magnets. This is what we'll do.
First you need to fix the powerbank module in the case. You can see that it is slightly wider than the body. You can take advantage of this. Namely, make two grooves. Insert a board into them. Thus, it will be fixed in all directions. It remains only to make a window for the display at the USB input. It is most convenient to work with a dremel and a cutting disc. But not everyone has such a tool. So let's see more available method. Scalpel, hot knife and file. Very sloppy, but quite effective. The front struts also bit off. The module falls into place and holds up perfectly.
Continuation from the fifth minute on the video clip
Everyone knows that external batteries (power bank) are used for charging, or recharging portable devices, hiking or where it is not possible to charge the device from the mains. The device offered for self-assembly can operate in two modes: Main and Reserve. Parts for making Power Bank are not expensive, and you can even find them at home. So, in order to make a Power bank, we need:
1. Li-ion batteries 8 pieces 18650 2200mAh 3.6V.


4. USB input from a computer.
Assembly process and scheme

We cut holes in the case for the switch, and the USB input.

We solder the batteries according to the scheme, into two batteries of 4 pieces, and install them in the case.


Video of work
A full charge of the device is enough to charge two phones in one mode. In general, despite the simplicity - for charging phones on a hike or on vacation, such an autonomous PSU will be just right. A more advanced circuit using special controllers is
Method 4. External power storage with a solar battery
Another interesting option. As daylight hours begin to increase, it is relevant to discuss the benefits of energy storage solar energy. You will see how to make a portable charger with the ability to charge from solar energy storage panels.
We need:
- 18650 format lithium-ion energy storage,
- Case from the same drives
- 5V 1A voltage boost module.
- Battery charge board.
- Solar panel 5.5 V 160 mA (any size)
- Wiring for connection
- 2 diodes 1N4007 (others are possible)
- Velcro or double-sided tape for fixation
- hot glue
- Resistor 47 ohm
- Contacts for energy storage (thin steel plates)
- Pair of toggle switches

- Let's study the basic scheme of an external battery.
The diagram shows 2 connecting wires different colors. Red is connected to "+", black to "-".
- It is not recommended to solder the contacts to the lithium-ion battery, so we will put the terminals in the case and fix them with hot glue.
- The next task is to place the voltage boost module and the charging board for the battery. To do this, we make holes for the USB input and USB output 5 V 1 A, toggle switch and wiring to the solar panel.
- We solder the resistor (resistance 47 Ohm) to the USB output, on the back of the module that increases the voltage. It makes sense for iPhone charging. The resistor will solve the problem with the very control signal that starts the charging process.
- To make the panels easy to carry, the panel contacts can be attached using 2 small male-female contacts. Alternatively, you can connect the main body and panels with Velcro.
- We put a diode between 1 contact of the panel and the power storage charge board. The diode should be placed with an arrow in the direction of the charge board. This will prevent the storage battery from being discharged through the solar panel.
IMPORTANT. The diode is placed in the direction FROM the solar panel TO the charge board.
How many charges will this power bank last? It all depends on the capacity of your battery and the capacity of the gadget. Remember that discharging lithium drives below 2.7 V is highly undesirable.
As for the charge of the device itself. In our case, we used solar panels with a total capacity of 160 mAh and a battery capacity of 2600 mAh. Therefore, under the condition of direct rays, the battery will be charged in 16.3 hours. Under normal conditions - about 20-25 hours. But don't let these numbers scare you. Via miniUSB it will charge in 2-3 hours. Most likely, you will use the solar panel in conditions of travel, hiking, long trips.
Finally
Choose the most suitable method for you and build your own portable battery. Such a thing will definitely come in handy on the road or on a trip. The advantages of the device made are mass: it is unique appearance, but also a way to get the power that will satisfy exactly your needs. By using portable battery you can charge not only phones, but also tablets, wireless headphones and other small gadgets.
There can be all sorts of situations in life - an empty smartphone battery and the lack of power outlet for recharging nearby - a frequent occurrence. That is why it was decided to make our own, powerful Power Bank from an old laptop battery, with USB power. Of course, you can buy Chinese, but their 10,000 and 20,000 mA is a big exaggeration! This article will show you how to assemble a device consisting of a lithium battery charging module, a boost converter for USB, and LED indicator battery status of the Power Bank.
Where to get lithium batteries
It’s better not to buy the batteries themselves (it’s expensive and there are a lot of weak ones), but to use them from an old laptop. Inside this, which is in the photo - 3 packs of two parallel assemblies of lithium 18650 type 2200 mAh, which are connected in series.

In our design, we will use all 3 packages in parallel, having previously checked whether they hold a charge well for a sufficiently long time.

As a last resort, if some banks are already quite weak, put one double package - then the bank will become lighter and smaller, albeit weaker.
Modules Power Bank
The next important part of the USB Powerbank is the charging board. For this, a cheap one was chosen. Additionally, it disconnects the load if the voltage lithium batteries drops below ~3.7 Volts, thereby protecting battery from deep discharge.

Now we take a circuit that increases the voltage from the batteries to 5 volts (for USB power supply exit). This is any boost converter to USB.

How to connect it to each other -. Naturally circuit diagram will have a small toggle switch to enable Power Bank. The toggle switch is needed because the boost converter is always powered by the battery (and draws a small amount of current), even if no device is connected to the USB.

Housing for homemade Power Bank
It is better to take a non-metallic case - a suitable plastic box, cable channel, and so on. For this project, a non-standard and environmentally friendly material was used - wood, more precisely fiberboard. Two covers and walls along the perimeter, all this is connected with screws.
This is a very useful device, especially if you are a frequent traveler, and can be made very quickly and cheaply by hand. There are a lot of ready-made devices and cases for 18650 batteries, but for various reasons they all did not suit us and we decided to make our own.
Features of Power Bank
The idea of our charger very simple. This is in some way a case for 18650 LiIon batteries with the ability to quick change this battery. The device can both charge the battery itself and charge external devices. And all this, in accordance with the original plan, was to have a minimum size, low cost and the utmost simplicity of the device until everyone could assemble it themselves. And as a result, we got a fairly successful design:
Firstly, this approach saves you from deciding on the battery capacity you need. Our PowerBank allows you to carry as many spare batteries as you need in a given situation.
Secondly, batteries of this format are widely distributed and available. We do not recommend such actions, but they can even be found conditionally free of charge in old technology.
Thirdly, such universal solutions simply do not exist, or they are very expensive. And the main complaint is primarily about the size of ready-made solutions.
Assembly accessories

A complete list of everything you need:
- 18650 battery holder for PCB mounting
- Battery charge controller. It has built-in protection and can charge the battery with current up to 1A
- StepUp Charging Converter external devices current up to 0.5A
- Rocker switch (photo with dimensions)
- Screw M3x6 with countersunk head - 2 pcs
- Nut M3 square - 2 pcs
- Mounting wire and heat shrink tube
- Printed case (download link will be at the end of the article)
That is, the cost (including shipping!) Is approximately $4.
Wiring diagram
Everything is connected very simply, with five wires:

First you need to solder the wires and the switch to the charge board. It is important that the wires from the "B+" and "B-" contacts must be long, and the wires from the "OUT+" and "OUT-" contacts must be made short.

The board is then installed into slots inside the case. It is specially made very tight so that in the future the board does not hang out in it.

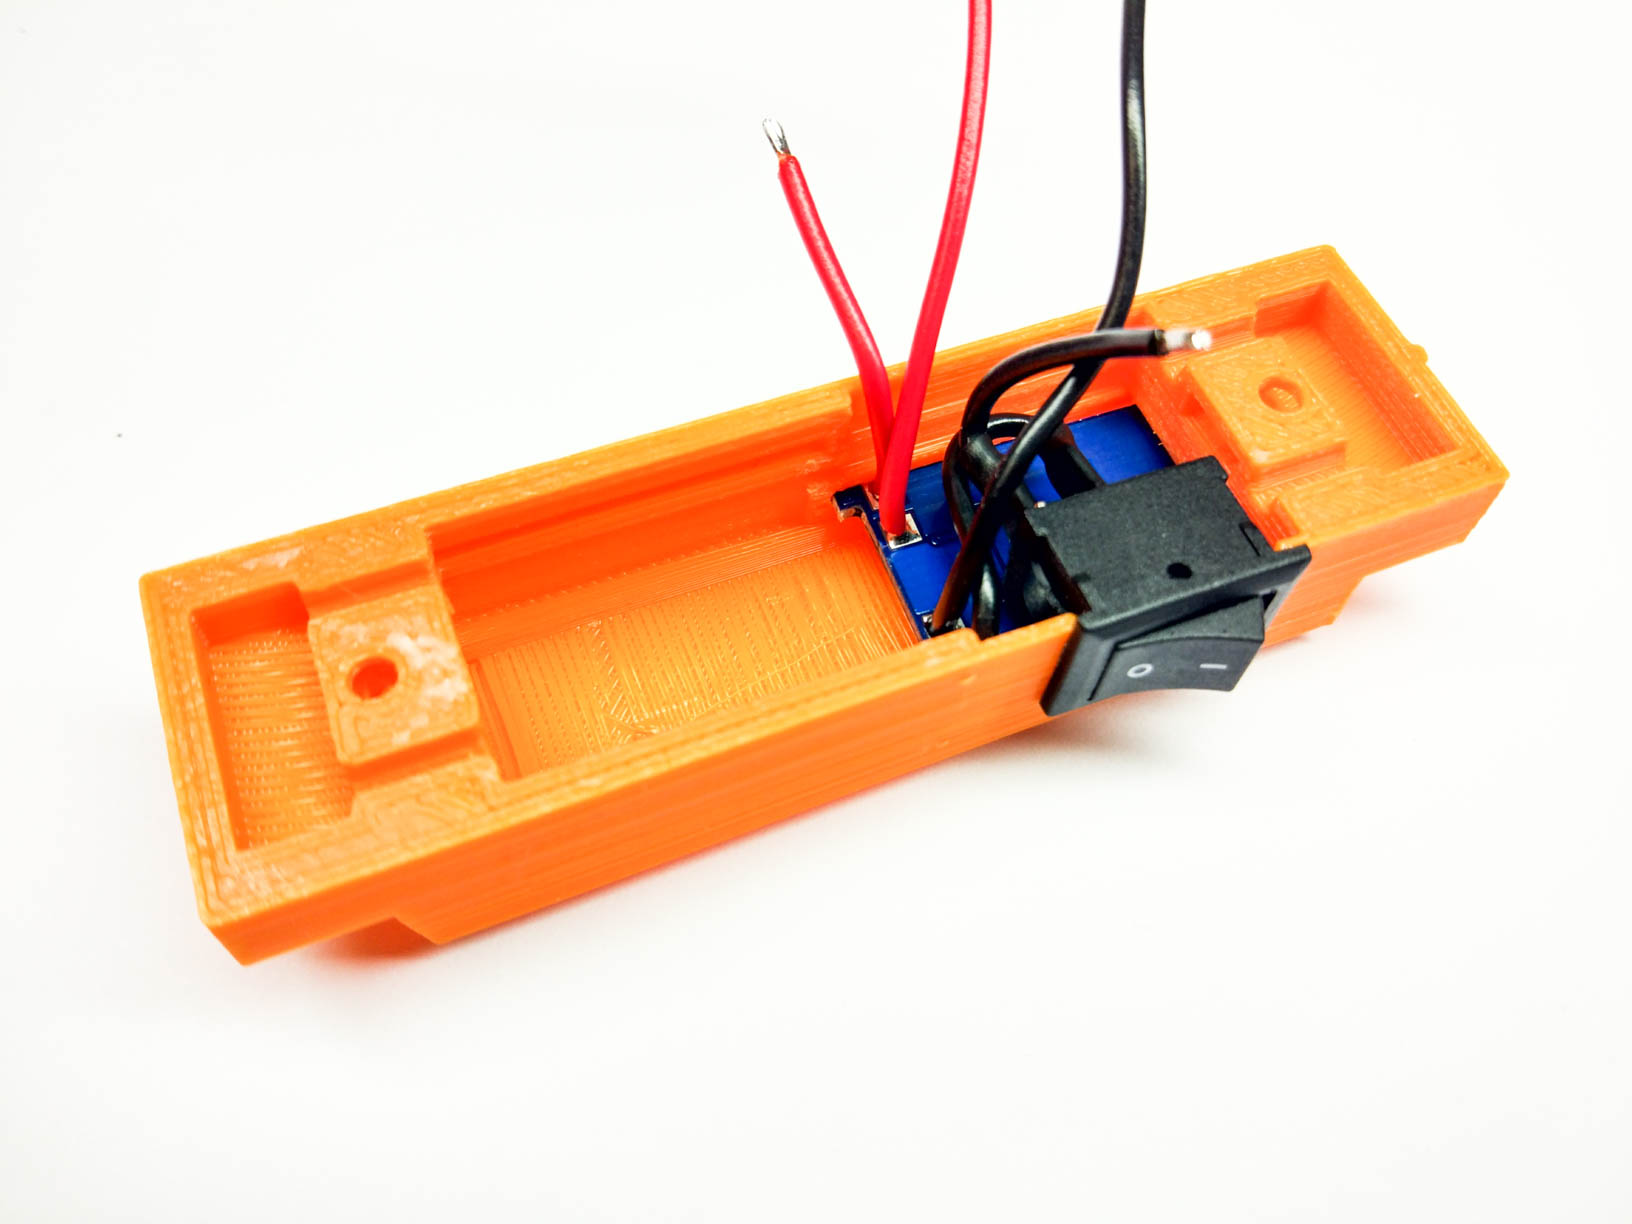
Now you can install the boost converter board into its slots and then solder the short wires from the battery charge controller to it, which go through the switch from the "OUT +" and "OUT-" contacts. It is important not to confuse the polarity anywhere, but everything is quite well and intuitively located there.

After that, you can shorten the wires going to the battery, solder them to the battery holder and install the nuts in the grooves. At the same time, observe the polarity of connecting the wires with the polarity on the battery holder and on the ends of the housing!

At this stage, you can already install the battery and check that the device is functioning normally. If everything works fine, then you can additionally fix the boards in the case with the help of tremoglue, but even without this they are held very tightly.
It remains only to screw the holder to the case with screws:

Video
Results
The whole device has dimensions of 79x26x31mm, while the battery diameter is 18mm and the length is 65mm. The charger weighs 25g without battery and 75g with battery.
The components that we used are used very widely and in some way have already proven themselves. We just combined it all into one complete product that anyone can make for themselves. And in our opinion, we quite succeeded in making it minimalistic and quite suitable for everyday use both for charging the batteries themselves, and for use as a PowerBank. 
Download links
File for printing the body on a 3D printer.
We will be very happy if you support our resource and visit our store.


