Network scanning programs. Setting up a USB scanner to scan over a network
The Internet is replete with articles on the topic of setting up shared access to printers, but you can find good instructions on the topic “How to set up shared access to a scanner in local network» is quite difficult, because novice users encounter problems when solving the problem on their own.
main feature in setting up shared access to the scanner lies in its drivers, which control the operation of the device. User and operating system interact with the scanner through drivers, therefore they must contain a mechanism to support shared access to the scanner for remote use.
To make sure that interaction occurs at the driver level, try running a scan from third party application, whether the operating system's Fax and Scan tool or graphics editor. Be sure to get into proprietary utility from the scanner developers. Therefore, if this point was not taken into account at the stage of writing software for the scanner, which is important for older devices that are not supported by the manufacturer, then public access to such a scanner cannot be organized.
The technical documentation for the MFP should contain all the necessary information regarding the use peripheral device, including over a local network. If there is no such data or it is difficult for the user to understand it, this instruction. It shows, using an example, how to connect and configure a scanner in the Windows operating system in order to scan documents over a network.
In our case, we used a PC with Windows 7 and an HP scanner. XnView and Blind Scanner were used as accompanying software to open public access to the scanner.
What is a network scanner?
Note that there are two methods to “share” the scanner on the network. The first is to connect the device to one of the computers on the network and configure it accordingly. The second is to connect the scanner to the network as an independent device and make the appropriate settings. The connection methods differ in that in the first case the device will not have its own identification number (IP address) by which other network users will access it. Requests will occur through the mediation of the computer to which the scanner is connected. We will focus on this switching method due to its prevalence and ease of implementation. The second case requires a special device that is equipped with an integrated network card for individual functioning in computer network, or a hybrid scanner. It can work either separately from a PC on a local network or connect to a computer via USB or Bluetooth.
The ability to use the scanner over a network requires that the computer controlling it be turned on and connected to the network.
Let's start setting up public access on the server
First of all, you should connect multifunction device or a scanner to a computer via USB and supply power to it, provided that the drivers are installed in the system. Otherwise, download them from the developer or device support website and install them. Then you should restart your computer and scanner.
Now you should install a utility with the option of scanning documents, if the system does not have one. You can use, for example, XnView.
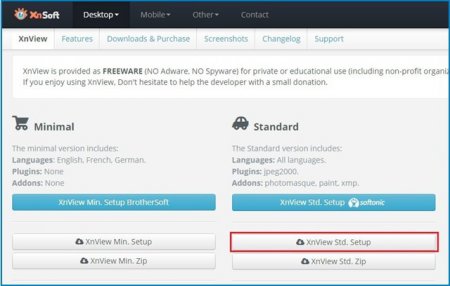
Installing the application is very simple, so any beginner can follow all the instructions.
Client machine configuration
Then we switch to the computer from which we will perform network scanning and install the BlindScanner program on it, taking one point into account: in the component selection window, move the checkbox to the “BlindScanner Pro TWAIN driver (Client)” position.
Using the scanner over a network

As a result, we will receive a digitized document.

You should know that the most important thing to install a scanner is to understand the basic principles by which the system “communicates” with external device. Many network scanners do not require a connection and are used directly over the Internet if the IP address or host name of the scanner is known. As for scanners that are physically connected to your computer, the most important thing to remember is the basic rules on how to install a Windows 7 scanner.
For Windows 7, scanners, printers, cameras and fax machines are, in general, no different. This operating system exchanges signals with these devices in approximately the same way. Most often, Windows 7 automatically installs various devices, aimed mainly at games and entertainment. Scanners, printers and faxes are an exception in some cases. And here it becomes important to know how to choose a printer, scanner or other peripheral device.
Windows 7 cannot automatically install drivers that are not specifically designed for this operating system, or that have not at least passed the compatibility test with Windows 7. This category most often includes older devices that may work fine, but when installed on Windows 7 Major problems may arise, which most often have to be solved by trial and error before using the scanner.
If the available driver is not designed for use with Windows 7 or later, it is best not to use it. In this case, you should go to the manufacturer's website and look there for newer drivers for of this device. It goes without saying that you will have to install them manually, but there is nothing difficult about it. First you need to figure out how to connect the scanner to your computer. Most often this is done USB cable. If the installation wizard automatically appears at startup, this means that the system has seen some kind of device.
Next you can try to select automatic installation. If a message appears indicating that the wizard could not find suitable software, you should select manual installation and indicate the exact location where the driver is located - a control program that tells the computer how to operate the scanner. At this point, a warning may appear stating that this scanner has not been tested for compatibility with Windows 7. If so, you should select “continue anyway” and the installation will be completed. However, it is best in such a situation not to use the wizard at all, but to install the driver by directly running the installation file. Even a novice PC user can do all this on their own and get excellent results.
For some multifunctional devices, manufacturers provide software, thanks to which you can click on the “Scan” button, the document ends up in a specific folder or network resource, and then the employee can easily receive it over the network this document. But not all devices have such functions, so in this video we’ll look at a program that allows you to perform remote scanning, i.e. over the network. It does not require physical presence at the computer to which the scanner or multifunctional device is connected, so as not to disturb the working employee.
And we will use the TWAIN Web program, which can be downloaded from the official website of the developers http://unit6.ru/twain-web. The main advantages of this program are that it is completely free and easy to use, since it only requires installation of the server part on the computer to which the scanning device is connected.
Regarding the requirements, the scanning server must have an operating system installed Windows system XP and older, as well as .NET Framework 2 and higher, and on the client there is only a browser and access to the scanning server.
Download the program and run the installer ( Advanced settings \ Leave the path the same \ Specify the port). By default, port 80 is specified, but I do not recommend specifying it, since this port may already be occupied by Skype or a web server. If you know for sure that neither the web server nor Skype will be installed on this machine, then you can leave the default port 80. I will indicate 81.
The page with the web interface for scanning is loaded. What we should pay attention to is the address http://127.0.0.1:81/TWAIN@Web. Actually, we will knock on the address of this page from other computers to perform a scan. More precisely, by correcting the IP address of the computer on which the program is running. Here we have the address 127.0.0.1, this is the address of the local machine, that is, now we have logged in to ourselves.
We will also need to create a rule in the Windows Firewall, or in a third-party firewall if you are not using the standard Windows Firewall. (Start\Control Panel\ Windows Firewall\Additional settings\Rules for incoming connections\Create a rule\For a program or port\TCP 81\Allow connections\For all profiles)
Now let's try to scan a document with client computer, to do this, enter in the address bar http://192.168.0.4:81/TWAIN@Web(192.168.0.4 – IP address of the scanning server). The web interface was displayed, which means that the service was running on the server and the firewall let us through.
Scan options:
- scanner selection- there are usually 2 devices present here, this is the TWAIN driver supplied by the equipment manufacturer and the WIA driver. Personally, I was able to scan only through WIA, which is why we choose it. When switching, you can see what resolution range is supported, as you can see, the TWAIN driver produces some unrealistic numbers, and WIA is similar to the truth;
- name and number;
- DPI resolution- usually 150 is enough so that the file is not large and everything can be seen;
- color, output file type and paper size.
If you want to scan several documents in a row, then there is the “Batch scanning” item. Here you should specify the number of documents scanned and the delay between scans, i.e. the time it takes to replace the sheet on the scanner in seconds. This delay is also performed during the first scan so that you have time to get to the scanner and place the document there.
But there are subtleties here; you can specify scanning documents and saving them in separate jpeg file s. But, in internet explorer, every time you will be asked to save or open the file, you will still have to go to the computer every time to select an action. In this situation, you can save documents in pdf file, then only after scanning of all documents a request to save the document will appear.
If you need to scan each sheet into a separate jpeg file, you can use a browser Google Chrome, in which documents are automatically saved in a specified folder, without prompting. And in general, everything works more adequately in Chrome, as you saw in Internet Explorer, the file name and numbering did not work, but here everything is fine. It’s also worth considering that file numbering will continue from the last scan, even if you haven’t scanned for a week.
Now, we can simply create a shortcut on the user's desktop at this page, and if you have a network with a domain, using group policy You can distribute this shortcut to all computers in a matter of minutes!
Thus, you can scan even from devices such as phones and tablets, the only condition is that they are on the same network, and then continue through the browser.
If over time you need to change the port on which the server part of the program runs, you can change it at any time ( Start\Programs\TWAIN@Web\Configuration)
It is also advisable to specify automatic restart of the scanning service in case of failures (Start\Control Panel\Administration\Services\TWAIN@Web\Startup type: automatic\Recovery: for all failures - restart the service)
And if you have any questions or suggestions, please contact the developers, they welcome such initiatives!
The scanner usually comes with cords (power and USB cable), an update disk, and instructions in in electronic format and sometimes software. All this will be useful to you to connect the device to your computer. In addition, the instructions below will help.
Connecting the scanner directly
To connect the scanner you need:
When the scanner is still not found by the computer, you should simply move the cable to another connector. If this does not help, you will have to turn off all the wires, remove all updates for the scanner from the PC and start the project again from the second point.
Scanner that works on multiple computers
If there are many personal computers on your network, to connect you need:- Check the presence of the “Ethernet” connector on the scanner and insert the required wire there.
- Organize your workspace so that wireless network covered all the necessary computers.
- Connect the router and place it next to the scanner (the closer, the brighter, clearer and faster it will work).
- On your computer, follow the operating system recommendations.
- Connect your PC to the network scanner.
- Go to “Start”, go to “Control Panel” and then click “Devices and Printers”.
- Now click on “Add a printer” and “Add network, wireless or ...”.
 Add a Printer Window
Failed to install scanner
There can be many reasons. For example, you did everything according to the instructions, but the scanner does not want to perform its direct duty just because the transport switch is set to “Closed”. And this is the easiest case to solve. If you bought this scanner secondhand, it is quite possible that the previous owners had a power failure, and electronic elements couldn't stand it.The problem may be related to the drivers. It's worth trying to install them again. And it’s best to contact a specialist who will tell you what condition the equipment is in. If the equipment is new and has not been negatively affected, the product may be defective. It's worth going to the store and exchanging the scanner for a new one.
Video setup of the scanner driver on a PC with Windows 8
After installing the scanner on a computer running Windows 8, you may see an error - “The scanner cannot be connected.” In the following video, the wizard will tell you which driver you need to install to solve the problem:
How to make a network scanner?
Master's answer:
A local network that connects several computers within one organization has some advantages in use: accessibility to common applications and files and the ability sharing equipment: scanners, printers.
To make the scanner network-ready, you can use the RemoteScan 5 application. To do this, you need to download this program at: http://www.cwer.ru/node/6585/, then install it on each computer on the network. Accordingly, on the PC to which the scanner is connected - the server version, and on others personal computers, to which you need to connect the scanner via the network - client version.
Please note that during the installation of the client version of the program, a message may appear stating that the scanner is missing. No need to pay attention to this. After completing the installation of the server part of the program, you need to right-click on the program icon in the tray in order to be able to use the settings.
You can then select your scanner and configure the ports to connect to it. Keep in mind that it may take up to three minutes to identify any device. If this did not happen, then this model scanner is not supported by the application.
Wait until the icon is no longer crossed out. After this, you should open your antivirus program/firewall and allow access to the scanner port. The default is 6077. If you have NOD32 antivirus installed, then you can go to your personal firewall, open settings, select interactive mode and start creating a separate rule for the RemoteScan program. You need to install the client version of the application on the appropriate computers, add special software and scan over the network.
Perhaps using another program to share the scanner on the local network will help if previous application did not detect your scanner. To do this, you need to download the Blindscanner program, go to http://www.masterslabs.com/ru/blindscanner/download.html, select the required version, download and install the server and client versions of the program on computers, respectively. Perform the setup in the same way.


