Checking RAM in windows 7. Preparing to diagnose RAM with Memtest86
From time to time, many users want to perform such an interesting operation as checking RAM.
The fact is that very often in the Windows operating system, RAM does not cope with the load assigned to it, although, judging by the volume, it should.
In other words, the computer does not give out the speed that it should give, based on the amount of RAM.
In general, this is far from the only problem that occurs with memory in operating rooms. Windows systems.
Additional utility memtest86+
In addition to the standard tool described above, there is more than one special utility to check the RAM.
All of them can be easily downloaded and some of them are even in Russian. This option is just right for Windows 10 and Windows XP.
Such programs also do an excellent job with their main task, that is, checking for errors. But according to many users, the best one is memtest86+.
This program gives the most accurate data and can work in the most different versions operating systems, including Windows 7, 10, Vista and so on.
You can download memtest86+ very quickly online. The whole process of using this program from start to finish is as follows:
- Download memtest86+ from the official site. The link looks like this: www.memtest.org/#downiso . There are several download options available to us:
- in .gz format for the Linux operating system and the like (underlined in Figure 5 with a red line);
- in .zip format in order to burn the image later on a regular CD or DVD disc(underlined with a green line);
- in .exe format for writing to a flash drive (blue line).

- After that, you will need to write the downloaded image to a USB flash drive or to a very ordinary disk, so that later, when the system starts, these files can start.
Everything is very simple here - if you downloaded .zip, then by standard means we write the file to disk, if .exe, then we dump it on a USB flash drive, deleting everything else from it. And if you downloaded .gz, then just run it. - After recording, it is necessary to put the boot from the shooting media into the BIOS. To do this, you need to make sure that the system checks at startup for anything in the drives and connectors.
To make this happen, we restart the computer and when it starts, press the Delete button (on some computers F2). Thus, we will get into the BIOS.
There we are looking for an item whose name contains the word "Boot" (for example, in Award BIOS it's called "Advanced BIOS Features" - shown in Figure #6).

There we are looking for the item “Boot Sequence” (again, depending on the version, the name may change).

In the window that appears, we see a list of all available media from which loading can occur. The name of the flash drive will appear "USB", in the name of the disk - "CD / DVD".
We need to click on the first item, that is, "1st Boot Device" and select the desired drive in the window that appears. In the example above, this is a flash drive, that is, a USB drive.


- We insert the media with the program. It will start automatically. The program window looks as shown in Figure 10.

Advice: It is better to check each RAM module separately. This means that you need to physically (by hand) remove each memory module in turn and run a test. In this case, the utilitymemtest86+will find the module that is damaged.It's better to just throw away the problematic memory module and replace it with a new one.
If problems are found, the memtest86+ window will look like Figure 11.

Unfortunately, memtest86+ does not work in Russian. But it can be easily and quickly downloaded online.
Yes, and here the main thing is to find problems, and if they exist, we will see a red color, as shown in Figure No. 11.
You can learn more about how memtest86+ works in the video below.
Thematic video:
RAM is a very important component of any computer system. Thanks to it, information is downloaded and exchanged between hard drive and processor.
Therefore, in the event of a malfunction this component your computer or laptop may become unstable or not work at all.
In this article, you will learn how to effectively check the RAM of your computer using the built-in tools of Windows 7, as well as the super-efficient program.
When should memory be checked for errors?
Problems with RAM can appear on any computer or laptop. And it can happen quite spontaneously.
The first and most common symptoms of RAM failure are:
- Frequent blue screens with different error codes;
- Blue screens during Windows installation;
- Various errors issued by various programs;
- One short and one long when turning on the PC.
How to check RAM for errors in windows 7?
Windows 7 has a built-in tool that allows you to test RAM your computer or laptop.
To start the scan, you need to go to the control panel, for example, through the menu " Start«.
We go to the control panel
There select " Administration«.

Administration in the control panel
Here you need to double-click on " Checker Windows memory «.

Windows Memory Checker
A window will appear in which we select " Restart and verify (recommended)«.

Performing a reboot
After that, the computer will restart and the memory test will begin.

Memory testing process
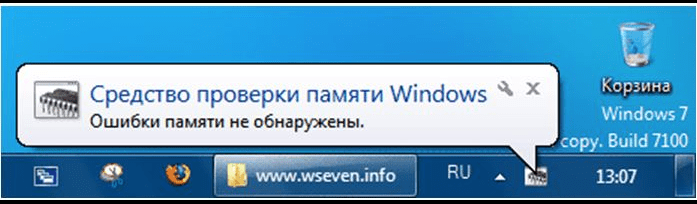
At the end of the check, you will see the result, which will say whether errors were found or not.
Checking RAM with MemTest86+
If, according to the results of the RAM test Windows tools 7 errors were not found, we recommend running a check with the program MemTest86+.

RAM errors identified by memtes86+
This program checks "from under the BIOS", writing to a USB flash drive, which it creates itself in the right way.
Thanks to this program, you can test the memory even if windows is not installed or does not start.
Detailed instructions for downloading and running the Memtest86+ program can be found in.
Share the article on in social networks! Help our site!
Join us on VK!
When a blue screen of death appears on the monitor of the device, it's time to think about checking the RAM. In addition, the RAM must be tested in the event that the computer restarts or freezes on its own.
Check RAM on Windows 7 will help standard means, but if you use a different version of the OS, you will need to download a special program from the Internet. Almost always, software failures, at first glance illogical, turn out to be related to RAM problems.
Exclusion Method
The first verification option does not provide for the launch of additional utilities. It is possible when multiple RAM sticks are used. If there is only one, you will need to use an application or another device to check. It is necessary to take out the RAM strips in turn and look at the overall stability of the system. This option is good because it allows you to check the slots at the same time motherboard. If one of the bars functions normally in another device without causing failures, it is quite possible that the cause of the breakdown is the system board. When, after removing one bar, the computer starts working normally, it is she who is faulty. Therefore, the Windows 7 Memory Test Tool does not need to be run.
It is worth noting that the physical removal of the slats does not take much time, and checking when using special programs has a longer process. This is especially true when the amount of RAM is large. If installed perfectly new module memory, and blue screen remains even during BIOS boot, it is possible that the processor or motherboard does not support the device of the manufacturer that released it. In this case, you need to check the official website of the company that is the manufacturer of the motherboard. May need BIOS firmware latest version.
How to perform a RAM test in Windows 7?
To run the built-in program that can test the RAM, you must perform the following steps:
1. Go to "Start".
2. Go to the "Control Panel".
3. Open "Administrative Tools" and select "Windows Memory Checker".
You should be extremely careful. You will need to close all applications and save important documents before performing the check. When the "Reboot" button is clicked, all programs that require additional actions from the user will be forcibly terminated. Next, the computer restarts, after which the RAM test automatically starts. It is carried out in two stages. They take a small amount of time if the amount of RAM is two gigabytes and the memory is healthy. Otherwise, the verification may be delayed. During the testing period, it is recommended to refrain from unnecessary clicks on the buttons. If defects in RAM are detected, information about errors will appear at the bottom of the screen. After finishing Windows checks 7 The computer restarts automatically and a report is generated of all RAM problems found by the system.
Memtest86+
It is worth noting that identifying problems with RAM Windows tools 7 does not always show high efficiency. To perform more serious and in-depth tests, you will need to use the Memtest86+ program. It is presented in a free version and can be easily used on any device with any operating system. The program is available in three versions:
Bootable ISO (provided for creating boot disk by burning the image with a CD burner or DVD drive;
Auto Indtaller For USB Key (not always suitable for older devices);
Pre-Complied for Floppy (an archaic solution for those who do not have USB sockets, a CD writer, but have a floppy drive).
Create a bootable flash drive
You need to go to the official Memtest86+ website and download the required distribution. After that, you need to unzip it. For these purposes, it is proposed to use 7-zip or the well-known Winrar. When the program launch is completed, you must select the drive, which will become bootable.
Bootable CD/DVD
Sometimes it is impossible to check the RAM from a flash drive. The system crashes when using a specific flash drive driver. There are also situations when the drive may not be at hand, the BIOS is outdated and is not able to boot the device from USB devices. In such cases, you have to burn the distribution to disk. The Ultra ISO program is designed for this. After it is installed, double click on any ISO file opens it in this application. Then you need to select the tools menu and the item "Burn image". Memtest86+ is a small program, so writing will be very fast.
Memory check
After the distribution is written to a USB flash drive or disk, you need to go to the BIOS. You need to do this in the process of turning on the computer by pressing the "DEL" button. When the program is launched, you should select the used USB flash drive or CD-ROM in the First Boor Device column. When all actions are performed correctly, the reboot is followed by an automatic memory test. The utility performs nine different tests, but after they complete, the program goes into a loop and starts all over again. As a rule, the first successful two or three tests make it clear that there are no problems with the RAM.
Prevention
Often crashes operating system leads to dustiness system block. In this case, OS testing is not required. Everything needs to be blown out inner space fixtures, paying particular attention to heatsinks and slots. It is advisable to remove all devices, excluding the processor, from the sockets, carefully wipe the contacts. It is worth being careful with microcircuits, since the slightest damage to them can lead to failures.
The need to check the RAM (RAM) is dictated by the frequent occurrence of the following situations in Windows 7:
- The appearance of the "blue screen of death" (BSOD).
- Computer freeze.
- Unstable or incorrect operation of the computer.
- Critical errors when running applications.
In all such cases, RAM is the most likely culprit and needs to be checked. There are several ways to test RAM in Windows 7.
Unlike previous versions OS that required application third party applications to analyze the health of this computer node, the seven has a built-in tool for this. It can be launched in two ways:
- From command line.
- From the control panel.
To run this tool from the command line, you need to click "Start", type mdsched in the search bar, press the Enter key. The following window will appear:
This window shows two options for performing the built-in RAM test:
Which option to choose depends on the user's intentions. Needless to say, when choosing the first option, you need to save your work and close running applications, which is what the message in the window reminds you of.
To run this tool from the control panel, select "Administrative Tools" in it, and in the list that appears on the right side of the window, select "Windows Memory Checker":

Further actions of the user and the computer are the same as when starting the test from the command line.
Built-in memory checker settings
It is recommended that you run this tool with the default settings first. If no problems with RAM were found, then a more detailed analysis can be carried out. To do this, run the built-in test again and press the F1 key while it is running, after which a settings menu is displayed, which can be navigated with the arrow keys and Tab. This tool provides three analysis modes that differ in the set of tests and the completeness and time of passage:
- Basic (Basic) - duration of several minutes.
- Standard (Standard) - takes about an hour.
- Extended - up to several hours.
At default settings, all tests are run in two passes. This value can be changed from 0 to 99. If set to 0, then testing will be performed indefinitely until it is stopped by the user, which can be done by pressing the Esc key.
The successful completion of the RAM test is indicated by the appearance of a window like this:
Boot Memory Check
This is another option for running a built-in test, which is used when, due to problems with RAM, it is not even possible to boot Windows. To launch it after turning on the power of the computer, use the F8 key to achieve the appearance of a menu with additional boot options, then press the Esc, Tab and Enter keys in sequence:


The built-in diagnostic tool will start:

Upon completion of the check, there will be automatic reboot Windows 7 and its normal operation will begin.
Checking RAM using the Memtest86 utility
Many third-party utilities have been developed for RAM tests, but Memtest86 is deservedly considered the “king” among them. It differs from many similar programs in that it has its own bootloader and starts with bootable media(for example, from a flash drive or CD). This allows it to more thoroughly diagnose the performance of RAM. Unfortunately, this utility has two drawbacks:
- The need to obtain bootable media from the distribution iso file. It is hardly necessary to attribute this to shortcomings - that is why the program does not require any OS, and does not depend on it.
- Quite a long test execution time (more than 1 hour).
When should it be used:
- Of course, the first and most frequent case is that the OS does not boot up, or a BSOD appears.
- When the PC is unstable.
- Diagnostics of purchased and non-working RAM modules.
- For fine tuning timings when overclocking system components.
What to do if tests reveal problems
If errors were detected during testing in any way, or the tests could not even complete, then this is a clear sign that one or more RAM sticks are faulty. What to do in such cases:
- Don't be in a rush to get new boards. First remove all the strips from the slots and reinsert. Just remember to turn off the computer before doing this and discharge static electricity by touching the computer case.
- If a lot of effort is required when removing and installing the slats, then either you forgot about the latches of the slats, or you insert them incorrectly.
- Gently wipe the contacts of the bars with an eraser to remove the plaque formed as a result of contact with air and subsequent oxidation.
- Install the brackets in the motherboard slots, turn on the computer and repeat the test. It is possible that the test will end successfully.
In contact with
When you boot your computer, the diagnostic tool sometimes starts automatically. The user does not receive data on the results, if there are no critical failures.
But it is possible to run a check in Windows 7 in manual mode. In this case, after the scan is completed in Windows 7, the testing device will notify the problems found in the report. Or in a system message after restarting the PC, depending on the diagnostic method.
We open Control Panel, we find - system and safety, go to Administration and run Required as an administrator.
A window will appear in which you can choose whether to restart Windows right now or postpone it until the next time you turn off the PC.

We choose, for example, Reboot and check right now The computer restarts and then a window with the function of checking the operating system will appear.
In the same window, the RAM will be checked. A blue screen will be displayed, in which the process of passing the test of the RAM will begin.

In it, we draw attention to the fact that so far no problems have been detected, but you still need to wait for the end of testing.
If suddenly this inscription changes to some other, then you need to take measures to more thoroughly check the RAM. In addition, it is possible to change the parameters of the memory test.
Press F1 and here using the keyboard you can select which test set will be performed. For example, in this case it is a normal test set.
If you want to be 100% sure that the RAM is working or not, then you need to run a check of a wide range of tests.

To do this, select a wide set and press the F10 button. In any case, we wait for the end of the check and get the results, whether any problems were found.
To see the test results, go to Control Panel, go to Administration, we find the point , start the event viewer.
Then we go to Windows logs and choose - System.

An event log will be displayed, which may contain messages about what was found in RAM. Whether or not there were any failures during scanning, or there were none at all.
Based on these data, you can already determine whether there are any problems with the RAM.
It is usually used when the computer no longer starts. That is, you need to check the memory on a working PC.
Checking RAM with Mentest86
To do this, you need to download a small utility - Mentest86. Her website is memtest.org. We go to the site and there is an opportunity to download the installer. Next, check the performance of your RAM.
The site provides a list of versions. You can download an archive that is installed on a disk or on a bootable . We select, for example, from the list of versions an archive to create a bootable USB flash drive.

Download and extract the program from the archive. We launch the installer and select your media in the window that opens. In this case, the drive under the letter N.

It is proposed to format the drive in Fat32, check the box and click Create. The program performs formatting and exits. The test drive is ready to use.
In BIOS, choose to boot from USB media, on which the program image was recorded, and save the settings. After the PC restarts, the program will automatically start working.
If the computer has more than one memory module, then it is better to test separately. In this case, you can determine exactly which memory module is failing. You can interrupt the scan with the Esc key.
After the test is completed, you can see the total number of errors, as well as how many and which test failed.

The red boxes in the test results indicate critical errors in memory, which leads to reboots or unexpected shutdowns of the PC.
There are also errors that are not critical, but, nevertheless, they exist and also do not contribute to the normal operation of the memory. More detailed information Tests can be found on the official website.
At the end of the work, an inscription will appear that the program has completed the work, no errors were found - no errors. Click exit and exit the program.
I must say that Mentest86 works for quite a long time - several hours, so it's worth running it at a time when the computer is free.
If any errors are found, then you need to make sure that the RAM check in Windows 7 is performed on another computer. To make sure that it is the memory that gives out malfunctions, and not some other PC components.
Damaged memory sticks need to be replaced in order for the computer to work more reliably and stably in the future.


