How to create a partition on ubuntu. Ubuntu partition breakdown
Today we will learn on our own create disk partitions in Linux Ubuntu in the process of installing the distribution on a computer, in other words, manually create hard disk partitions in Ubuntu that are necessary for the normal functioning of the operating system on a home computer, and we’ll also talk a little about which partition is needed for what.
So, as an example, we will use the current one on this moment version Linux Ubuntu 17.04, i.e. let's imagine that you are installing Ubuntu 17.04 ( or any other derivative distribution, such as Kubuntu, Lubuntu, Ubuntu MATE and others) and reached the step where you need to select “ type of instalation", i.e. disk partition type, for example: automatic - this is the first item " Erase disk and install Ubuntu", or " Another variant" - this is exactly the type in which we can mark up the disk ourselves; we will now consider it.
Note! In this article we will look at the initial layout of a blank disk, i.e. on which there are no partitions and data yet.
Creating disk partitions during Linux Ubuntu installation
To create a disk partition yourself during the installation of Linux Ubuntu, you must select the installation type " Another variant" and press " Continue».
If you have several physical disks ( I have one) select the one you need and press “ New partition table».
We are then warned that a new empty partition table will be created, we click " Continue", i.e. confirm your action.

The first thing we must create is the root partition, i.e. basic ( systemic) section for installing the system. For this we indicate:
- Size– for the root partition, a minimum of 15 gigabytes; in the future, of course, it is better to specify more, for example, 50 gigabytes. I have a small disk for testing, so I specify 15 gigabytes;
- New partition type– indicate “ Primary", since this type must be on the disk;
- – indicate “ The beginning of this space»;
- Use as– here we need to select the type of file system, leaving the default file system Ext4 - this is a journaled file system for Linux operating systems, which is currently most suitable for the file system of the root partition ( yes and for user data);
- Mount point– we indicate “/”, since this is our root partition.
Click " OK».

Then, in almost the same way, we create a section for user data, i.e. home section. Creating such a section will allow you to store your data ( documents, music, photos and so on) in a separate place that will not need to be copied in any special way ( reserve) during reinstallation ( updates) distribution or even its change.
In this case, we need to specify:
- Size– maximum possible, i.e. all the remaining space, as I already said, my test disk is small, so there is little space left;
- New partition type– indicate “ Logical»;
- Location of the new section– indicate “ The beginning of this space»;
- Use as– also select the Ext4 file system;
- Mount point– specify “/home”.
Click " OK».

Swap partition (swap) we will not create, since in Ubuntu, starting from version 17.04, a swap file is used instead of a swap partition ( like in Windows). By default, its size is 5% of the free disk space, but not more than 2 gigabytes. After installation, the paging file size can be changed at any time.
This completes the disk layout, which is suitable for a home computer, click “ Install now».

Confirm making changes to the disk, click “ Continue" and continue installing the distribution.

That's all for me, I hope the material was useful to you, bye!
In order to install Mint from scratch, we first need to partition the hard drive, and for this, we need to decide what we have and where we will install it. In principle, we can have two installation options, namely: installation on a computer on which, in addition to the Mint there will be nothing more on the computer that already has any partition or partitions occupied by another operating system (Windows) or simply a section designed to store necessary and important files.
The first option, when all HDD computer will be completely dedicated to Mint,
It shouldn’t cause any particular difficulties during installation. During installation, the installer will ask you whether to use the entire disk or use other options? In this case, you choose to use the entire disk and further along, automatic partitioning. That’s it, nothing special will be required from you and the whole procedure will take place on its own.
The second option is not that complicated, but it will take a few more different body movements. Let's assume that you already have installed Windows and you don’t want to part with her just yet. Or, another option, you have a zero computer and you decide to install and Windows And Mint. In both cases, we will need to carry out certain actions with hard drive. The only thing you need to know if you want to install two systems at once is that Windows you need to install it first, and not vice versa, it will be easier, although the other way around is also possible, only then you will have to do some additional digging so that everything turns out as if you had installed Windows first. Therefore, it is better to immediately choose the correct sequence.
To perform the necessary partitioning and formatting of the disk, use special programs designed for these purposes. Today, there are plenty of such programs to suit every taste, both paid and free. Moreover, I would like to draw your attention to the fact that paid programs do not mean at all that you need to pay for them; I think there is no need to tell you how this is all done, and it does not make sense, because available free analogues, fully coping with the task. One such utility is GParted Live CD (Gnome Partition Editor).
You can download from. website: . You only need to download stable versions (stable). After downloading, write the program to CD-disk and get a boot disk with GParted. By inserting such a disc into the tray CD/DVD drive and rebooting the computer, we are able to produce various actions with our computer hard drive using the utility interface GParted. Except GParted Quite popular in this regard may also be Acronis disk director and, Paragon(Home Expert). If you want to have a full complement of various utilities, including those listed above, then this is best suited Acronis Boot CD Strelec. This is bootable CD- disk on base Windows 7 with a set of various utilities for working with the hard drive and more. All this is natural, commercial products but, there is always a but, you understand what I'm talking about. You can find it from download, for example.
Please note that the names of disks and partitions in Linux-environment, slightly different from the designations in the environment Windows. If in Windows This: C; D; E etc., then in Linux This: sda1; sda2; sda3 etc. You should also know that when installing Mint, You can create the necessary partitions during the installation process using the installer itself.
Now, directly about the breakdown and formatting. When we install Windows then we simply create a partition or select the entire disk on which it will be installed and format it in NTFS. Except NTFS There are still a lot of file systems that we won’t talk about now, just NTFS- This is the latest system today. That's all, as it were. IN Linux But, a little differently, let’s look at it in more detail. Here classic scheme to create the necessary partitions during installation Linux:
1.
swap(swap file)
2.
/ (root)
3.
/boot(boot)
4.
/var
5.
/usr
6.
/tmp
7.
/home
But all this concerns general concepts, and for an ordinary home computer, it is quite enough to use the following scheme:
1.
swap(swap file)
2.
/ (root)
3.
/home
In addition, as many argue, section "swap" on home computer not required. According to my personal observations, constantly monitoring the work of this file, I have never seen that it was somehow involved in the work. This means that this statement is completely justified. However, I do not take any responsibility and therefore, whether to create such a section or not is up to you to choose. In any case, if you create it, it won’t get any worse, that’s for sure.
A few more words about the section / home. It is designed to store various user information, i.e. You. Downloaded movies, photos, some text files, etc., are all stored on this partition. This partition is created for the purpose that if a sudden system failure occurs, then during the subsequent installation of the system or its recovery, this partition with your important personal files will remain untouched and would be easily accessible after reinstallation or recovery. This is quite prudent, but is not the only markup option. Here's an even simpler diagram:
1.
swap(swap file)
2.
/ (root)
But in this case, you need to pay special attention to timely archiving of the system in case of failure and possible recovery. Which option to use is again up to you, but purely for the home, the first option is not relevant. The second option is a classic, the third is not standard, but it does exist, the question is where and when? A specific example of using the third option can be used when, to archive and restore the system, you use third-party utilities, one of which is a free program Clonezilla. A very good program, although it has a very primitive interface, nevertheless, unlike its paid counterparts, such as Paragon Backup and Recovery or Acronis True Image Home etc. works quite correctly with the system Linux.
The peculiarity of this utility is that no matter how many and what partitions you partition your disk into, be it the first, second or third options, it is still all partitions for Linux defines as one. Let's say you have installed Windows (sda1) And Linux according to scheme number one (sda2, sda3, sda4, sda5, sda6, sda7, sda8), a total of eight sections. When working with Clonezilla it will show you only two: Windows (NTFS) sda1 And Linux (ext4) sda2. IN sda2 will include all the partitions that you created for installation Linux except swap because swap no need to archive. Well, here’s a utility, it doesn’t “see” any other way, but on the other hand, it’s convenient, all the partitions are in one form, archived and restored, everything is simple and convenient. Why so many words? The third markup option is just right for the case if you suddenly decide to use Clonezilla how to perform system backup and restore. You can download
Well, in conclusion, let's take and carry out disk partitioning using some example. Let's say we have a brand new computer with 4.0 GB of RAM and 500 GB of hard drive capacity, as well as boot CD/DVD With LinuxMint boot CD/DVD With Windows and bootable from GParted Live CD. We will install Windows And Mint simultaneously. We insert GParted into the tray and restart the computer, after starting the program we begin marking.
Create a section for Windows:
- Size 50 GB (taken from flashlight), system NTFS.
We create sections for Linux according to the second scheme (as an example):
- Chapter swap size 8.0 GB (two computer RAM 4x2=8)
- Partition / (root) 25-30 GB, ext4 system (usually 7-10 GB is enough, but with our 500 GB disk we won’t be greedy).
- Chapter / home(all remaining free place), ext4 system.
So we'll end up with something like:
/dev/sda1 NTFS Windows 50.0 GB
/dev/sda2 swap 8.00 GB
/dev/sda3/ext4 30.0 GB
/dev/sda4 home ext4 412.0 GB
That’s it, after this you can install the systems in the correct order, first Windows Then Linux. If you use the third layout option, then allocate the remaining free space to the / (root) partition. I hope that in general terms, it is possible to understand the whole, although it turned out to be quite voluminous, but I hope that it is not useless.
To install Windows, simply select a disk partition. The system itself will format it and install all the files there. But Linux allows you to customize the location of the system and its files much more flexibly. During installation, you can place different folders with system or user files on different partitions.
This greatly increases the reliability of the system, as well as the ease of use. Our article today is aimed at beginners; we will look at how to partition a disk to install Linux. Let's talk why this is needed, what sizes to choose for partitions, and so on.
A little theory
Let's start with the fact that in Linux there are no disks as we know them in Windows. Everything is much more transparent here. There are disk partitions, and there is also one root file system.
The partition you have chosen for this is connected as the root file system, and other partitions are connected to it in subdirectories. Flash drives, DVDs and other external media are also connected here. For example, the bootloader partition is connected to /boot, kernel virtual file systems are connected as /sys, /proc, /dev, and RAM is connected as /tmp.
But to the user it all looks like a single file system. It seems that all the files are on the root partition, and not scattered across several. Generally speaking, you can install Linux on a single partition without splitting the file system, but this is not recommended; below we will look at why.
Why do this?
Each section has its own task. Partitioning a Linux disk between several partitions isolates them from one another. If one partition, for example, the home partition, runs out of space, the system will still be able to operate normally, because this does not affect the root partition in any way.
Removing the home partition is also very useful during reinstallations. This way you can reinstall the system but keep all your data. Or you can also use one user on multiple systems.
The bootloader is placed on a separate partition if the file system of your root partition is not supported by Grub, for example, if you use Btrfs, xfs, etc. Also, such partitioning of the disk into linux partitions is necessary if you use LVM technology or encryption. In addition, the bootloader will find its files faster if they are on a small partition at the beginning of the disk, and not somewhere in the wilds of a multi-gigabyte file system.
Servers sometimes have /var and /usr partitions. This is again necessary for isolation and security, for example, you can prevent the execution of files from the /var partition using the mount option.
Disk partitioning for Linux
The standard disk layout for Linux uses four partitions:
- / - root, the main partition for the file system;
- /boot- bootloader files;
- /home- section for user files;
- swap- swap partition, for unloading pages from random access memory if it is full.
All that is listed here except swap are mount points in the file system. This means that the specified partitions will be mounted to the corresponding folders in the file system.
Now we will not consider how disk partitioning is performed for linux installations on practice. All this is done in the installer in a couple of clicks. But let’s take a closer look at file systems and their sizes so that you know exactly what values to choose.
/boot partition
Partitioning a Linux hard drive begins with creating this partition. Everything is very simple here. This section contains configuration files and bootloader modules that are read when Grub starts, as well as the kernel and initrd image. These files do not take up much space, about 100 Megabytes, but some distributions may also host Grub themes here, and older versions of kernels will accumulate over time, so it is better to reserve space and allocate 300 Megabytes. This will be quite enough.
As for the file system, we need the fastest and simplest one. The purpose of this section is to provide files as quickly as possible during loading. Journaling is not needed here as it will only slow down loading and files change very rarely. Therefore, our choice is ext2.
Chapter /
This is the main partition of your system. It will contain all system files, and other partitions will be connected to it. This is where we will install all our programs and games.
Considering all this, you need to allocate a sufficient amount of space. The minimum requirement for all files from the installation disk to fit is 8 Gigabytes. But when you install all the programs you need, the system will begin to take up about 20 Gigabytes (this is without games). With each update, the system size will further increase by 200-500 megabytes. Now add games here. If you take 50 Gigabytes as root, you won’t go wrong.
The file system must be stable, because otherwise you risk losing the entire system if the computer fails to shut down. And that's why we need a journaling file system. You can use ext4, resierfs or btrfs. Now the latter has become noticeably more stable. But it is strictly not recommended to take something like XFS because it is very sensitive to failures.
But you can't use ntfs or fat. The fact is that the kernel uses some features of file systems to work correctly, for example, hard links to configuration files or the inotify system to notify about changes in the file system. But these file systems do not support such functions.
swap section
This is the swap partition where unused memory pages will be sent if it is full. Also, all the contents of memory are recorded here when the computer goes into sleep or hibernation mode. Of course, the swap partition can be placed as a file on the disk, just like in WIndows, but this will work faster. The size is calculated very simply, it should be equal to the amount of RAM. The file system is special - swap.
Home partition - /home
This is the section for your files. Your downloads, documents, videos, music, as well as program settings will be here. There can't be enough space here, so we take everything that's left. The file system, just like the root, needs to be stable and fast. You can take the same ext4 or btrfs, or even xfs, if you are sure that there should be no unexpected failures and power outages. Disk partitioning for Linux for this partition is done last.
Dynamically resizing partitions
It often happens that the disk partitioning for installing Linux has already been done, the system is installed and working normally, and after a while we realize that there is not enough space allocated for a particular partition. In such cases, we are faced with a long repartition or even complete deletion of partitions, if you did not immediately foresee such an option.
Firstly, you can create a backup partition, after the one that may require a lot of space in the future, leaving 10 GB in reserve so that there are no problems later is not such a bad idea.
Secondly, it can be used. This is a virtual layer for working with disks in Linux, allowing you to dynamically resize partitions regardless of the free space before and after them.
conclusions
Now you know how to partition a Linux disk and can handle this task. Correct breakdown will save you a lot of time later. If you have any questions, ask in the comments!
Volume Manager (LVM2) - a layer between file system and iron. It allows you to resize partitions, create and delete partitions. I'm skeptical about it and only use static disk partitioning. In defense of my point of view, I can give several arguments against using LVM:
- I don't feel the need to change partition sizes every day.
- The extra layer affects the speed of disk access.
- Static markup is enough for me.
The latest versions of Solaris (and now Linux and BSD) allow you to install the system on partitions with ZFS. With ZFS you can resize partitions and take snapshots.
Why might it be necessary to divide the disk into partitions?
- To protect your data.
- Use different file systems.
- Be able to unmount the partition.
- Use various parameters mounts for different partitions (ro, nodev, nosuid, noexec)
- Place them on different hard drives.
/ - Root
This section must be present.
If there are no other partitions, all system and user files will be stored on it. This must be taken into account when determining its size. Typically, the distribution manufacturer gives recommendations on the minimum size of the root partition.
Swap
A paging file or swap is needed to accommodate memory pages that are not currently in use. Swap can be made either as a separate partition or placed in a file on any partition (a file for swap can be created using the utility dd). The first option is, of course, preferable.
If you don't use sleep mode, don't run heavy applications, and have a lot of RAM, you can reduce the swap size or disable it altogether.
Boot
This partition is placed at the beginning of the disk. Moreover, it can not be mounted at all when loading or mounted with the option ro.
The kernel size is ~1.5-2M, so 15-20M for this partition will be enough.
It is recommended to use ext2 as the file system.
Home
Section with user home directories /home can be selected for security reasons (mount it with the noexec, nosuid, nodev options) or to increase system reliability.
You can also use one section /home for multiple operating systems on one machine.
The size of this partition is determined according to the needs of the users.
Var
On servers (mail, web, caching proxies) this section may become clogged big amount small files. In this case, it is quite reasonable to format it in raiserfs.
And, for example, on a machine with gentoo, when compiling OpenOffice, up to five gigabytes of free space in /var/tmp is required.
The size of this partition will depend on the task the system is performing.
Opt
When using third-party software that requires a lot of disk space, you can move /opt to a separate partition and install this software on it. This also increases the reliability of the system (breakage of this software will not affect the main system in any way).
Usr
User files, documentation, various icons and other junk are stored here. There are those who like to separate this section as well.
Tmpfs
Information in the /tmp /var/tmp /var/lock partitions does not have to be stored on disk.
These sections contain temporary files. When mounting them in tmpfs, all contents will be placed in memory or in swap. Additionally, you can specify mount options for these partitions: noexec, nodev, nosuid, which will increase system security.
Other sections
You can create a partition with information not related to the main system or mount a partition from another hard drive. Example: /mnt/pron or /mnt/anime.
Fstab
Information about file systems, mount points and options is contained in the file /etc/fstab, or /etc/vfstab in Solaris.
More information about mounting options can be found in the help. man mount
about the file format - man fstab.
Utilities
Disk partitioning is usually done when installing the system using the installer program.
If during installation you left unmarked space or there was a need to change the markup, you can use the following utilities:
- fdisk
- cfdisk
- format - in Solaris
- parted
Conclusion
Several ways to partition a disk:
For desktop:
swap 2 x ram_size / 10G /home - all remaining space /boot 20M (noauto,noatime) swap 2 x ram_size / 10G /home optional (noatime,noexec,nodev) /tmp, /var/tmp, /var/lock - to tmpfs (noexec,nodev)For the server:
/ 10G swap 2 x ram_size /var 10G
Before installing the operating system, you must markup hard drive, during which the disk is divided into partitions and formatted. Installers of modern operating systems can perform this operation automatically, but they usually do this not in the most optimal way. In certain cases, it makes sense to carry out this operation manually using special programs. The need for manual disk partitioning arises if:
- It is planned to install several operating systems on the computer, for example, Windows and Linux;
- operating system or file system has limitations on maximum size volumes, so a large disk must be divided into several small logical drives.
There are also some benefits that can be achieved by using proper disk partitioning. When performing a backup, you can archive not the entire disk, but only part of it, with important data. For example, you can create separate archives for the user and system sections. At the same time, in the event of a system crash, user data may remain intact. And the time required for archiving and recovery will be reduced. You can also use different file systems and different size cluster. For example, a small cluster size will significantly save space on a partition where many small files are stored.
File systems
File system defines the way information is organized and stored on disks. IN journaled The file system, in the so-called “log”, records file changes that are planned to be made, so in the event of failures, the likelihood of data loss is significantly reduced.
Ext- the first file system in Linux. Currently practically not used.
Ext2- non-journaling file system. Can be used for data that rarely changes. For example, for boot sectors of disks, for working with SSDs and flash cards that have a limited resource of write cycles. It is characterized by high speed, but the read speed is lower than that of the more modern journaled system - ext4.
Ext3- is a journaled version of ext2. Widely used before the advent of ext4.
Ext4- developed based on ext3, has more high performance, allows you to work with very large disks and files. This is the most popular file system for Linux today and is used for system files and user data.
ReiserFS- the first journaling file system for Linux. It can pack files into one block, which improves performance and saves disk space when working with small files. Reiser4 is the fourth version of ReiserFS, which improves performance and reliability of data processing. Added the ability to use plugins that can, for example, compress or encrypt data on the fly. Recommended for working with small files.
XFS- a journaled system with high performance can be recommended for working with large files.
JFS is another journaling file system developed by IBM. The developers sought to achieve high reliability, performance and scalability for running on multiprocessor computers.
Tmpfs- designed to place temporary files in the computer's RAM. This is especially relevant when working with an SSD and having free RAM.
FAT And NTFS- MS-DOS and Windows file systems, which are also supported by Linux. A Linux user can have access to FAT and NTFS partitions. Used for installing appropriate systems, for transferring and sharing data.
Swap- can be either a separate disk partition or a regular file. Used exclusively to create virtual memory. Virtual memory is necessary in case of insufficient main memory (RAM), however, the speed of operation when using such memory is significantly reduced. Swap is necessary for computers with a small amount of memory; in this case, it is recommended to create a swap partition or file 2-4 times larger than the computer's RAM. Swap is also necessary to go into sleep mode; in this case, you need to allocate a memory amount equal to the computer's RAM or a little more. If the computer has sufficient memory and does not require sleep mode, then swap can be disabled altogether. A modern personal computer usually needs 4 GB of RAM. But when processing large amounts of data, servers with many users may require significantly larger amounts of memory.
Disk structure in Linux
The disk can be divided into four physical partitions. One of these sections may be extended. An extended partition can be divided into an unlimited number of logical partitions. Disks in Linux are designated by the letters sd?, where instead of a question mark, letters of the Latin alphabet are used, starting with “a”. That is, the first disk in the system is called sda, the second - sdb, the third - sdc, etc. On older computers with IDE disks, the names may be used: hda, hdb, hdc, etc. In turn, disk partitions are indicated by numbers: sda1, sdb5, sdc7. The first four digits are reserved for physical partitions: sda1, sda2, sda3, sda4. Even if the disk has fewer than four physical partitions, the first logical partition will be called sda5.
Directory structure
Here we will consider only those directories that make sense to be placed on a separate section.
/ - the root of the disk. Created anyway. Recommended file systems: ext4, JFS, ReiserFS.
/boot- serves to boot the system. The recommended file system is ext2.
/home- contains user files. Recommended file systems: ext4, ReiserFS, XFS (for large files).
/tmp- used to store temporary files. Recommended file systems: ReiserFS, ext4, tmpfs.
/var- often used for storage modified files. Recommended file system: ReiserFS, ext4.
/usr- contains files of programs and libraries installed by the user. The recommended file system is ext4.
Disk partitioning using fdisk
Fdisk is a utility for partitioning hard drives with a text interface. All devices in Linux are located in the /dev directory. You can view a list of disks using the command:
ls /dev | grep sd
If the sda disk is already partitioned, then information about the partitions can be found using the command:
sudo fdisk -l /dev/sda
You can also get information about partitions using the command:
Let's say we want to get the following disk structure:
1 (sda1) partition for Windows with a capacity of 100 GB.
2 (sda5) partition for booting Linux - /boot 100 MB
3 (sda6) swap partition - 4 GB.
4 (sda7) root partition - / 20 GB.
5 (sda8) partition /home - the entire remaining disk.
Launch fdisk:
sudo fdisk /dev/sda
If you need to partition the second or third disk, instead of sda we write sdb or sdc.
After starting the program, press “m” to view the list of commands.
We look at the partition table by pressing “p”.
If the disk is not empty, delete old partitions with the “d” command, after which we indicate the partition number. If there are several partitions, you will have to run the command several times.
Create a new physical Windows partition by pressing the “n” key and then “p”. Next, indicate the section number - “1”. The first sector is the default - press “Enter”. And at the end, enter the disk size “+100G”.
In the terminal it will look like this:
Command (m for reference): n
e extended
Select (default p): p
Section number (1-4, default 1): 1
First sector (2048-976773167, default 2048):
Default value 2048 is used
Last sector, +sectors or +size(K,M,G) (2048-976773167, default 976773167): +100G
Command (m for reference): n
e extended
Select (default p): e
Section number (1-4, default 2): 2
First sector (209717248-976773167, default 209717248):
Uses default value 209717248 Last sector, +sectors or +size(K,M,G) (209717248-976773167, default 976773167):
The default value is used 976773167
The next partition is swap, with a capacity of 4 Gigabytes. Sequentially “n”, “l”, “Enter” and at the end we enter +4G.
In the same way, create a root partition of 20 Gigabytes by pressing “n”, “l”, “Enter” and +20G.
And the /home partition, which will take up all the remaining disk space: “n”, “l”, “Enter”, “Enter”.
After which, pressing “p”, we will see something like the following:
/dev/sda1 2048 209717247 104857600 83 Linux
/dev/sda6 209926144 218314751 4194304 83 Linux
Since we plan to install Windows on the sda1 partition, we will change the file system type. Press “l” and see that NTFS corresponds to id=7. To change the type, press “t”, then the section number “1” and the code “7”, in the terminal it will look like this:
Command (m for reference): t
Section number (1-8): 1
Hexadecimal code (enter L for a list of codes): 7
System partition type 1 changed to 7 (HPFS/NTFS/exFAT)
In the same way, change the id of the paging file for the sda6 partition: press “l”, “6” and enter code 82.
Let's see what happened with the "p" command:
Device Load Start End Blocks Id System
/dev/sda1 2048 209717247 104857600 7 HPFS/NTFS/exFAT
/dev/sda2 209717248 976773167 383527960 5 Extended
/dev/sda5 209719296 209924095 102400 83 Linux
/dev/sda6 209926144 218314751 4194304 82 Linux swap / Solaris
/dev/sda7 218316800 260259839 20971520 83 Linux
/dev/sda8 260261888 976773167 358255640 83 Linux
If everything is in order, then to write partitions to the disk, press “w”. Until we enter the “w” command, only preliminary operations are performed and no data is written to the disk. After recording the partitions, we reboot and install the systems.
Disk partitioning using GParted
GParted or GNOME Partition Editor is a program for editing disk partitions with a graphical interface. It is essentially a wrapper around the GNU Parted text utility. GParted has a simple and intuitive interface. It allows you not only to create and delete partitions, but also to resize, copy and move them. The program supports working with many popular file systems.
Attention: subsequent actions may lead to complete loss of information from computer disks. Before using GParted, be sure to make copies important information. It is also advisable to charge the laptop battery using a UPS. Some operations may take a long time and data may be lost if the power is turned off.
We launch the program with the command:
You need to run it as a privileged user; to do this, first run the command su, or sudo:
sudo gparted
If the command does not work, then you need to install this program, although many distributions include it by default.
If the disk is already partitioned, we will see something like this:
Rice. 1. GParted program
There is a text menu at the top. Below are buttons to perform basic actions. On the right side of the icons is the disk selection window. The partitions of the selected disk are shown below in the form of rectangles. Even lower, the same disk partitions are in table form, with more . If you right-click on any of the sections, a menu will appear with a list of operations that can be performed with the selected section. You can also select a disk partition with the left mouse button, and then select an operation in the top text menu or by clicking on the icon.
If the disk is unpartitioned, you can immediately begin creating partitions. IN otherwise We delete unnecessary partitions - right-click (RMB) on the partition name and select “Delete” from the menu.
If the partition is used by the system (mounted), then before performing operations you need to unmount it - right-click on the partition and select “Unmount” from the menu.
If the disk has the partitions you want, you can resize them to make room for new partitions. Let's say there is a Windows partition that occupies the entire disk. You must leave Windows and install Linux. To do this, right-click on the Windows partition and select “Resize/Move” from the menu. Then indicate the new size Windows partition, or free space before or after the section. After that, click the “Resize or Move” button.

Rice. 2. Resizing the partition
Naturally, for this operation the Windows partition must have sufficient free space. After resizing the partition, there will be unallocated space that can be used to create Linux partitions.
To create a new partition, you need to right-click on the unallocated space and select “New” from the menu. Next, in the “New size” field, indicate the size of the partition. We indicate the partition type (primary, extended, logical) and file system, as well as the disk label, for example “home”.

Rice. 3. Create a new partition
We create all the necessary partitions (see above for the description of working with fdisk).
At the very end, to perform all selected operations, you need to select “Perform all operations” in the top “Edit” menu, or click the corresponding button in the form of a green checkmark on the toolbar. You just have to wait a while while the program partitions the disk.
fdisk - common name system utilities to manage hard disk partitions. Widespread and available in almost any operating system, but they work differently. Use text interface user.
Warning: Don't create, delete or modify partitions unless you know what you're doing!
FDISK utility in Unix/Linux
With FDISK utility you can view, create, resize, delete, copy and move partitions on your hard drive. And I will give clear examples of use.
Viewing partitions in Unix/Linux
Let's start with the easiest thing - viewing sections. Use the "-l" option with the FDISK command to view available partitions in Linux (in Unix systems— this option may not work. Tested on Mac OS X). All available partitions in Linux are displayed by the name of their device. For example: /dev/sda, /dev/sdb or /dev/sdc.
So, let's run the command:
The conclusion we get is the following:
You can find out some useful information for a specific block device. For example, the following command will display all partitions for /dev/sda:

If you have different device names, simply write the device name as /dev/sdb or /dev/sdc and so on.
Displaying available commands via FDISK
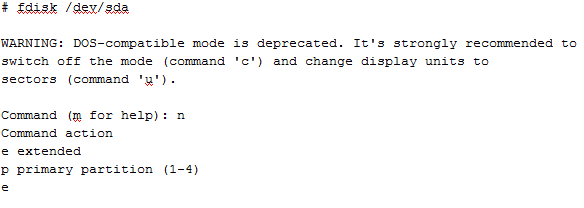
If you would like to see all the commands that are available for FDISK, then simply use the following command by mentioning the name of the hard drive, for example /dev/sda, as shown below:
output all available commands for FDISK for example for /dev/sda
Type 'm' to see a list of all available FDISK commands that will help with the /dev/sda hard drive. After entering 'm' on the screen, you will see all the available options for FDISK that you can use for the /dev/sda device ( this device taken as an example):

WARNING: DOS-compatible mode is not recommended. Highly recommended
turn off the mode (command 'c') and change units for the sector (command 'u').
Valid options when working with fdisk
- a:- This option is used to toggle the boot flag.
- b:- This option is used to edit the BSD disk label.
- c:- This option is used to toggle the dos compatibility flag.
- d:- This option is used to delete a partition.
- g:- This option creates a new, empty GPT partition table.
- G:- This option is used to create an IRIX partition table (SGI).
- l:- This option is used to display known partition types (Linux swap, Linux, GPT, Solaris, and so on).
- m:- This option is used to display available commands (menus).
- n:- This option is used to add a new section.
- o:- This option is used to create a new empty DOS partition table.
- p:- This option is used to display partition tables.
- q:- This option is used to exit the menu but without saving any changes.
- s: - This option creates a new and empty Sun disk label.
- t:- This option is used to change the type of “System ID” of the partition (you can take it from the output of the “l” option).
- u:- This option is used to change display/input blocks.
- v:- This option is used to check partition tables.
- w:- This option is used to record everything changed and then exit.
- x:- This option is used to call additional functionality (for experts only).
Displaying all partitions (sections) in Unix/Linux
To list your block device's partition table, use:
# fdisk /dev/sda
After which, you find yourself in a menu (you can perform various operations with partitions in it), we are only interested in viewing, so we enter the “p” option:

Create a partition table (disklabel) in Unix/Linux
If you have an empty block device and you want to make markup on it for installing a future OS, then first you should select the future markup.
Here are the main tables for marking:
- MBR (msdos)
To create your block device's partition table, use:
# fdisk /dev/sda
This action selected the block device /dev/sda and to create a new partition table on it, use one of the options:
- g - To create a new, empty GPT partition table.
- o - To create a new, empty DOS partition table.
And let's move on to creating sections.
Create a new partition in Unix/Linux
And so, let’s say you have free space on one of the devices (for me it’s /dev/sda) and you need to create a new partition (for example, to install the OS). Then you should run the utility as follows (Type the following command to enter the control mode of a specific block device):
# fdisk /dev/sda
After entering command mode, press "n" to create a new partition in /dev/sda with a specific size.
After pressing "n", you are asked to select the type of the future partition:
- p — For " primary", i.e. create a primary partition.
- e - For “extended”, i.e. create an extended partition.
I would like to note the following that up to 4 “primary” partitions can be created, and all the rest will be “extended” (i.e. extended partitions). Since for me this is only the 1st section, I select the “p” option. As I said earlier, this is my first, primary partition and for it, I must indicate the number (partition number), logically indicate 1 (But you can choose 1-4, because there are only 4). To create a full-fledged partition, you need to specify a sector (the beginning of the cylinder position for the partition being created), they tell me what it will be - 2048 (selected the standard value), and also, you need to indicate where this sector will end (the end of the cylinder position for the partition being created) - I am offered to indicate the standard value, but it does not suit me, because it will create 1 partition of maximum length (at For me it's 21 GB - test machine). At this stage, you can indicate the end of the sector in kilobytes (K), megabytes (M), gigabytes (G). Suppose I want to create the first 5GB partition, then I should enter “+5G” (or “+5000M” and so on).
You can also create several sections. The actions will be the same.
Please keep in mind that after creating a new partition, you must run the 'w' command for all actions to be saved. Well, after that, restart the OS to make sure that the partition has been created.
Formatting partitions in Unix/Linux
After the partitions have been created, formatting must be done. But before we get to this action, you need to decide on the file system (FS).
I will use the mkfs utility to format the partition. This utility supports the following FS:
- ext2: # mkfs.ext2 /dev/sda1
- ext3: # mkfs.ext3 /dev/sda4
- ext4: # mkfs.ext4 /dev/sda4
- fat: # mkfs.fat /dev/sda4
- minix: # mkfs.minix /dev/sda4
- msdos: # mkfs.msdos /dev/sda4
- vfat: # mkfs.vfat /dev/sda4
- xfs: # mkfs.xfs /dev/sda4
We select the type of FS and proceed to pharmaceutical preparation.
Check partition size in Unix/Linux
After formatting a new partition, you can check the size of the partition using the “s” flag and the FDISK command. So you can check the size of any specific device. For example:
# fdisk -s /dev/sda3 5285413
The size is displayed in blocks.
To output in gigabytes (GB), use:
# echo "`fdisk -s /dev/sda2`/(2^20)" | bc # echo "`fdisk -s /dev/sda1`/(2^20)" | bc # echo "`fdisk -s /dev/sda`/(2^20)" | bc
Looks usable.
Enable/Disable loading flag (*) from partition in Unix/Linux
When marking, I usually allocate 100MB for the partition in which the bootloader will be stored. And for this purpose, it is necessary to indicate that it will be downloaded from it. And therefore, you need to indicate the desired section. Let's start:
# fdisk /dev/sda
The first step is to view the available partitions to see the current partition table. As you remember, this is the “p” option. In my screenshot below, you can see that boot partition on the /dev/sda1 drive (you can see that this is the boot flag - the asterisk '*'), as shown below:

Then enter the 'a' option to disable the boot flag. We are asked to select the partition number where the download will be removed (I choose ‘1’ i.e. /dev/sda1). This will disable the boot flag on the /dev/sda1 partition:

To enable the boot flag, use the “a” option. After clicking, you will need to enter the number of the partition that will be loaded (for example, 1st) and put everything back in place.
Delete a partition in Unix/Linux
If you would like to remove a specific partition (i.e. /dev/sda4) from a specific block device (i.e. - /dev/sda). You must do:
# fdisk /dev/sda
Then, enter 'd' to enter the delete partition menu. After entering, they ask you to enter the number of the section that I want to delete. Suppose I need to delete the 4th partition, then I enter “4”. That's it, the section has been deleted. Enter 'w' to record all changes! New changes will only work after the next system reboot. This can be easily understood from the below output.

Warning: Be careful when performing this step because using the 'd' option will completely remove the partition from the system and you may lose all data on the partition!
Using fdisk in bash scripts
If you know the commands well, you can write a small bash script or simply use this construction in the shell shell, which would emulate the user’s work:
Fdisk /dev/hda<< EOF n p 1 a 1 t c w EOF
I will not explain what these letters do, because I described all the options above.
The topic is "How to use FDISK command on Linux", I tried my best to cover almost all the basic commands of fdisk, but still FDISK contains many other commands you can use them by typing "x". For more details, enter the command 'man Fdisk' in a terminal.
For Windows installations Simply select a disk partition. The system itself will format it and install all the files there. But Linux allows you to customize the location of the system and its files much more flexibly. During installation, you can place different folders with system or user files on different partitions.
This is a very interesting feature that increases the reliability of the system, as well as the ease of use. Our article today is aimed at beginners; we will look at how to partition a disk to install Linux. Let's talk why this is needed, what sizes to choose for partitions, and so on.
Let's start with the fact that in Linux there are no disks as we know them in Windows. Everything is much more transparent here. There are disk partitions, and there is also one root file system.
The partition you have chosen for this is connected as the root file system, and other partitions are connected to it in subdirectories. Flash drives are also connected here, DVDs and other external media. For example, the bootloader partition is connected to /boot, kernel virtual file systems are connected as /sys, /proc, /dev, and RAM is connected as /tmp.
But to the user it all looks like a single file system. It seems that all the files are on the root partition, and not scattered across several. Generally speaking, you can install Linux on a single partition without splitting the file system, but this is not recommended; below we will look at why.
Why do this?
Each section has its own task. Partitioning a Linux disk between several partitions isolates them from one another. If one partition, for example, the home partition, runs out of space, the system will still be able to operate normally, because this does not affect the root partition in any way.
Removing the home partition is also very useful during reinstallations. This way you can reinstall the system but keep all your data. Or you can also use one user on multiple systems.
The bootloader is placed on a separate partition if the file system of your root partition is not supported by Grub, for example, if you use Btrfs, xfs, etc. Also, such partitioning of the disk into linux partitions is necessary if you use LVM technology or encryption. In addition, the bootloader will find its files faster if they are on a small partition at the beginning of the disk, and not somewhere in the wilds of a multi-gigabyte file system.
Servers sometimes have /var and /usr partitions. This is again necessary for isolation and security, for example, you can prevent the execution of files from the /var partition using the mount option.
Disk partitioning for Linux
The standard disk layout for Linux uses four partitions:
- / - root, the main partition for the file system;
- /boot- bootloader files;
- /home- section for user files;
- swap- swap section, for unloading pages from RAM if it is full.
All that is listed here except swap are mount points in the file system. This means that the specified partitions will be mounted to the corresponding folders in the file system.
Now we will not consider how disk partitioning for installing Linux is done in practice. All this is done in the installer in a couple of clicks. But let’s take a closer look at file systems and their sizes so that you know exactly what values to choose.
/boot partition
Partitioning a Linux hard drive begins with creating this partition. Everything is very simple here. This section contains configuration files and bootloader modules that are read when Grub starts, as well as the kernel and initrd image. These files do not take up much space, about 100 Megabytes, but some distributions may also host Grub themes here, and older versions of kernels will accumulate over time, so it is better to reserve space and allocate 300 Megabytes. This will be quite enough.
As for the file system, we need the fastest and simplest one. The purpose of this section is to provide files as quickly as possible during loading. Journaling is not needed here as it will only slow down loading and files change very rarely. Therefore, our choice is ext2.
Chapter /
This is the main partition of your system. It will contain all system files, and other partitions will be connected to it. This is where we will install all our programs and games.
Considering all this, you need to allocate a sufficient amount of space. Minimum Requirements so that all files from installation disk- 8 Gigabytes. But when you install all the programs you need, the system will begin to take up about 20 Gigabytes (this is without games). With each update, the system size will further increase by 200-500 megabytes. Now add games here. If you take 50 Gigabytes as root, you won’t go wrong.
The file system must be stable, because otherwise you risk losing the entire system if the computer fails to shut down. And that's why we need a journaling file system. You can use ext4, resierfs or btrfs. Now the latter has become noticeably more stable. But it is strictly not recommended to take something like XFS because it is very sensitive to failures.
But you can't use ntfs or fat. The fact is that the kernel uses some features of file systems for proper operation, for example, hard links to configuration files or the inotify system to notify about changes to the file system. But these file systems do not support such functions.
swap section
This is the swap partition where unused memory pages will be sent if it is full. Also, all the contents of memory are recorded here when the computer goes into sleep or hibernation mode. Of course, the swap partition can be placed as a file on the disk, just like in WIndows, but this will work faster. The size is calculated very simply, it should be equal to the amount of RAM. The file system is special - swap.
Home partition - /home
This is the section for your files. Your downloads, documents, videos, music, as well as program settings will be here. There can't be enough space here, so we take everything that's left. The file system, just like the root, needs to be stable and fast. You can take the same ext4 or btrfs, or even xfs, if you are sure that there should be no unexpected failures and power outages. Disk partitioning for Linux for this partition is done last.
Dynamically resizing partitions
It often happens that the disk partitioning for installing Linux has already been done, the system is installed and working normally, and after a while we realize that there is not enough space allocated for a particular partition. In such cases, we are faced with a long re-partitioning or even complete removal sections, if you did not immediately foresee this option.
Firstly, you can create a backup partition, after the one that may require a lot of space in the future, leaving 10 GB in reserve so that there are no problems later is not such a bad idea.
Secondly, you can use . This is a virtual layer for working with disks in Linux, allowing you to dynamically resize partitions regardless of the free space before and after them.
conclusions
Now you know how to partition a Linux disk and can handle this task. Correct breakdown will save you a lot of time later. If you have any questions, ask in the comments!
In this short article I will show you with a practical example how to work with disks in Linux.
Disk activation in Linux
Suppose you connected a new disk that does not yet have a file system. The system does not see it and we need to run commands to connect it.
I’ll say right away that all the actions described here can be performed in commands with graphical interface. I will mark and format disks on the command line - this is a more universal method, as it allows you to configure disks and partitions even in operating systems that do not have a graphical environment.
When connecting a new drive we need:
- divide it into sections
- format each partition to create a file system
- mount the disk to be able to write and read data
- configure automatic mounting when you turn on the computer
How to find out disk names, how to view all disks in the system
We need to start by finding out the name of the disk that we will change. Linux has a completely different drive naming system from Windows. Instead of the usual drives C, D, E and so on, in Linux drives are devices in a folder /dev/. In dev, in general, all possible devices, even very exotic ones that do not exist in Windows.
To view available drives, run the command:
Sudo fdisk -l
As can be seen from the screenshot, there is a disk /dev/nvme0n1. Then two devices are listed /dev/nvme0n1p1 And /dev/nvme0n1p2. By matching part of the name nvme0n1 you can understand that these are the partitions into which the disk is divided /dev/nvme0n1.
There is also a disk /dev/sda, which is not divided into any sections - this is what I will connect.
Disk partitioning (partitioning) in Linux
In the console, the disk can be partitioned with the command cfdisk. After it, specify the name of the disk with which you want to perform actions:
Sudo cfdisk /dev/sda

The disk may be GPT or MBR(shown as dos). You can easily find a lot of information about these partition tables on the Internet. I’ll just note that GPT is more modern and has more features. Therefore, if you don’t need to work with old hardware that only understands MBR, then choose GPT.
To create a disc, select New:

Enter its size.
If necessary, change the partition type:

Then move down to the free space and repeat these steps to create partitions. When you're done, select Record.
Formatting Partitions
To format in ext4:
Sudo mkfs.ext4 /dev/partitionname
To format in ext3:
Sudo mkfs.ext3 /dev/partition_name
To format in ext2:
Sudo mkfs.ext2 /dev/partitionname
To format in FAT32:
Sudo mkfs.fat -F32 /dev/partitionname
My example (I did not partition the disk):
Sudo mkfs.ext4 /dev/sda

By the way, if you want to format a partition that you are already using, you must first unmount it (more on this later).
Mounting and unmounting disks
With disks in /dev/ You cannot work directly, that is, you cannot write files to them or copy files from them. To work with them they need to be mounted. This is done by the team mount.
The disk is connected to the mount point and in this folder you can work with the contents of the disk.
This concept may seem foreign to Windows users, but it's very convenient! The disk can be mounted in any folder. For example, the home folder can be on another drive - convenient when reinstalling the system - the data does not need to be copied to a safe place, since it is already on another drive.
To mount, use the following command:
Sudo mount /dev/partition_name /mount/mount point/
Let's say I want a new disk to be mounted (mounted) to a folder /mnt/disk_d. You can choose any name and the mount point does not have to be in the directory /mnt/– can be done in your home folder or in any other folder.
We start by creating the directory in which the disk will be mounted:
Sudo mkdir /mnt/disk_d
We mount:
Sudo mount /dev/sda /mnt/disk_d
We allow everyone access to this disk so that an ordinary user can also view and write files there:
Sudo chmod 0777 /mnt/disk_d
In fact, access rights can be configured more finely - without giving full permission to everyone.
To unmount a disk, use any of two commands:
Sudo umount /dev/partitionname
Sudo umount /mountpoint/
Automatically mount disk when Linux boots
Disks to be mounted when Linux starts are registered in the file /etc/fstab.
Let's say I want to mount the disk at boot /dev/sda to the directory /mnt/disk_d/. At the same time, I want the disk to be readable and writable by the user. Then I create a directory - a mount point:
Sudo mkdir /mnt/disk_d
I open the file /etc/fstab:
Sudo gedit /etc/fstab
and add the following line there:
/dev/sda /mnt/disk_d ext4 rw,relatime 0 0
In this line you need to replace
- /dev/sda- to the disk you want to mount
- mial- in your username
- /mnt/disk_d- to your mount point that you chose for your disk.
- ext4- to the file system of your disk
If you are not sure about the file system or its designation, then run the command:
Lsblk -f
As a result, the disk will be automatically mounted every time the system starts.
To allow your user to access this folder without having to escalate their privileges, run the command:
Sudo chown -R $USER /mnt/disk_d
You can fine-tune access rights - for example, by creating a group in which only members will have access to the disk.
Please note that if you did something wrong in the file /etc/fsta, then the system will not be able to boot into the graphical interface and you will have to fix everything from the console. Link to additional instructions at the end of this article.
Connecting removable media (flash drive, external drive) in Linux
By the way, many Linux distributions automatically mount them when you connect a USB flash drive or external drive. Automounting is usually a feature of the desktop environment. That is, on the same Linux distribution, but with different desktops (Linux Mint versions as an example), automounting may or may not be present.
If this does not happen, then you need to mount it manually. This process is no different from normal disk mounting: also create a mount point and use the command mount.
Removable media can be mounted via /etc/fstab, there is even a special option for this nofail— ignore errors if the disk is missing.
How to view all drives and mount points
To do this, use the command we are already familiar with:
How to delete disk partitions
If you want to delete the entire contents of a disk, including its partitioning, then this is done like this:
Open the drive in gdisk:
Gdisk /dev/disk
To switch to expert mode, enter
Then to remove GPT enter
Agree twice to completely clear the drive.
Remounting a drive with write permissions
Sometimes disks are mounted with read-only permissions. In this case, you can copy files from the disk, but you cannot write or delete anything to it. You can remount the disk for writing with one command:
Sudo mount -rw -o remount /dev/sdb1
In it /dev/sdb1 replace with the name of your section.
If you encounter an error:
Mount: /run/media/mial/New volume: /dev/sdb1 is write-protected but explicit read-write mode requested.
Then you need to run the command (replace /dev/sdb1 to your section):
Sudo hdparm -r0 /dev/sdb1
Example output:
/dev/sdb1: setting readonly to 0 (off) readonly = 0 (off)
After that, remount the disk.
note that if you mount a disk with the NTFS file system, then you must have the package installed ntfs-3g, otherwise, no matter what you do, the disk will be read-only.
Conclusion
If you still have questions, ask them in the comments.
A few more tips and problem cases are discussed in the article “Working with disks in BlackArch (mounting, solving problems)” - this article is suitable for all distributions, not just BlackArch.
When reinstalling a system, installing a new distribution, or simply reorganizing file systems, we often deal with hard drives. Often you need to add, remove or resize partitions, manage partition flags or convert file systems. To do this, Linux has quite a variety of tools, both GUI and console-based. I think it won’t be difficult for you to understand the Gparted graphical interface, but in some cases you may need to split your hard drive into Linux partitions in the terminal, without access to the X server, and this can become a serious problem.
In this article, we will look at how to perform the basic operations that we are used to doing in Gparted, such as partitioning a disk in Linux, deleting and creating a Linux partition, in the terminal using the parted utility. First, let's look at the parted command itself.
The parted syntax looks like this:
$ parted [options] device [command]
Optional arguments are indicated in square brackets.
options indicate how the program will work, for example, interactive or script mode, or you just need to display help
device- the hard drive with which the program will work.
team- an action to be performed on the hard drive.
Parted options and commands
parted has only a few options and a huge number of commands.
Here are the options:
- -h- display information about the program
- -v- display the program version
- -s- script mode, the program works without asking the user
- -i- interactive mode, the user enters commands interactively. By default, the program operates in this mode.
There are not very many commands, but even remembering them all is not at all necessary. Let's consider only those that will be useful to us in today's examples:
- help command- help with the selected command
- mkpart partition type file system start end- creating a linux partition with a file system starting from the position beginning and ending with the end, the last two parameters are set in megabytes by default
- mktable type- create a partition table
- print- display the partition table
- quit- go out
- resize section end- change partition size
- rm section- delete section
- select section- set the partition as current
- set section flag state- set a flag for the section. The state can be on (enabled) or off (disabled)
Previously, options for working with the file system mkfs, check, mkpartfs were also supported, but starting from version 2.4 they were removed.
I understand that now disk layout in Linux is incomprehensible and vague for you, but with examples it will become much clearer. Let's not talk about theory anymore, let's move on to examples.
Disk partitioning in Linux
Everything you learn requires practice, and working with Linux hard drives is no exception. But practicing on a real disk, at the risk of damaging the file system, is not entirely correct, and creating a virtual machine for such purposes is too impractical. But there is a solution. In Linux, everything is a file, including the hard drive, which is also represented as a file. This raises an interesting possibility. We can use a regular file instead of a hard drive for our experiments.
Let's create a test site for ourselves with the command:
dd if=/dev/zero of=/disk.iso count=2000M
Thus, we will get a file of 2000 megabytes in size, filled with zeros, with which we can safely work.
Let's launch parted, passing it our file instead of the device so that the Linux hard drive can be partitioned:
parted/disk.iso
The program will start in interactive mode and you will be able to execute the necessary commands:
GNU Parted 3.1
Using /disk.iso
Welcome to GNU Parted! Type "help" to view a list of commands.
(parted)
First, let's try to view the list of partitions on the device:
Disk /home/sergiy/disk.iso: 1992MB
Sector size (logical/physical): 512B/512B
Partition Table: unknown
Disk Flags:
It is empty because there is not even a partition table. While it is not there, disk partitioning in Linux cannot be done; we have to create it. To do this, use the mktable command:
We will create a partition table of type gpt, but you can choose one of these: aix, amiga, bsd, dvh, gpt_sync_mbr, gpt, mac, msdos, pc98, sun, loop
Now let's create a new partition with an ext2 file system of 100 megabytes in size. To do this, there is the mkpart command, as you remember, you need to pass three parameters to it: partition type, file system and coordinates. The partition type can be: primary, logical, extended (primary, logical and extended).
In gpt you can create the required number of primary partitions and not think about their type. This was all created for the MBR, this table has a limit on the number of primary partitions - only four. Therefore, it was necessary to create three primary ones and one extended one, into which as many logical ones were already invested.
Well, let’s create the primary one:
mkpart primary ext2 0 400M
Since this is the first partition, we start from scratch and end with the size we need - 400 megabytes.
Let's look at the list of sections again:
Sector size (logical/physical): 512B/512B
Partition Table: gpt
Disk Flags:
1 17.4kB 400MB 400MB primary
Let's create a few more sections, for example for the system horse and for the home folder:
mkpart primary ext2 400 1000M
mkpart primary ext2 1000M -0M
The -0 parameter means counting from the end of the partition, so all available space for the third partition will be occupied. Let's see what happened:
Number Start End Size File system Name Flags
1 17.4kB 400MB 400MB primary
2 400MB 1000MB 600MB primary
3 1000MB 1992MB 992MB primary
Working with a disk in Linux is carried out by their numbers. Let's make the last partition smaller and create another one after it:
Now let's create:
mkpart primary ext4 1600M -0M
Number Start End Size File system Name Flags
1 17.4kB 400MB 400MB primary
2 400MB 1000MB 600MB primary
3 1000MB 1600MB 600MB primary
4 1600MB 1992MB 392MB primary
Let's delete the newly created fourth partition:
Let's set labels for existing sections using the name command:
Let's make the first partition bootable with the set command:
The following flags can be set: boot, root, swap, hidden, raid, lvm, lba, hp-service, palo, prep, msftres, bios_grub, atvrecv, diag, legacy_boot, type, irst
That's basically it. Linux disk partitioning is complete. We will omit working with file systems in this article, since other commands are used for this, which we will consider in one of the following articles.
conclusions
Conclusions: Now you know enough information not to get lost if you find yourself without access to the graphical interface and need to partition your Linux hard drive.


