How I changed the SSD in the MacBook Pro to inexpensive, but capacious and fast. Installing SSD and second HDD Installing ssd in macbook pro
Fair, not too high or too low. There should be prices on the Service website. Necessarily! without "asterisks", clear and detailed, where it is technically possible - the most accurate, final.
If spare parts are available, up to 85% percent of complex repairs can be completed in 1-2 days. Modular repairs take much less time. The site indicates the approximate duration of any repair.
Warranty and Liability
A warranty should be given for any repair. Everything is described on the site and in the documents. A guarantee is self-confidence and respect for you. A 3-6 month warranty is good and enough. It is needed to check the quality and hidden defects that cannot be detected immediately. You see honest and realistic terms (not 3 years), you can be sure that you will be helped.
half success in Apple repair- this is the quality and reliability of spare parts, so a good service works directly with suppliers, there are always several reliable channels and a warehouse with proven spare parts for current models so that you do not have to waste extra time.
Free diagnostics
This is very important and has already become a rule of good taste for service center. Diagnosis is the most difficult and important part of the repair, but you should not pay a dime for it, even if you do not repair the device after it.
Service repair and delivery
Good service appreciates your time, therefore offers free shipping. And for the same reason, repairs are carried out only in the workshop of the service center: it can be done correctly and according to technology only at a prepared place.
Convenient schedule
If the Service works for you, and not for itself, then it is always open! absolutely. The schedule should be convenient in order to be in time before and after work. Good service works on weekends and holidays. We are waiting for you and working on your devices every day: 9:00 - 21:00
The reputation of professionals consists of several points
Age and experience of the company
Reliable and experienced service is known for a long time.
If a company has been on the market for many years, and it has managed to establish itself as an expert, they turn to it, write about it, recommend it. We know what we are talking about, since 98% of incoming devices in the SC are restored.
We are trusted and passed on complex cases to other service centers.
How many masters in the directions
If you are always waiting for several engineers for each type of equipment, you can be sure:
1. there will be no queue (or it will be minimal) - your device will be taken care of immediately.
2. you give away macbook repair an expert in the field of Mac repairs. He knows all the secrets of these devices
technical literacy
If you ask a question, the specialist must answer it as accurately as possible.
To give you an idea of what you need.
Will try to solve the problem. In most cases, from the description, you can understand what happened and how to fix the problem.
Hello! Today I'll tell you how I changed HDD on SSD drive in your new MacBook. I already talked about on my blog, and about what I bought Macbook Pro 13 without Retina. So here in this laptop costs terribly slow HDD Hard disk, its rotation speed is 5400 because of this, there are noticeable freezes when starting certain applications or when waking up from sleep. I especially notice this due to the fact that I have been using an SSD hard disk in a stationary computer for 3 years now, I have a system installed on it and desired programs, plus I also bought one SSD drive for games, sometimes I like to play various cool games.
I'm not saying that Apple missed the mark with this laptop and made it slow, no. Just like anyone else, someone would not even notice this if there was nothing to compare with.
This laptop has a drive, I found a lot of videos and articles on the Internet about the upgrade option by replacing the drive with optibay (dvd slim 9.5mm adapter for HDD) in which you can put a hard drive instead of a drive and put an SSD in the place where the HDD was. I bought everything, and an adapter and an SSD drive for 256 GB Vertex 450 from the manufacturer OCZ (The price is crazy 7890r.) Why did I choose OCZ? “For me, this is a proven durability maker, as SSDs have a limited number of write cycles.
Optibay - The thing is very interesting, many thanks to the one who came up with it, I think such a thing will come in handy for those who have a laptop that is not quite new, it will be possible to put an SSD drive instead of a drive and Windows will work many times faster even on not very powerful hardware.
I thought for a long time and decided that, in principle, I don’t need a second HDD instead of a drive and decided to leave the drive and just put a 256 gigabyte SSD, this is not so little for a working laptop, especially since I have an external USB hard and desktop PC.
Let's start replacing this very slow HDD!
The first thing we need is a tool, we need a small Phillips Torx screwdriver, I still have it from the moment when I changed the glass on my old iPhone 4. Hexagon and a plastic spatula, also from the kit. The tool in the analysis of Apple technology plays a very important role! No need to twist those little bolts with a knife! I recommend not to rush, and if you don’t have the necessary tools, then it’s better not to take it, but first buy everything you need.

Now you need to remove static electricity from yourself, I searched on the Internet how to do this and decided that it would be easier to just undress to my underpants than to look for all sorts of antistatic agents
Turn off the laptop and turn it over

Before unscrewing, draw a diagram on a piece of paper in order not to get confused in the bolts, because in all Apple technology, almost all the bolts are different. Here we have 3 long and 7 short in these seven by 4 there is a border, this is important.

So we draw just such a thing and put the bolts in their places, so that later they can be screwed back into place without any problems! This method works in disassembling any device, and it is very effective - why didn't I know about it when I disassembled my toys as a child
Unscrewed, laid out the bolts, remove the cover and disconnect the power cable! Otherwise, if you accidentally drop a screwdriver or some other metal object on the motherboard, a short circuit will occur and that's it, kapets, replacing the motherboard ... or maybe something else.

We do everything confidently and accurately with a plastic spatula!
Next, unscrew the holder hard drive. Again, I’m surprised how simple and high-quality everything is done, the holder is metal, the orange rubber bands in the photo clamp the mounting bolts so that the hard drive feels comfortable, I think it even cushions a little on impact and does less harm to the hard drive.

After removing the holder, carefully lift the hard drive and pull out the SATA cables, if it is difficult to disconnect, pry it off with a plastic spatula.


We twisted it, now we put our SSD in place, carefully connect the cable, and first insert the lower bolts into the orange rubber bands and clamp it with the holder.


We close the lid back, take the bolts from our diagram, and screw everything into place.
Don't worry about the bill operating system, here Apple also excelled! Let's install everything now. Yes, all data old hard the disk will have to be transferred by connecting to a computer or via a SATA - USB adapter, I think this will not be difficult.
We connect the laptop to the Internet via a cable (it's faster) or via Wi Fi, it will prompt you to choose an access point, which one to connect to, enter the password and that's it.
Turn on the laptop and hold down the CMD + R keys until the progress bar appears, after the bar is full we will see this image:

Unfortunately, they offer to install OS X mountain lion, although OS X Mavericks has been out for a long time, but it’s okay to update later, we don’t have a hackintosh (I used Hackintosh on my stationary PC for about a year, then my craving for Apple began, especially attracted attention time machine, this thing will never be in Windows!)
Do not rush to click continue, first go to the top menu in Utilities, Disk Utility and create or partition a hard drive. After that, click "Continue", accept the license agreement, and select the disk on which we will install.
I have one, I did not share it:

We are waiting for the process of loading the installation files of the system, it is not necessary to sit and wait, he will do everything to the end in automatic mode, after downloading the files, it will reboot and the installation will begin, which will take place quite quickly.
Here is the result of the speed of work, using the launch example Adobe Photoshop CS6:
There was a case when I installed Windows 8 on an SSD using the installation USB flash drive 3.0, on PC with intel processor i5, to be honest, I was shocked, because the installation time from start to desktop took only 8 minutes! That's cool, what's in the future?
That's all, I think the information will be useful. Thank you for your attention! Subscribe to my blog updates. Ask questions in the comments, in the future I think I will write how I installed more random access memory, but for now I'm satisfied with 4 gigabytes on a laptop.
The cost of the original 256Gb SSD for Macbook Air and Pro Retina 2012 is 17,000 rubles, for Macbook Air and Pro Retina 2013-2015 it is even more expensive - 26,000 rubles. An M.2 (NGFF) SATA SSD converter worth about 2,000 rubles comes to the rescue. This thing will allow you to use M2 SATA SSD drives, for example Samsung on 256Gb, but already for 7000 rubles. Saving in 2 times - not sour! You can install the converter on Macbook Air 11" and 13" 2010-2015, as well as Macbook Pro Retina 13" and 15" 2012-2015.
Unfortunately, since 2016, the Macbook Pro Retina 13" and 15" have non-removable SSDs soldered onto the motherboard, just like their younger brother, the Macbook Retina 12". The only option to upgrade or replace is to replace the entire motherboard.
Is it possible to upgrade the integrated SSD in a MacBook?
If the flash memory is soldered, then it must be replaced motherboard. Such Apple models has been producing since 2015, starting with the MacBook Retina 12 "and the Pro line. A couple of "workarounds":
- use high speed external drive, for example with USB interface 3.0
- Use the SDXC card slot - neat, budget, but the speed of 60 MB / s upsets
- Buy a TarDisk Pear memory card for 128 or 256 gigabytes 2 times more expensive than your fellow tribesmen. Installed in the same slot for SDXC. Pear's key advantage is automatically merging with built-in hard drive and creating an analogue Fusion Drive
Information recovery
In 70% of cases, the data will be copied even if the HDD is damaged. It is more difficult if the disk controller (board) is faulty, although we also solve such problems. With an SSD, in 80% of cases it will not be possible to pull out files, or the operation will be prohibitively expensive.
Let's see if it's possible to upgrade Macbook Air at home, increasing his memory.
It is not difficult. But there are a few very important points to be aware of. Otherwise, you will lose money.
Which MacBook Air models can replace the SSD?
AT MacBook Air before 2010 you can replace the drive with a 1.8-inch SATA SSD. We won’t talk about them today, since computers are outdated, and SSDs of this form factor themselves are publicly available and do not differ in any features that are critical for a Mac. Just bought and installed.
AT MacBook Air models since 2010 year, you can also replace the SSD drive. But there is its rare form, hence the need for this article.
Apple in their repertoire. SSD drives in all modern MacBook Airs have a rather specific connector. 28pin. Thank you for at least not soldering the drive on the motherboard.
Publication from website (@site) Dec 6 2017 at 11:53 PST
Because of this, replacing an SSD is much more complicated, and the following options remain:
1. Buy original SSD for macbook. You will have to look for such components, and the price for them is frankly not encouraging.
2. Find a similar 3rd party SSD. Again, everything depends on the price, as they say, the game is not worth the candle.
3. Use a special adapter. small adapter for $13 on Amazon or $9.5 from AliExpress, it allows you to install almost any modern M.2 drive instead of the standard one.
A suitable 256 GB SSD will cost 7-10 thousand rubles. For 15-17 thousand rubles. (difference between MacBook Air models) you can find a 512 GB model.
After the upgrade, there will be another 128 GB of stock disk on hand, which can be sold.
Important: it's not enough just to buy a "flat" SSD
Not every SSD is suitable for use with an adapter.
Firstly, The SSD must override the Serial ATA interface and the AHCI (Advanced Host Controller Interface) mechanism. This is usually indicated in the specifications of the device.Secondly, the drive must have a connection key M or universal B&M, but not key B.
Thirdly, the length of the SSD board should not exceed 80mm, in otherwise she won't fit. If the drive is too short or an adapter board is used, you will most likely not be able to get into the mounting hole and will have to use double-sided tape to secure the drive.
How to replace an SSD on a MacBook Air
Attention! Self-replacement computer components will void your warranty. All actions you carry out at your own peril and risk.
To replace, you need a couple of screwdrivers: T5 Torx and P5 Pentalobe.
1. Using the P5 Pentalobe, unscrew the 10 screws on the back of the laptop.
2. Gently pry off the cover near the display hinge.
3. To power off the laptop and prevent accidental switching on, it is recommended to disconnect the battery. To do this, you need to find the power connector and pull the plastic tab.
4. Using a T9 Torx screwdriver, remove the screw securing the SSD drive.
5. Install new drive and repeat the operations in reverse order.
That's not all, you need to set up macOS
After replacing the disk, you can clean install macOS or roll backup. In any case, after starting the system, you will need to perform one more operation.
When using a third-party SSD with macOS, the TRIM command must be enabled. Otherwise, the performance of the drive will degrade over time, and write operations will be slower.
Starting from version OS X 10.11 El Capitan You can enable TRIM on all SSDs using the terminal command:
After confirming with an administrator password and restarting the Mac, TRIM will be activated.


(early 2011) at home.
There is a crisis in the yard, and dreams of buying new Macbook disperse like smoke. In this harsh time, when a kilogram of ordinary cucumbers costs like a kilogram of Israeli apples, it's time to get a screwdriver and upgrade your faithful aluminum comrade with your own hands.
If there is no screwdriver, hands, or lack of courage, if you please, turn to the professionals of modding and repair. Proven masters live in the company modmac who, with unwavering hands, will ruthlessly dismantle any gadget, fix it and assemble it back without unnecessary remaining parts.
On a winter Saturday morning, by the pattern of clouds in the sky, I realized - it's time! Having made a backup, my MacBook Pro and I went to workshop for rejuvenation surgery. The plans included replacing the native HDD cable with a new one, as well as replacing the optical drive with a super-fast SSD drive using a special Optibay tray.
Few people know, but if you put an SSD drive instead of a native HDD, and install a native HDD as a second hard drive instead of a CD drive, then in this situation the system will work a little slower. It is better to stick an SSD drive in place of the optical drive, and leave the native HDD in its place. Performance will be higher.
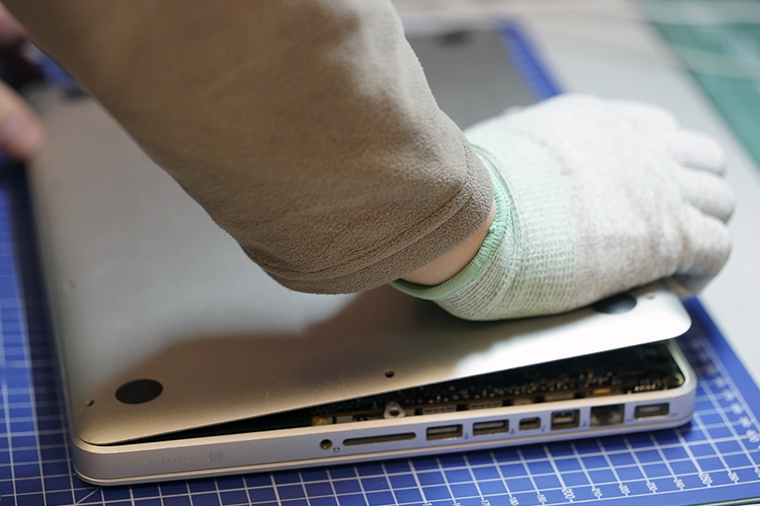
Upon arrival at the place, my laptop immediately passed into the hands of the master, and I got the small role of an impassive extra, who recorded on camera every movement of the specialist’s hands.
Preparation
So, the MacBook Pro is located on the table, turned upside down, revealing its defenseless belly to our eyes. With deft movements of a Phillips screwdriver, 10 screws were unscrewed, along the perimeter back cover. And then, with little effort, the lid was removed and carefully set aside.


Once again, I marveled at the ergonomic arrangement of all components inside the brainchild of Steve Jobs. How fascinating all the stuffing is fitted to each other!

The first stage is successfully completed, we move on to the next level.
HDD cable replacement
In my MacBook, the hard drive is removed quite simply. In some models, for example, to pull out the HDD, you must first remove the battery, but this is not our case. So here's what you need to do, point by point:
1) Disconnect the cable leading from the battery to the board;


2) unscrew the two screws and pull out the clamping bar;


3) gently pull the hard drive by the special tab and use your fingers (with a mediator, a special plastic spatula) to disconnect the cable from the hard drive.


The hard drive cable is very fragile, it is not recommended to pull, tear and twist it strongly.

Why you need to change the cable to a new one: sometimes (rarely, but still) after replacing an ordinary HDD with an SSD, the MacBook drive starts to behave strangely. It seems that disk utility sees the new SSD, formats it and does not find any errors; The operating system is downloaded, but all installation attempts are interrupted by a gray screen with a flashing folder icon or a question mark.

In this case, replacing the hard drive cable helps. The operation is very jewelry and requires confident movements and some skill in such actions. Here is how the HDD cable is replaced:
1) Carefully disconnect the cable connector from the board, unscrew the two screws that fix the cable in the case and the two screws that fix the black bar on the front inner wall of the case.


With your fingers, carefully pull out the black bar to which the HDD cable is glued and be horrified by the miniature size of the connector, which must be carefully removed.

At this stage, you need to gather all your concentration into a fist and disconnect the connector from the HDD cable with tweezers. You can’t swear at your mother, it’s desirable to breathe every other time.


After this dangerous procedure, you can exhale and relax, the HDD cable is completely removed.

So, at this stage, we have removed the native hard drive and completely disconnected its cable. To install a new cable, all the above steps must be repeated in reverse order. Again, the hardest part is connecting the small connector to the connector on the new HDD cable.
Replacing an optical drive with an SSD drive


Carefully disconnect the cable responsible for Airport/Bluetooth and the camera cable from the board. These cables (like most others) are very fragile and brittle.


Then carefully remove the cable around the perimeter of the CD drive and disconnect the antenna connector.


The easiest thing left is to unscrew the three screws holding optical drive, carefully remove it, and disconnect the cable connector. Everything, half the work is done, now you need to insert an SSD drive into the resulting void.
SSD and Optibay


Everything is simple here. An Optibay tray is taken, a new SSD drive is inserted into it, two fixing screws need to be tightened on the side, a short cable from the CD drive, which was removed in the previous step, is inserted into the tray, and the entire resulting structure is inserted into place. In conclusion, repeat all the above manipulations to remove the drive in reverse order.

At the very end, the main thing is not to forget to reconnect the battery cable, which was disconnected at the very beginning of this instruction article.
Note to the owner

After “pumping” the MacBook wizard from modmac can set up something like Fusion Drive.
Fusion Drive is a technology that combines a conventional hard disk drive (HDD) and solid state drive(SSD) with 128 GB of flash memory in a single logical volume. Mac OS X automatically manages its contents, so frequently used files such as applications, documents, photos (and so on) are dynamically moved to flash memory for faster access. For example, if a program is used frequently, it will automatically be moved to an SSD drive to speed up access to it. As a result, startup times are reduced, and as the system accumulates information about the computer usage profile, programs start up and access files faster.
– Wikipedia
Through cunning manipulations with terminal commands, the guys from modmac can configure the MacBook so that the system will see one shared drive, with a capacity of 768 gigabytes (total capacity of SSD and HDD drives) as if it were a single SSD drive.
Productivity grows, nerves are protected, the owner is happy. I highly recommend. The only caveat is that during the operation of the laptop, you need to avoid emergency shutdowns, the Fusion Drive may “crumble”, and you will have to restore all the information again ( so you should always remember about backup!).


