Recovering damaged component storage. SFC and DISM: Checking and Repairing System Files in Windows Uninstalling a Store Using PowerShell
- The files to launch PowerShell can be found at this path:
- 64bit PowerShell if you have a 64-bit system or 32bit PowerShell if you have a 32-bit system:
- C:\Windows\System32\WindowsPowerShell\v1.0
- 32bit PowerShell on a 64-bit system is located in the folder:
- C:\Windows\syswow64\Windowspowershell\v1.0
- You can add a shortcut to your desktop and run as administrator. How to do this, see the picture below by clicking on it to enlarge it:
- If you deleted the Store in Windows 10, no problem. In this article, I will tell you two ways to get the store back. The first method is the simplest; you don’t have to do anything, just download the file and run it on the machine where you want to return the store. The second method, if the first did not help, will be more complicated, but I will describe everything step by step. Let's move on to the first, easiest way to return the store. Download the file:
- This article will help you run files with the ps1 extension for execution and not opening as is usually the case:
- Run the downloaded file by right-clicking and context menu select run as administrator. We wait for the operation to complete and go look for the restored store. You can find it by typing store in the search.
- This option is more complex but quite effective. Launch Powershell as administrator. You can find and launch powershell by typing in the start menu, then search, powershell or power, then select powershell from the list:
- In powershell type the command:
- and press enter.
- You get a list in which you look for the section: Microsoft.WindowsStore and in this section find in the right column: PackageFamilyName. Next, copy the name of the previously deleted store; it will be on the left in the same line PackageFamilyName. The picture above shows the name of the store. Paste the code into powershell:
- The code says where you need to paste the name of the previously copied, deleted store from powershell. Press Enter and search for help again where you type the familiar word store. The store is there if you found it using the search!
- You can disable loading and launching the store in group policies by enabling the appropriate rule. Group Policy You can run it with a command, not even a command, but a file name in the execute window: gpedit.msc Below you will see the entire process of shutting down the store in Windows 8.1, but this method is no different from all the others Windows versions which have or have a store:
- This option is more humane and you can always return it back simply by turning it on, using the same method as turning it off only in reverse. By disabling rules in group policies.
- Launch PowerShell, there are plenty of methods on how to do this above. Lkz first we need to find the name of your store. Entering the command in PowerShell
- Get-AppxPackage >D:\app.txt
- After pressing Enter, we go along the path that was indicated and find a text file called app.txt. Open it in notepad and look for your store, for me it looked like this:
- We find the line:
- PackageFullName: winstore_1.0.0.0_neutral_neutral_cw5n1h2txyewy
- Above in the picture I showed it with an arrow. Next, copy the name of your store after the colon from the text file and write the command in PowerShell:
- Remove-AppxPackage –package
- Next, add the name of your store taken from the text file:
- winstore_1.0.0.0_neutral_neutral_cw5n1h2txyewy
- Press Enter and wait for the removal to complete. This way you can remove any application installed on Windows. I advise you not to delete the text file; it may come in handy. If you want to install back you will not find the store name in the newly created text file, so this is one of the reasons to save the text file.
Where are the files for launch PowerShell?
Return windows store store back in place as it was!
Download
Second option for restoring the store:
Remove or disable the store in Windows 10 or 8.1
Disable the store in group policies.
Removing a store from using PowerShell
If you often install software or apply tweaks, it would be nice if before each such intervention you create system restore point
. Windows 10 this is especially true, since in the tenth version rollback points are created less frequently than in previous versions. You can create a restore point manually from applet control panels System -> System protection, you can also use the console for these purposes PowerShell
.
The second method has certain advantages, allowing you to create restore points during execution. various scripts, in addition, the user can enter the appropriate command PowerShell into a shortcut with which you can create rollback points with one click.
Here's how it's done.
Making sure that System recovery using checkpoints is enabled.
Open your console PowerShell as administrator and run the following command:
Checkpoint-Computer -Description "My restore point" -RestorePointType "APPLICATION_INSTALL"


Argument -Description specifies a text description control point, -RestorePointType- her type. It can take the following values:
MODIFY_SETTINGS- change settings.
DEVICE_DRIVER_INSTALL- driver installation.
APPLICATION_INSTALL- installation of the application (default)
.
APPLICATION_UNINSTALL- deleting the application.
CANCELLED_OPERATION- cancel the action.
Which key will you use? special significance does not have. Please note, however, that this method can only create one control point per day.

To remove this restriction, open with the command regedit registry editor, expand the branch HKLM\Software\Microsoft\Windows NT\CurrentVersion\SystemRestore , create a new one in the last subsection 32 -bit type parameter DWORD With name SystemRestorePointCreationFrequency and set its value to the number of minutes that define the interval between the creation of recovery points.
The default is number 1440 in the decimal number system, which corresponds to one day. After applying the tweak, you will be able to create restore points in PowerShell with the frequency you need.
Checking system integrity Windows files 10 may be useful if you have reason to believe that such files have been damaged or if you suspect that some program may have changed system files operating system.
Windows 10 has two tools for checking the integrity of protected system files and them automatic recovery if damage is detected - SFC.exe and DISM.exe, as well as the Repair-WindowsImage command for Windows PowerShell (which uses DISM to work). The second utility complements the first one if SFC fails to recover damaged files.
The Windows Image Deployment and Servicing Utility DISM.exe helps you identify and fix system storage issues. Windows components 10, from where, when checking and correcting the integrity of system files, their original versions are copied. This can be useful in situations where Windows Resource Protection is unable to perform file recovery despite detecting corruption. In this case, the scenario will be as follows: we restore the component store, and after that we again resort to using sfc/scannow.
To use DISM.exe, run command line on behalf of the administrator. Then you can use the following commands:

Note: In case the component store restore command does not work for one reason or another, you can use the install.wim (or esd) file from the mounted ISO image Windows 10 () as the source of files requiring recovery (the contents of the image must match installed system). You can do this using the command:
Dism /Online /Cleanup-Image /RestoreHealth /Source:wim:path_to_wim_file:1 /limitaccess
Instead of .wim, you can use the .esd file in the same way, replacing all wim in the command with esd.
When using the specified commands, a log of completed actions is saved in Windows\Logs\CBS\CBS.log And Windows\Logs\DISM\dism.log.
DISM.exe can also be used in Windows PowerShell running as an administrator (you can run it from the right-click menu on the Start button) using the command Repair-WindowsImage. Example commands:
- Repair-WindowsImage -Online -ScanHealth- checking for damage to system files.
- Repair-WindowsImage -Online -RestoreHealth- checking and correcting damage.
Additional methods for restoring the component store if the ones described above do not work: .
As you can see, checking the integrity of files in Windows 10 is not such a difficult task, which can sometimes help fix a variety of problems with the OS. If you couldn’t, perhaps one of the options in the instructions will help you.
How to check the integrity of Windows 10 system files - video
I also suggest you watch the video, where the use of basic integrity check commands is clearly shown with some explanations.
Additional Information
If sfc /scannow reports that system protection was unable to repair system files, and restoring the component store (and then running sfc again) did not resolve the problem, you can view which system files were damaged by looking at the CBS log. log. To export the required log information to an sfc text file on your desktop, use the command:
Findstr /c:"" %windir%\Logs\CBS\CBS.log >"%userprofile%\Desktop\sfc.txt"
Also, according to some reviews, integrity checking using SFC in Windows 10 can detect damage immediately after installing an update with a new system build (without the ability to fix them without installing the new build “cleanly”), as well as for some versions of video card drivers (in this case In this case, the error is for the opencl.dll file.If any of these options happen to you, you may not need to take any action.
Whenever something goes wrong with your computer or laptop, there are a number of troubleshooting tools you can run to try and fix the problem. Windows 10/8/7 has several built-in commands that you can use to check and repair corrupted system files that cause problems when modified over time. One way to troubleshoot Windows problems is to scan your system and repair system files. It can help with all types of problems such as slow system, blue screen deaths, sudden power failures and system crashes.
Let's take a look at how to run System File Checker in Windows using CMD command line And PowerShell, such teams as sfc /scannow and tools DISM. I would like to note that to update the Anniversary Update of Windows 10, it would be better to use methods specifically with PowerShell.
Check and Restore system files via CMD
System File Checker scans your computer for any damage or changes to system files that are otherwise could interfere with the normal operation of your PC. From there it replaces the file correct version to ensure smooth operation. Using the command line, you can try to scan and restore system files of later operating systems like Windows 10/8/7/Vista. Let's look at two teams sfc /scannow and DISM using CMD.
1.
- Run Command Prompt (CMD) as an administrator. Click "search" and simply write "cmd" or "command line", then right-click on it and run as administrator.
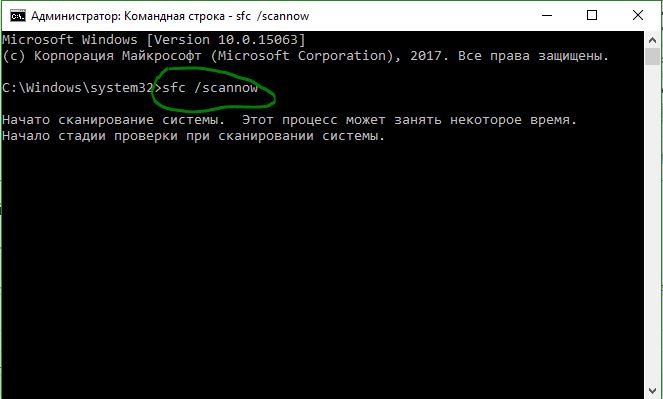
- Specify the command sfc /scannow and wait for the process to complete.
Note: After scanning your system, one of three results will be returned:
- There will be no system file errors.
- There will be system file errors and Windows will repair them automatically.
- Windows has detected errors but cannot repair some of them.
If option 3 shows you that an error has been detected and the system cannot recover, then repeat the procedure. I advise you to disable encryption and if they are available at the time of checking. Nothing succeeded? Let's move lower.

2. (DISM)
If the above doesn't work in safe mode, there is one last method check for corruption in system files and fix them. We use the Deployment Image and Service Management (DISM) tool. The team works with Windows systems 8/8.1/10. Open it back and use the following command:
The process may take a long time and the percentage scale may freeze. When finished, restart your computer and start it back sfc /scannow to make sure there are no errors or the error has disappeared.

Check and Restore system files viaPowerShell
We will use Windows PowerShell to show how to use the Maintenance and Management Service DISM to scan and fix damaged system files in Windows 10. This method will be more effective for updating Anniversary windows 10 than the command line.
1. Using the System File Checker (SFC) tool
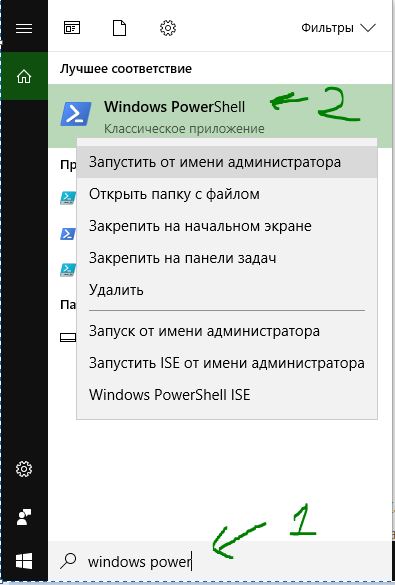
- Run PowerShell on behalf of the administrator. Click "search" and type windows powershell, then right-click and select as admin.
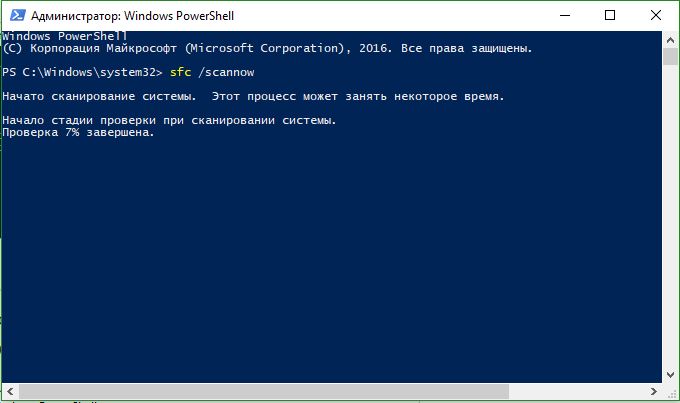
- Set in the window PowerShell command sfc /scannow. If the scan finds any problems, Windows will try to fix them. If Windows can't fix them, it will warn you that further investigation and action is needed. Move below if errors are found.
2. Using the Deployment Image and Service Management tool (DISM)
The DISM scan detects corrupted system files and Windows will try to fix them and give you a progress report at the end. If Windows is unable to find the files needed to repair damaged system files, you will also be provided with information on what to do next, with a link to Microsoft's website and troubleshooting options. Enter the below command into the PowerShell window.
DISM /ONLINE /CLEANUP-IMAGE /RESTOREHEALTH
If DISM fixed everything or did not reveal any errors, then restart your laptop or computer and run it back to check sfc /scannow.

Ran Windows 10 System File Integrity Check using sfc /scannow and the message came out: “Windows Resource Protection has detected damaged files, but cannot restore some of them.” From your article it follows that in this case you need to restore the component store Windows command DISM /Online /Cleanup-Image /RestoreHealth, but I get an error here too: “Failed to download source files" This is probably due to the fact that the Windows Image Servicing Tool (DSIM) uses Windows Update, and the Internet on the laptop disappeared after removing the viruses? What to do in this case?
Recovering a corrupt Windows 10 Component Store using PowerShell
Hello friends! Most recently, I wrote an article about how to properly check the integrity of Windows 10 system files. This check is carried out if your operating system is unstable and various system errors, standard ones do not start Windows applications and so on. In this case, you need to run the command line as an administrator and enter the command sfc /scannow, then the system will begin checking for damaged system files and if any are found, they will be immediately replaced with the original versions.
The original versions of system files are located in the Windows Component Store, namely in the C:\Windows\WinSxS folder. If this storage If it is damaged or some components are missing, then when you check the integrity of system files, you will receive the error “Windows Resource Protection found damaged files, but cannot restore some of them.”
In this case, you need to restore the Windows component store itself with another command: “DISM /Online /Cleanup-Image /RestoreHealth ", while the means Windows Image Servicing (DSIM) uses Windows Update and downloads required missing components from Microsoft servers. In particularly severe cases, various errors are also possible at this stage, for example this: "Failed to download source files. Specify the location of the files required for recovery components»

Then we have nothing left, how to use PowerShell extensible automation tool to recover damaged storage.
This tool will more thoroughly restore the operating system component storage using the Update Center ( Windows Update) and you must have the Internet turned on.
To launch PowerShell, find the icon on the desktop Search in Windows
and enter in the input field “PowerShell ", the results will show a match to the specified search -“Windows PowerShell”, right-click on it and select “Run as administrator”.

Enter the command:
Repair-WindowsImage -Online -RestoreHealth
and press Enter.

If your Internet is disconnected, the recovery process may stop at this stage.

If there are no problems with the Internet, then the process will complete and the components will be restored.

You will learn about this from the contents of the next window.
ImageHealth State: Healthy(Restored)

If you have no internet as a result of system violations, then use the original Windows 10 ISO image to restore. How to do this.
For example, you have a laptop with installed Windows 10 Single Language.

Double-click on it with the left mouse and connect it to the virtual drive. In my case, the virtual disk drive is under the letter ( G:).

In PowerShell running as administrator, run the command:
Dism /Get-WimInfo /WimFile:G:\sources\install.wim, Where G: Windows 10 virtual drive letter.
We see that in my image there is one image of Windows 10 Single Language (For one language) under the index 1 ,


