How to test a network cable with a multimeter. Types of Twisted Pair Damage and How to Detect Them
A local area network with an Internet connection is now available in almost every home. Network problems happen, and unfortunately, it is not immediately possible to identify a breakdown. It is necessary to check each component of the network at the software and hardware level.
Action algorithm
Consider the situation. There is a computer in the room. It is connected via a patch cord to the router, and the latter, in turn, via an Internet cable to the provider's equipment to access the global network. At one point, the network check program on the computer shows that the connection is not available or is not connected.
What should be done:
- Check the local interface of the computer you are working on - exclude software errors in Windows or hardware failure network card.
- Check the operation of the section from the computer to the router - exclude a network break in the section PC - router, malfunction of the software or hardware of the router responsible for the local network.
- Send requests to one or more remote servers of large companies to check the operability of the cable or equipment that goes and is located outside your home.
To go through the troubleshooting algorithm, work with the network commands.
Troubleshooting
A superficial check can be done using the ping all nodes command home network and several remote Internet servers. For these purposes open command line on behalf of the administrator. Next, enter commands, focusing on the algorithm of actions:
- Checking the operation of the network card of the computer itself is done by exchanging test packets with itself. If there are no losses, then everything is in order. Team ping 127.1.1.0.

- You can add the -t option to make packets run indefinitely until you manually stop them with the Ctrl+C key combination.

- Next, ping the site to the router. It is important to exclude a break in the Internet cable between the computer and the router. If there is packet loss, reboot your router and try pinging again. If the local IP address of the router has not changed, then it is 192.168.0.1 or 192.168.1.1.

- With 100% packets reaching the router, the next step is to ping one of the remote servers. Thus, you can check if there is access to the Internet. It is recommended to ping the IP address of the server of a large corporation, as this excludes the fact that it is not available on the network. It is not necessary to know the IP address, you can ping by domain name.

Analyze the received information.
Fault analysis
We will start from the losses received when sending packets. It is important to understand that the ping command is a protocol of the fourth level of nesting of the OSI model, that is, software, network and hardware errors are excluded, but data layers 5-7 according to the OSI model are not checked.
It turns out that a cable break, if any, can be detected in this way and this is the easiest way to do it. But the programs do not allow you to identify the specific location of the cable breakage, but only point to the area.
How to check an Internet cable or a local cable and understand that a break has occurred? Exclude other options related to a malfunction of the network card or router. If there were packet losses when checking the computer itself:
- Restart your network connection.
- Disconnect from all network add-ons (VPN, proxy).
- Do a network reset.

- Update or reinstall the network card driver.
In case of packet loss in the PC-router section:
- Restart your router.
- Check the fit of the Ethernet cable connectors into the port of the router and network card ( motherboard).
- Switch the Ethernet cable to the next port on the router.
- Roll back the router to factory settings.
Check the indication of the connected port on the router. If it is not lit, two options are possible: the capacitors on the router board have failed (or another hardware failure of the router) or the cable is faulty.
When packets are lost when going online:
- Restart your router.
- Release the dynamic IP address in the router settings.

- Turn off VPN and proxy.
- Ping others remote servers to ensure that the server is unavailable.
- Load web pages through another browser.
- Reset your router to factory settings.
- Contact your ISP to find out the cause of the problem.
If the packets are still not getting through, there are three likely causes: a faulty internet cable, a problem with DNS processing, and problems with the provider's equipment.
Twisted Pair Break and Insulation Continuity Test
The following video describes 5 ways to test a twisted pair cable:
If everything points to a cable problem, it needs to be identified and fixed. If a short cable fails, you can simply replace it. For wires several tens of meters long, special devices can be used to help identify the problem.
Tester
MicroScanner2 is a professional cable troubleshooting solution. By connecting one connector to the port, the tester screen will display graphic information about the length of the patch cord to the fault.

The rest of the methods require removing the connector and making measurements directly on the contacts of the twisted pair. It will also not be superfluous to make sure that the cable is crimped with a connector. If the crimp is weak or the insulation is broken, problems with signal transmission are guaranteed.
multimeter
In resistance mode, you need to ring the orange and green twisted pair to check the integrity of the cable:
- Remove the second connector from the network card of the PC or other network equipment.
- Remove the connector from the end to be measured and expose the strands.
- Attach the tester probes first to the orange and white-orange twisted pair conductor. Normal resistance is 1-2 ohms.
- Next, attach to green and white-green. The resistance should also be 1-2 ohms. Polarity is not important.
- Then attach the multimeter probes to the orange and green conductors. The multimeter should have more than 100 ohms. Usually multimeters indicate infinity.

regular potato
If there were no devices at hand, and you need to find out if the cable is damaged right now, do the following:
- Cut the potatoes in half.
- Dip each pair as close to each other as possible into the potatoes by 1.5 cm.
- If the wire is connected to the plus, the area around the immersed conductor will start to turn green.
- If the core is connected to the minus, then white foam will appear near the conductor. If you pull out the "negative" wire, it will begin to darken.
- With zero changes in the state of the potato, the twisted pair is most likely shorted or in a break.
Conclusion
For problems accessing global network you need to find the cause of the problem. It happens that Internet access is blocked because there was a cable break in the area local network or with a patch cord connected to the WAN. It is best to check the integrity of the twisted pair cable with a tester, since it does not require the removal of crimped connectors. If there is no such device, use a multimeter or more improvised methods.
When carrying out electrical work, it may be necessary to check the cable, for example, when marking cores and wires, checking the insulation and integrity of the wiring, and also searching for a break in the electrical cable. Let's consider in what ways testing can be carried out, as well as the equipment necessary for this purpose.
Methods
Testing methods depend on the purpose for which it is performed. To check the integrity of the cable for an open or electrical connection between its cores (short circuit), continuity can be done with a tester based on a battery and a light bulb, or you can use a multimeter for this purpose. The latter is preferable.
Despite the fact that the price of a multimeter is higher than a primitive device, we recommend buying it, this device will always come in handy on the farm.
To test the cable, the multimeter must be turned on in the appropriate mode (diode or buzzer image).

The testing methodology is as follows:
When checking a wire for a break, the tester is connected to its ends as shown in the figure. If the cable is intact, the lamp will glow (when testing with a multimeter, a characteristic sound signal).

Explanations for the figure:
- A - electric cable;
- B - cable cores;
- C - power source (battery);
- D - light bulb.
If the cable is already laid, then on one side it is necessary to connect the cores together and ring the wires at the other end;

when the presence of an electrical connection between the cable cores is checked, the tester probes are connected to different wires. Unlike the previous example, it is not necessary to twist the cores on the other side. If there is no short circuit between the wires, the lamp will not light (when testing with a multimeter, there will be no beep).
Ringing of multi-core cables for the purpose of their marking
When marking multi-core cables, you can use the methods described above, but there are ways to greatly simplify this process.
Method 1: the use of special transformers that have several taps of the secondary winding. The connection diagram of such a device is shown in the figure.
As can be seen from the figure, primary winding of such a transformer is connected to the power supply, one end of the secondary winding is connected to protective screen cable, the rest of the conclusions - to its cores. To mark the wires, it is necessary to measure the voltage between the screen and each wire.
Method 2: Use a block of resistors with different ratings connected to the wires of the cable on one side, as shown in the figure.

To determine the cable, it is enough to measure the resistance between it and the screen. If you want to make such a device with your own hands, then you should select resistors in increments of at least 1 kOhm in order to reduce the effect of wire resistance. Also, do not forget that the value of the resistors has a certain error, so first measure them with an ohmmeter.
When checking a multi-core telephone cable, installers often use a dial-in headset, for example, TMG 1. Actually, these are two handsets, one of which is connected to a 4.5 V battery. Such a simple device allows you not only to check the cable, but also to coordinate your actions during installation and testing.

Insulation test
To test insulation with a megohmmeter or multimeter, the continuity principle is the same as when searching for an electrical connection between cable cores.
The testing algorithm is as follows:
- set the maximum range on the device - 2000 kOhm;
- we connect the probes to the wires and see what the display of the device shows. Given that the wires have a certain capacity, until it is charged, the readings may change. After a few seconds, the instrument panel may display the following values:
- unit, this indicates that the insulation between the wires is normal;
- zero - a short circuit between the wires;
- some average readings, this can be caused by both "leakage" in the insulation and electromagnetic interference. To determine the cause, switch the device to the maximum range of 200 kΩ. If the insulation is faulty, the display will show stable readings, if they change, then we can confidently talk about electromagnetic interference.
Attention! Before checking the insulation of the electrical wiring, it must be de-energized. The second important point is that when taking measurements, do not touch the probes with your hands, this can introduce errors.
Video: Wire continuity - integrity check.
Finding the place of the break
After a break in the wiring has been detected, it is necessary to localize the place where this happened. In this case, you can use a tone generator for dialing, for example, such as Cable Tracker MS6812R or TGP 42. Such devices allow you to determine the location of the break with an accuracy of up to a centimeter, as well as determine the route of hidden wiring, in addition, the devices have other useful functions.

Devices of this type include an audio signal generator and a sensor attached to an earpiece or speaker. When the sensor approaches the place where the pairs of the UTP cable or the conductors of the electrical wiring are broken, the tone of the sound signal changes. When a tone is produced, before connecting the sound generator, it is necessary to de-energize the wiring, in otherwise the device will fail.
Note that with this device you can ring both power and low-current cables, for example, check the integrity of a twisted pair, radio wiring or communication lines. Unfortunately, such devices will not allow you to determine the correct connection; for this purpose, special equipment is used - cable testers.
Cable testers
This class of devices allows you to check both the integrity of the cable and the correctness of its connection, which is very important for ISP networks. This may be simple devices, checking crossover or complex devices on a PIC controller that have an ADC and a built-in multiplexer.
 Pro'sKit MT-7051N Multi-Purpose Microcontroller Cable Tester
 Naturally, the cost of such devices does not favor their domestic use.
Homemade contactless dialer
Shown below is a schematic of a simple non-contact open detector that can be assembled in one evening. Given the small number of parts, you can not bother making printed circuit board, and apply hanging mounting.

List of required radio components:
- variable resistance R1 - 100 kOhm;
- resistor R2 - from 4 to 8 MΩ;
- electrolytic capacitors: C1 and C3 - 220 uF, C2 - 33 uF;
- ceramic-type capacitor with a capacitance of 0.1 uF;
- D1 - LAG 665 chip (preferably in a DIP package);
- SP- regular earphone from a telephone headset.
The circuit can be powered from a source with a voltage of 2 to 5 volts.
The probe (P) is made on the basis of a conventional spoke from a bicycle wheel.
Properly assembled non-contact cable continuity does not require configuration.
Video: Do-it-yourself cable ringing. How wires are dialed using a light bulb and a battery
Do you know that when installing or repairing a computer network and communications, sometimes you need to check the twisted pair to determine the integrity, the absence of short circuits and the correct crimp? You can check it with special equipment (using lan testers and multimeters). But due to the lack of the necessary device, the cable is checked simple methods at home. In the article, we will talk about how to find out the reason for the termination of the cable and how to perform the correct test of the twisted pair cable in various ways.
There is no Internet access: what to do?
What to do if on computer monitor suddenly a window pops up, announcing that there is no connection, and the diode on the network board is off? There are a number of options for solving the problem.
First, try plugging in and pulling out the RJ-45 male connector. If there is still no access, then the hope for a bad connection has collapsed, because the reason lies elsewhere. For example, this may be due to a separate network card installed on the PC. Ask why the connection dropped if you didn't? User participation in the shutdown may not be necessary. Instead of you, the following factors will cope with this:
- unstable voltage in your network;
- use of unlicensed programs (their download and launch);
- the presence of viruses on the PC.
How to check it? For example, Windows XP users can perform the following sequence of actions: Start - Settings - Control Panel - Network connections. During the last step, you can find out if there is a connection to the connection or not. Also, users of this OS can check the correct operation and settings of the network card drivers, because they are variably another cause of connection problems. In this case, the sequence of actions: Start - Settings - Control Panel - System - Hardware - Device Manager - Network boards. After taking the last step, make sure there are no warning signs.
The problem with this card can be associated with both lightning and thunderstorms. To do a sanity check, connect it to a working line or install it in a completely different PC. Before that, do not forget about installing drivers for it. Try moving the card to the nearest slot on the board, as this sometimes helps.
If all these methods do not solve the problem, contact your ISP's support team. Perhaps the reason is failures on their lines. But if everything is fine with this, then the problem is in the violations of the twisted-pair cable. Among such faults are:
- one or more wires break completely, which happens very often;
- less often, a short circuit occurs, which can be in one twisted pair between its wires or in the conductors of the pairs themselves, which are closest.
Therefore, the twisted pair cable needs to be repaired. You can do repairs and checks with your own hands without the help of specialists. We will talk about how to check a twisted pair cable later.
Use of verification programs
Often people are looking for some kind of magic tool to help them determine the condition of their twisted pair cable. But few people know that such options are in their computer. This program makes you aware of its existence when you find that there is no connection with the cable. The corresponding inscription is a signal of an open process or a short circuit, which occurs in a twisted pair cable. True, it is impossible to find out exactly where the problem was formed using the program. A malfunction can only be determined independently with the help of special testers, which include MicroScanner Pro, the capabilities of which we will return to later.
If there is an unstable or very slow connection, then you should monitor the traffic. We recommend using a free innovative program called Network Traffic Monitor. With its help, you can perform the following actions:
- measure data and the speed of their transmission over the network;
- analyze speed changes over a certain period of time;
- save all relevant information on the hard drive;
- the possibility of wide settings;
- maintaining a large number languages;
- use of various services.
Installing the program will not take much time. All you need is to launch the exe file and click on the button that confirms your actions. After downloading and installation, monitoring will be performed and all the necessary data will be saved. This program is considered the best in the analyzing and diagnosing kind. This is evidenced by reviews from experienced users.
About connecting a PC to an active network using twisted pair
In order to carry out a high-quality, effective test of a twisted pair electrical wire, you need to simply imagine wiring diagram twisted-pair connection of a PC together with another device (hub or additional computer). We suggest that you familiarize yourself with the scheme in detail for a general understanding.
Particularly interesting when checking a twisted pair is the part with the depicted diagram of a card or hub. The RJ-45 connector, which we mentioned earlier, is connected to it. It can be purchased in Russia at the Allotelecom store. Look closely and you will see that the connection of each twisted pair to the transformer itself is carried out in a symmetrical way. This means that there is a middle of the transformer winding, in it there is a tap. It, in turn, is connected to a common conductor using a resistor, as well as a capacitor.
Such a connection guarantees the destruction of interference in the twisted pair, which come in antiphase. Instead, we get a useful signal, the magnitude of which does not change. Another advantage of the transformer schematic diagram is the protection of your equipment from tangling cable wires, short circuits.
On the swing strength and waveform of a twisted pair signal
Many people ask this question, so we will try to give an exhaustive answer. After analyzing the waveform of the information signal, we can draw the following conclusions:
- The presence of signals of types Rx and Tx with the same shape and a span of two volts.
- One pair serves as a signal transmission, and the other as a reception, due to the presence of exactly two twisted pairs.
- If any RJ-45 connector of the cable is pulled out of the device, then the signal stops transmitting automatically.
- The signal is round.
- Distance restrictions between different signal points (no more than 100 meters).
From this, the conclusion suggests itself that a signal range of two volts does not pose a danger to a person. In the same way, the closure is safe for the operation of network equipment. And therefore, it is quite possible to check twisted pairs without disconnecting the cable from the network. In this case, you do not need to worry about the loss of equipment performance.
The tester is an excellent way to check
To begin with, take a look at the electrical wire along its entire length, namely, look at how well the crimping is done in the RJ-45 plugs. In the case of poor-quality crimping, contact problems will occur due to wires not fully inserted. Or they can be overlapped in a fixed place between each other, as a result of which the twisted pairs will not close. Couldn't spot the problem at first glance? Then use testers who carry out quality checks.
Today there is an innovative cable tester that has an LCD display. We already mentioned it at the beginning of the article. What is MicroScanner Pro? The tester has many different functions and is designed to test twisted pairs. Among the standard tests performed are the following:
- determining how correctly the wiring is done;
- determination of the place where the damage is present;
- analysis of the nature of the malfunction (complete breakage of pairs, insufficient length of pairs, mixed up conductors in one and two pairs);
- determination of segment length;
- calculation of 100% of the distance to the place where the fault is present;
- tone generator mode, which traces the electric wire.

Buy this modern appliance Of course, you can, but not always necessary if you have the right tools at hand. This applies to a pointer tester or a digital multimeter. With their help, you will measure the resistance of electrical circuits, voltage, and current (DC and AC). You will be surprised, but checking a twisted pair with a multimeter is optimal solution whose success is guaranteed.
Multimeter is the best way
First you need to turn on resistance mode. Try to bring the cable ends to a single point. If you succeed, then the check will be carried out in the following order: checking the integrity of all the cores separately; testing each cable according to its color; check for a short circuit following veins. If it is possible to establish a connection between the probes, resistance will be detected.
However, it often happens that it is impossible to bring both ends of a pair into one single point. Then you need to either cut off the connector, or strip the cores at one end, connecting them in pairs to each other. After that, use a multimeter to probe each of the pairs at the other end. If time permits, then take an old computer outlet that has a working connector and short its internal contacts. This avoids cutting connectors and stripping wires.

Checking with a turnout tester
This method is considered the simplest. With its help, dialing is carried out. Both green and orange pairs are affected. Your actions should take place in this order:
- To begin, remove the RJ-45 connector from the PC network card.
- Turn on the mode that will determine the resistance.
- Touch the orange and white-orange wires with the probes of the machine.
- Wait until the resistance reading reaches 1-2 ohms.
- Touch the wire green and white-green.
- Watch for changes in resistance readings.
- Measure the indicator between the green and orange wires by touching the probes.
- Expect an indicator from 100 ohms to infinity.
If the measurement was successful and showed results that are completely similar to the example, then the test indicated the working condition of the twisted pairs.
After checking, you need to decide how to proceed. If a pair of green or orange color breaks off, then one pair should be replaced with one that is not used (brown or blue), but only if it is working. To do this, feel free to cut one fork, ring the pairs again, and then cut the second one as well, having carried out a second pair check. This is due to the fact that the short circuit also happens in the plugs, namely in those places where the clamps are made with clamps. Therefore, if after cutting you find a defect, then inspect the entire length of the electrical wire more carefully. Still can't find the damaged area? Then consider replacing the twisted-pair cable with a new electrical wire.
About checking in the absence of a tester
What if the tester or multimeter is only in the store, and cable testing is necessary? We suggest trying a certain technique. To do this, cut off pieces of 10-15 cm in size from each cable end (this includes connectors). Next, release the ends from the sheath by about 5 cm, after which remove the insulation from each conductor for a length of 2 cm.
After preparing the twisted pair cable, take a small container made of glass, plastic or polyethylene and fill it with water. Before this, salt, boiled until completely dissolved in water, should be added to the liquid (there should be a quarter of the volume of salt water). But keep in mind that if the volume of salt is larger, then this is even better, because with its help electrical water resistance is carried out. Next, place the end of the twisted pair wires into the prepared liquid. Please note that the contact of the conductors is excluded, and therefore there must be at least a small distance between them.
As for the ends of the twisted pair, which are on the opposite side, you need to connect in right order actions to any active power source that has a value greater than 3 V. But if there is too much salt in the water, then a value of 1.5 V is enough. Getting voltage is possible from any sample of a finger battery. You can also use a cellular battery (3.7 V). Use the following equipment as a power source:
- resistor having a rating of 50-100 ohms. With it, you will get protection against twisted pair short circuits;
- net telephone communication. It contains the presence direct current and voltage of 40 V, which is safe both for communication lines and for human life. The option is ideal for supplying voltage at the entrance, because there is a telephone box nearby;
- charger for mobile phone;
- computer USB port, having 5 V at the extreme terminals and a load current of 20 A. But note that you can only connect it to a computer with a resistor that limits the current, otherwise the PC will fail.
After the voltage has been applied, you will see what will happen to the other ends of the twisted pair in the water. The conductor connected to the minus should highlight small white hydrogen bubbles on itself. And the conductor that is connected to the plus, highlight the yellow-green bubbles of chlorine. If this happens, then everything is fine with the twisted pair cable and there is no question of a short circuit. If a short circuit is present, then hydrogen or chlorine bubbles will also come from another conductor.
Thus, you will find the twisted pair damage and end the verification process at this point, replacing the damaged pair with a blue or brown sample. Don't know how to do it? If, when checking, you find a break in the orange pair, then connect its place coming from the connectors with a pair of blue cables.
Despite such an elementary method, we still recommend crimping the cable with a new connector instead of splicing. If you do not have it, then you can always buy connectors in Moscow at affordable prices in the Allotelecom online store.
If everything is fine with a pair of green and orange colors and you do not want to crimp, then check the cut pieces of the twisted pair with the connector. To do this, twist together colored conductors that are protected from insulation and separately white wires. After that, stick the connector into the salt solution, completely immersing the contacts in the water. Twist the wires, attach to the battery. Watch for little white bubbles appearing through one on 4 of the 8 contacts. Next, reverse the polarity of the battery connection so that bubbles form where they did not appear before and also through one. If something goes wrong, then this is the first sign of a non-working twisted pair cable. There are no white bubbles on one of the contacts, which means that the wire is broken, and if they are absent at all, it means that a short circuit has occurred.
Potatoes and twisted pairs
First, prepare the twisted pair in the same way as you prepared for the salt solution. Then follow this sequential check:
- Take half of the raw potatoes, which is needed instead of a container.
- Push each twisted pair one by one into the potatoes 1-1.5 cm.
- Keep a minimum distance between wires.
- Keep track of what is happening around the connected wire: if it turns green near the positive terminal, and whitish foam forms near the negative terminal, then everything is fine with the wires. Well, if there were no changes on the cut, then the twisted pair is broken or shorted.
You can also use half an apple for this experiment. Experience has shown that with its help you can also find out about the health of the twisted pair, although this does not happen as clearly as with potatoes.
Now you know about everyone possible ways twisted pair checks, which are carried out by programs, testers, multimeters and folk methods. In this way, you can check different electrical wires. We hope that this article has become useful for you and now you can easily find out the reason for the breakdown of a twisted pair cable by carefully checking it.
allo-tele.com
Testing a twisted pair cable at home.
During installation and repair computer networks and communications, there is often a need to check the integrity of the twisted pair, the absence of short circuits, the correctness of the crimp, and so on.
Of course, if you have the appropriate equipment (for example, a lan-tester or at least a multimeter), this task comes down to simply connecting the cable to the appropriate device and checking it using standard methods.
But not always the required device is at hand. Sometimes you need to check the twisted pair cable at home, so to speak "on the knee".
Method 1. Checking the twisted pair with a multimeter.
I think that many people at home or in the garage have a multimeter, arrow tester or similar device for measuring resistance, voltage and current in the circuit.
With this device, you can very easily and quickly check the twisted pair cable for breaks, short circuits and overall performance.
The twisted pair is checked by a device operating in the resistance measurement mode.
If it is possible to bring the ends of the cable to one point, then the test will be carried out as follows - first, we will check the integrity of each core separately, for this, we will test each cable in turn by color. Then we check for a short circuit with other wires - for this, on one connector we touch one wire, and on the opposite one to each in turn. Resistance should be shown only in those cases when there is contact between the probes (in the first case, it indicates that the core is in order, in the second, that there is a short circuit with the corresponding core).
However, it is not always possible to bring both ends of the cable together at one point, so you can use the following trick: either cut off the connector, strip the wires at one end and connect them in pairs, each pair to each other. After that, probe each pair at the other end with a multimeter. If you have time and desire - you can take the old computer socket with a working connector and close the contacts inside it, this will make it possible not to cut the connector and not strip the wires. Additionally, you can not only short-circuit the contacts inside the socket, but also connect them using resistors with different resistance values - then you can see if there is a short circuit between the pairs. (The resistance on the multimeter will be the value of the resistor + a small increase due to the length of the wire).
Method 2. Checking a twisted pair cable without a multimeter.
If you don’t have a multimeter, but you still need to check the cable, then you can use the “old-fashioned” method: At one end, the wires are stripped to a length of about 5 centimeters and lowered into a glass of warm, highly salted water.
After that, at the other end of the cable, a voltage of more than 3 V is applied to one of the pairs. To do this, you can use a krone battery, a battery from cell phone, a battery from the motherboard. If none of the listed power sources is at hand, then you can use a standard AA 1.5V battery, but then the water must be heavily salted.
The container with water must necessarily be made of a dielectric (plastic, glass).
After power is applied, the following will happen inside the glass: white hydrogen bubbles will be actively released at the cathode (negative pole), while yellow chlorine bubbles will also be actively released at the anode (positive pole). This means that the wires are in good condition, they conduct current and there is no short circuit between them.
Another original way the test is to insert one pair into the potato, to a depth of 1-1.5 cm. And feed the food in the same way as described above. After that, white bubbles should appear on the cathode, and the place around the anode connection will turn green.
In fact, there are a huge number of these "folk" ways to check different cables. It would be interesting to know what methods you use, which ones you heard about, etc.
avs-electronics.livejournal.com
How to check for a broken internet cable
If the owner of the PC encountered problems with the Internet and when trying to connect to the network sees the error " network cable not connected”, then most likely there are problems that will be quite difficult to fix on your own. A more reliable sign of cable damage is the absence of an LED signal at the point of entry of the Internet plug. Unfortunately, not all motherboards have a light that indicates the connection of a working wire. This is also true for external network cards inserted into the PCE slot that do not have LED indicators.
You can try to solve this problem on your own. To do this, you need to determine what exactly caused the lack of Internet. Here are some of the most common faults that you can fix yourself:
- Unstable mains voltage. Such a problem leads to many malfunctions in the computer, one of which is problems with the Internet. The solution to the problem is to install uninterruptible source power supply that protects against voltage surges.
- Use of unlicensed software. One of the most common sources of problems when working with a PC is the use of unverified programs that can lead to errors or contain malware. Therefore, only licensed software should be used on computers used for work and containing important data.
- Network equipment turned off. Sometimes problems with browsing the Internet can be caused by simple things, such as a disabled network adapter. To check activity this device, you need to go to the "Control Panel" in Windows, find the "Network Connections" item, go into it and select the "Network adapters" tab. On the window that opens, make sure that the adapter is active.
- There are no drivers for network equipment. This problem especially relevant when reinstalling operating system. To make sure that there are drivers corresponding to the network equipment, you need to go to the "Control Panel" tab, select "System", open the "Device Manager" menu, find "Network adapter" and look at its properties. If there are no warning error messages, then the problem is most likely not in the drivers.
All of the above errors can usually be resolved by the efforts of the computer owner.
Help from experts
If the above causes of the malfunction do not fit or you cannot cope with the problem on your own, then you should use the help of professionals. The first thing to do in case of problems with the Internet or the power cord is to call the operator of the provider that provides network access services. Thanks to this, you can quickly find out about the presence of cable damage or any other breakdowns.
If, by calling the operator, the owner of the computer found out that there was no problem on the part of the operator, and also checked his PC for serviceability, then it can be argued that the cable is damaged. You can fix the problem using the services of specialists from a company that provides Internet access.
In some cases, wire damage can be repaired on your own. To do this, you need to know the possible types of breakdowns and how to eliminate them. The most common malfunctions that appeared during mechanical damage cable is as follows:
- The most common cause is a complete cable break. It usually occurs due to negative mechanical impact such as squeezing or operating at temperatures that are higher than normal for this type of cable.
- A short between twisted pair wires. It is also a fairly common cause of problems with the Internet. Also appears due to crushing and blows.
If it was possible to detect a cable break, then you can try to fix the problem yourself. It is also quite easy to check the network card for operability, which also often causes network problems. To do this, just install it on another computer and connect an Internet cable. But this feature is relevant if you have access to the network through a working wire.
To accurately determine the malfunction of the Internet cable, you must have knowledge of correct connection wires through a switch, hub or other devices, and also have a general knowledge of the principle of transmitting information through a twisted pair cable.
It is also advisable to familiarize yourself with the cable connection diagram. Basically, for wires that transmit any digital data, a transformer connection scheme is used to avoid interference. Thanks to the knowledge of the above causes of cable failure, anyone can fix a malfunction or break in the conductor.
If you need to find a malfunction of equipment or electrical wiring, one of the operations that is performed first of all is the continuity of cables and wires with a multimeter (tester) to check the health of the circuit (the absence of breaks in it), the presence of a short circuit and determine its resistance (if necessary ). Thus, it is possible to easily and quickly check the lamp, iron, switch, fuse, transformer for serviceability. How to ring the wires with a multimeter correctly will be discussed in this article.
What you need to know about the device to ring the wires
If you plan to ring the wiring in the apartment, you need to know a few fundamentally important facts about multimeters. First of all, it is worth noting that you can check the wire with the simplest device. An inexpensive Chinese model with minimal features is quite suitable.
But at the same time, it is most convenient to use a device that has the dialing function itself. In order to set the device knob to the appropriate position, it is necessary to turn it in the direction of the diode icon (as an option, an image of a sound wave can be additionally applied). This means that when checking the integrity of the wire, an audible signal will sound when the contacts are closed.
But the presence of sound accompaniment is completely optional for the continuity of wires with a multimeter. The fact that the circuit is broken will be indicated by a unit on the display, indicating that the resistance level between the probes is higher than the measurement limit. If there is no damage in the area under study, the resistance value will be displayed on the screen, which should ideally tend to zero (provided that it works in household networks of small length).
Call sequence
- Before ringing the circuit with a multimeter, you need to turn the knob of the device to the desired position.
- Insert the ends (measuring leads) into the appropriate sockets. The black wire to the jack marked COM (sometimes it can be marked with an "*" or a ground sign), and the red wire to the jack where the Ω sign is indicated (sometimes they put the R sign). It is worth noting that the sign Ω can be applied both separately and in combination with the designations of other units of measurement (V, mA). This is the correct position of the test leads, which will allow you to maintain polarity when making further measurements. Although if only the integrity of the wires is checked, their relative position will not affect the result in any way.
- Turn on the device. For this, a separate button may be provided or the inclusion may occur automatically when the knob is turned to the desired position when selecting the measurement limits or operating mode.
- Close the measuring ends together. If a signal sounds, then the device is working and ready for operation.
- Take the cable or wire to be tested (its ends must first be stripped of insulation, cleaned to a metallic sheen, dirt and oxides removed from the surface). Touch the test leads to the bare areas of the conductor.
- In case of integrity, a signal will sound, and the readings of the device will either be equal to 0, or indicate the resistance value. If the display shows 1 and there is no audible signal, this means that the tested conductor is broken.
Rules for safe dialing using a multimeter

network cable continuity with a multimeter
Working with electricity does not allow unprofessionalism, so there is a certain list of rules that allow you to make it as accurate, fast and safe as possible.
- It is most convenient to use special tips at the ends of the measuring wires, which have received the more common name "crocodiles", when dialing. They will allow you to make contact stable and free your hands when taking measurements.
- When ringing, the always checked circuit must be de-energized beforehand (it is necessary to remove even weak-current batteries). If there are capacitors in the circuit, they must be discharged by shorting. Otherwise, during the work, the device will simply burn out.
- Before checking the integrity of a long conductor during measurements, it is important not to touch its bare ends with your hands. This is due to the fact that the resulting readings may be incorrect.
When ringing a multi-core cable, it is necessary to separate and strip all existing cores from both ends. After that, you need to check the circuit for the presence of short circuits in it: for this, a “crocodile” is fixed in turn on each core, all the remaining ones are touched with the other measuring end in all possible combinations.
Check if there is a short circuit between the wires of the cable. If there is no sound signal on the indicator “1”, then everything is in order, otherwise there is a short circuit.
In this case, the sound signal will indicate the presence of a short circuit between the wires being tested. This may not be of practical importance for small cross-section multi-core cables operating in low-current networks, but when working with high voltage it is of fundamental importance.
We call the cable cores. There is a sound signal - everything is fine, otherwise - the core is damaged.
To determine the integrity of the cores, the same operation is performed, only at one end of the cable all the stripped cores are twisted together. When looking for a break, it is important to consider that the absence of a sound signal at any of the ends will indicate a violation of the integrity of the conductor.
We call the wiring in the apartment with a multimeter
Consider, as an example, a modern apartment in which the wiring is made in accordance with applicable requirements and standards. This means that when laying the lines for lighting and powering the sockets, they were separated, and separate wires were laid for them in each of the rooms. Each of these circuits is fed from the apartment panel through a separate circuit breaker.
If the light has disappeared in one of the rooms, first you should check the serviceability of the lamp. Before starting work, it is necessary to de-energize the room / apartment, depending on the power scheme. When using an opaque incandescent lamp in a lamp, it is difficult to visually determine the integrity of the filament, so a multimeter and its continuity function are required. Let's see step by step how to do it right.
First you need to check the shield for the presence of triggered machines. In the first case, they will be in the on position (then the malfunction may be hidden in the room switch, lamp or cartridge). The chance of damage to the wiring in such a situation is small. If the device worked, it will be necessary to check everything except the room switch, including the switchboard itself.
If the machines didn't work

We call the switch. When the switch is on, there should be a sound signal, when it is off - silence and "1" on the indicator.
- Make sure that there is voltage at the input and output of the machine. If it is, you can proceed to further verification.
- Prepare the device for operation and check its serviceability by shorting the measuring ends.
- Unscrew the lamp from the socket.
- With one of the measuring probes, touch the base (the metal part of the lamp with a thread), and the second - the central contact of the lamp (the insulated center of the end of the base).
- An audible signal and instrument readings that are other than 0 or 1 mean that the lamp is working. If it is faulty, you need to replace it, which will be the solution to the problem.
- We check the cartridge for serviceability. To do this, you need to disassemble the lamp, make sure the integrity of the wires and contacts. If everything is in order, then the cause of the breakdown is not in the cartridge. If faults are found, they must be corrected. The lamp cannot be turned on.
- We check the serviceability of the room switch. To do this, remove the plastic cover, unscrew the screws and take it out of the mounting box. We inspect the equipment for the appearance of soot, check the tightness of the fasteners. If everything is in order, you need to install the measuring ends of the tester on the switch contacts. The appearance of a sound signal when the dialer is on will indicate that the equipment is working properly. The wires may not be disconnected.
During such a check, as a rule, a malfunction is detected, which becomes the cause of all the trouble. Its elimination allows you to quickly solve the problem.
If the machine worked
To ensure electrical safety during work, in this case, the voltage is turned off using a general apartment machine. Next, the serviceability of the cartridge and the wires connected to the lamp is determined according to the algorithm described above. If there are no malfunctions, you need to check the wiring itself using a multimeter and a continuity function. Such malfunctions happen quite rarely, but they still happen, for example, during installation suspended ceilings or decorative elements of the interior.
The dialing of the wiring in this case is performed as follows.
- Using a screwdriver, turn off the connected conductor (if installed correctly, it is located below) and take it to the side. The "zero" of this group is, as a rule, on the zero clamp under the machines.
- We unscrew the incandescent lamp from the cartridge. Using a ready-to-use tester, we check the line by connecting one of the measuring probes to “zero”, and the other to the disconnected conductor. If the device beeps, the wiring is shorted.
- In this case, in the room under the ceiling above the switch, we find and open the junction box. Disconnect wires.
- We check all groups of wires for the presence of a short circuit in them.
To determine the section of the circuit in which there is a short circuit, we again check the circuit on the apartment panel with a multimeter. If the signal sounds, it means that it is the wire laid from the shield to the box in the room that is to be repaired. Otherwise, the search will need to continue until a result is obtained.
Video
From all of the above, we can conclude that the presence of a multimeter with a dialing function in the house is an objective necessity for any home master. With such a device, in most cases it will be possible to quickly eliminate minor malfunctions without seeking help from specialists.
In the pop-up window on the computer monitor, the inscription “Network cable is not connected” appeared, the LED on the network board does not light up. You insert, remove the RJ-45 plug in the hope of a bad contact in the connection and realize that the cable is faulty. If you do not have a separate network card installed in your computer, and the network cable plug is inserted directly into the motherboard, then the LED will not light if the connection is disabled by software.
Currently, often a twisted pair network cable is first connected to a router, which sometimes freezes. So the first thing you need to do is reboot your router. To do this, just disconnect it from the mains for a minute and then turn it on again. It is possible that Internet access will be restored after that.
Disconnection can occur without your direct participation, for example, due to unstable network voltage, running unlicensed programs or a virus. To check in Win XP, you need to go: Start / Settings / Control Panel / Network Connections and make sure that the connection is connected. Less often, but it also happens that the network card driver does not work correctly. You can check: Start / Settings / Control Panel / System / Hardware / Device Manager / Network cards. There should be no warning signs.
Network cards very rarely fail, this sometimes happens after a strong thunderstorm. You can check the performance of a network card by connecting it to a known good line or installing it in another computer, remembering to install a driver for it. Sometimes it is possible to make the network card work by rearranging it into the adjacent slot of the motherboard.
call to technical service provider will help to check the operability of the line on their part. If everything is in order in the computer and the provider, therefore, the twisted pair cable has failed and it needs to be repaired. Of course, you can call specialists and wait, but if you wish, it is possible to diagnose and repair the twisted-pair cable with your own hands.
The most likely twisted-pair cable failures are:
- complete breakage of one or more wires - common;
- a short circuit between the conductors of one twisted pair or between the wires of adjacent pairs - is less common.
Program for checking access to the Internet
Network Traffic Monitor
AT search engines often looking for the answer to the question: “twisted pair cable test program”. On a computer with Windows system there is already such a program that displays the message "Network cable is not connected" in the event of a break or short circuit in the twisted pair cable. You will have to look for the place of a break or short circuit on your own, there is no such program that would indicate exactly the place and cause of the malfunction. There are special testers for this, for example MicroScanner Pro.
Another thing is if there is an Internet connection, but it is unstable or the download speed has suddenly dropped. To monitor traffic over the network, there is an excellent free program, more precisely, a utility called Network Traffic Monitor.
It allows you to measure the data transfer rate in real time, observe the change in speed over time, save data to the hard drive, rubber windows, extensive customization options and many others. useful services. Supports many languages, including Russian.
Installing the program on your computer is simple, just run the exe file and press the confirmation button several times. Network will automatically be added to startup and will monitor and save all data. To display any of the windows on the monitor screen, just right-click on the tray icon and select the desired window. Network Traffic Monitor best utility for analyzing and diagnosing the quality of the network from all that I met when searching. I have tested the Network Traffic Monitor program with Windows HP and Windows 7. You can download the Network Traffic Monitor program with one click of the mouse button from my website.
Scheme of connecting a computer to a network
utp twisted pair cable
To test a twisted-pair cable with skill, it is advisable to present an electrical circuit for connecting a twisted-pair cable to a computer network card with other devices, a hub, a switch, or another computer. The figure shows a diagram of a network section for connecting a computer to active equipment, a hub or a switch.

To test a twisted pair cable, it is precisely the part of the network card or hub circuit to which the RJ-45 twisted pair cable connector is connected that is of interest. As you can see, each pair is connected to the transformer in a symmetrical pattern (a tap is made from the middle of the transformer winding, which is connected to a common wire, sometimes through a resistor or capacitor). Thanks to this connection, all induced interference in the cable arrives at the input in antiphase and cancel each other out, while the useful signal arrives in phase and its value does not change. The transformer circuit has another advantage, it protects active equipment from short circuits and tangling of wires in a twisted pair cable when connected.
The range and shape of the information signal
twisted pair cable
Some people have a question, what shape and range does the signal have in twisted pairs? In the presented photo, the oscillogram of the information signal. On twisted pairs, both Rx and Tx signals have approximately the same shape and a swing of about two volts. On one pair, the signal is transmitted, and on the second it is received, therefore, two pairs are needed for communication. If one of the RJ-45 connectors on the twisted-pair cable is removed from the equipment, then signal transmission is automatically terminated.

Theoretically, the signal in a twisted pair should have a rectangular shape, but since there is capacitance and resistance of the conductors, the waveform is rounded. For this reason, the distance between communication points is limited, usually no more than 100 meters. The 2 V signal is not dangerous to humans, not dangerous to network equipment and a short circuit between the pairs, so you can troubleshoot the twisted pair cable without disconnecting it from the network. The network card, switch or hub will not fail.
How to find a break in a twisted pair utp cable
There are several ways to find a break in a twisted-pair cable: external inspection, dialing with a multimeter or pointer tester, and folk methods.
Checking twisted pair cable by external inspection
You should start checking the utp cable with an external inspection of the cable along its entire length, special attention should be paid to the quality of the crimp in the RJ-45 plugs. With careless crimping, the conductors may not be fully inserted into the plug, and the contact will be poor. Or the conductors are overlapped with each other at the place of fixation (it happens with a green pair, since its conductors are crimped at a distance of two contacts) and the twisted pairs in this place can close. If a visual inspection did not allow to detect a malfunction, then it is necessary to test the twisted pair cable.
If you had at your disposal a modern cable tester with an LCD display, for example, MicroScanner Pro, which allows you to determine not only the type of defect in a twisted pair cable, but also its location, or at least a home-made LED tester, then there would be no questions. However, in everyday life you have to do with improvised means.
Testing a twisted pair cable with a tester or multimeter

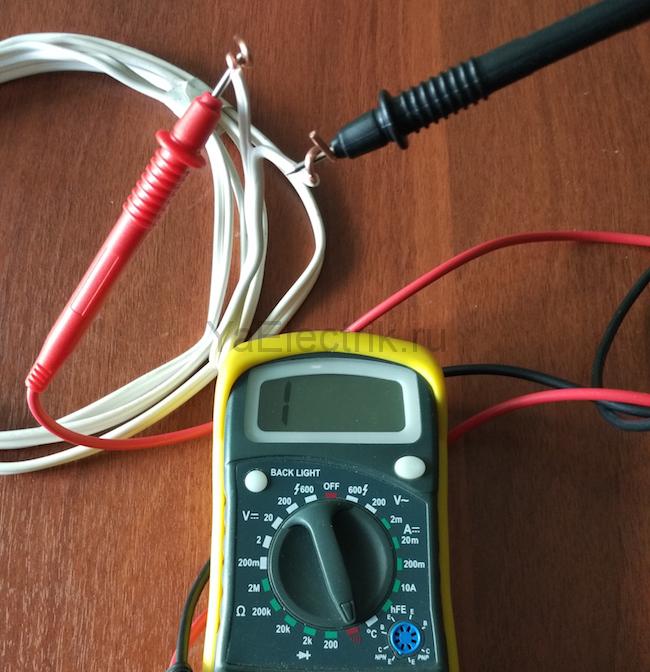
The easiest way to check is to test the orange and green twisted pair with a switch tester. To do this, remove the RJ-45 plug from the computer's network card. Further, with the probes of the tester, which is switched on in the resistance measurement mode, first touch the orange and white-orange conductor of the twisted pair. The tester should show a resistance of 1-2 ohms, then to green and white-green. The resistance should also be 1-2 ohms. The polarity of the tester connection does not matter. Next, the resistance between the orange and green conductors of the pair is measured. It must be more than 100 ohms, usually equal to infinity. If the measurement results match the above values, then the twisted pairs in the cable are working.
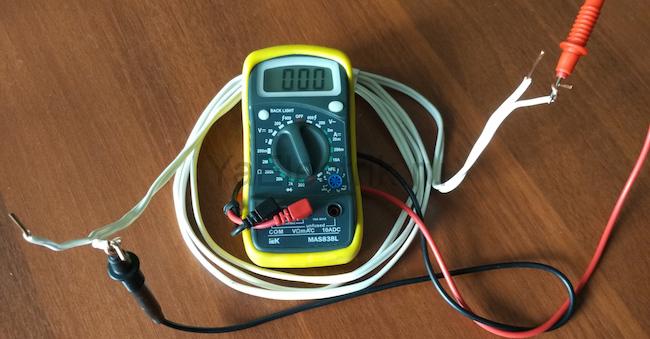
Here is another way that is more complicated, but reliable and indispensable if the twisted pair network cable under test is not connected to the equipment. It is necessary to bring the ends of the cable with RJ-45 plugs into one place and ring the conductors. It is necessary to set the switch on the device to the resistance measurement position and, according to the circuit, check the integrity of the conductors and the absence of a short circuit between them.

The photo shows a twisted pair cable crimped in an RJ-45 connector according to color coding option B.
The end of one probe of the device is touched to the contact of one RJ-45 plug, and the other probe is touched to the contact of the same name of the second plug. The resistance must be zero. The wires of each color are called in turn and each wire is checked for a short circuit with any other. The test for the absence of a short circuit is carried out on one plug. To do this, one end of the probe is connected to the contact, let's say number 1, and the second in turn to all the others. Next, the probe is connected to pin 2 and, in turn, to 3, 4, 5, 6. Since only two pairs are involved in signal transmission (orange and green, plug contacts 1, 2, 3, 6), you need to turn to them when checking Special attention.
But it is not always possible to bring the utp cable connectors to one point. In this case, it is difficult to do without an additional device. Of course, you can extend the end of the tester's probe to the entire length of the cable and test it together, or cut off one of the RJ-45 plugs, strip the wires and twist them together in pairs. But it is more expedient to make the simplest device from an RJ-45 socket, shorting pairs in it with pieces of conductors with a diameter of 0.5 mm or resistors, as shown in the photo. Resistors are better, as this allows you to check not only the integrity of the twisted pair conductors, but also the presence of a short circuit between them. If the measured resistance value is zero, and not installed in the outlet, then the conductors are shorted to each other. It is better to take different resistor values for twisted pair jumpers, for example, 50, 100, 150 and 200 ohms. Then the measurement results will be more informative.

The RJ-45 plug of one end of the twisted pair cable is inserted into a socket with jumpers, touching the probes of the tester to the contacts of the second plug, each twisted pair is checked in turn and there is no short circuit between adjacent pairs according to the technology described above.

Due to the different resistance values, it is easy to check the correctness of twisted pair crimping when checking a newly manufactured cable. If any pairs are reversed, then by the value of the resistance, this will be immediately visible. For example, if, when checking the orange pair, the multimeter shows a resistance of 100 ohms instead of the prescribed 50, then instead of the orange pair, another pair is crimped into pins 1 and 2 of the RJ-45, or the cable is crimped in another way.
It is very inconvenient to test a twisted pair cable by touching the RJ-45 plug. If a free RJ-45 socket is available, the measurement conditions can be improved. Insert the other end of the cable into the socket and carry out measurements by touching the probes to the contacts inside the socket.

Based on the results of the audit, a decision is made on further actions. If the orange or green pairs are open or shorted, then you can replace them with one of the unused ones, brown or blue, if they are working. To do this, you will have to cut one plug first and ring all the pairs again, then the second with a second check of the pairs, since an open or short circuit may be in the plugs themselves. Short circuits occur at the place where the cable is clamped with a retainer in the plug if the wires are not properly prepared. A break if the conductors are notched when cutting the outer sheath of the cable. This is where they often break. If, after cutting the plugs, all pairs turned out to be defective, it is necessary to more carefully examine the cable along the entire length, if it is not possible to detect a damaged place, you will have to change the twisted pair cable with a new one.
Checking utp cable twisted pair without devices
If there is no tester or multimeter at hand, then you can check the health of the twisted pair cable without them using the method below. It is necessary to cut off pieces of 10-15 cm from the ends of the cable, along with connectors. Release the ends of the cable from the sheath by 5 cm and remove the insulation from each of the wires for a length of 2 cm.

In a small container made of dielectric material (glass, plastic, plastic bag) pour a little water with table salt dissolved in it at the rate of a quarter of the volume of salt from the volume of water. The more salt, the better. Salt is added to water to reduce its electrical resistance. Immerse all conductors of one end of the cable in a container with a solution. You can immerse each twisted pair and in turn. The distance between the conductors of twisted pairs should be minimal, but they should not touch.

Connect the twisted pairs of the opposite end of the cable in series to the poles of any battery or power source greater than 3 V. If the salt concentration in the heated water is very high, 1.5 V will be enough. remote control TV. A battery from a cell phone will work with success, it has a voltage of about 3.7 V. A battery from the motherboard will also work, it has a voltage of 3.2 V. If you have a 50-100 Ohm resistor, it is better to connect the battery through it, to protect the case of a short circuit of twisted pairs. The polarity of the connection does not matter.
The telephone network can be used as a power source. Voltage in telephone network about 40 volts and a constant current, limited at the telephone exchange to 40 mA. Such a connection is safe for a person and a telephone line. This option is convenient to use if you need to apply voltage to the twisted pair cable in the entrance, where there is a telephone box nearby.
Any test will do. Charger from a cell phone, a USB port of a computer, at the extreme terminals there is 5 V. It is not permissible to connect to USB without a current-limiting resistor, it can damage the computer. To test twisted pairs, a current of 2 mA is sufficient.

After applying voltage, at the opposite ends of the twisted pair, which are in the water, the following picture will be observed.

As you can see, on the conductor, which is connected to the minus (cathode), small white bubbles of hydrogen are released, and yellow-green bubbles of chlorine are released on the conductor connected to the plus (anode). It is obvious that the pair is in order and there is no short circuit with other conductors. In the event of a short circuit, depending on which wire, white or yellow bubbles also came from the other wire.
If damage is found, then the twisted pair test can be completed at this point and the faulty twisted pair pair can be replaced with a blue or brown one. For example, when checking twisted pairs, a break was detected in the orange pair. Then connect the orange pair coming from the connectors with the blue pair of the cable. The connection technology is described on the Twisted Pair Cable Extension page.
Of course, it is better to crimp the cable with new connectors, rather than splicing. Or crimp in the old way, described on the page "How to crimp an RJ-11, RJ-45 plug onto a twisted pair cable".
If the orange and green pairs are OK and you don't want to mess around with crimping connectors, you need to check the cut pieces of cable with connectors. To do this, all colored wires of twisted pairs and separately white-colored wires, stripped of insulation, are twisted together.

The connector is immersed in the salt solution to such a depth that the contacts are completely in the water. Twisted wires are connected to the battery.

On four of the eight contacts after one, white bubbles should form. You change the polarity of the battery connection, bubbles should form on the contacts on which they did not appear before and also strictly through one. Deviation from this immediately indicates a malfunction. For example, if there are no white bubbles on one of the contacts, then the wire is open, if there is no one on any contact, then there is a short circuit between the conductors. For clarification, you can perform individual testing of pairs by unwinding previously made twists.
Depending on the results obtained, you will have to crimp or splice the wires.
Testing a twisted pair cable using a potato
The cable is prepared as described above, only the brine container is replaced with half a potato. Each pair is stuck sequentially into the potato to a depth of 1-1.5 cm. The distance between the conductors should be minimal.

As you can see in the photo, around the wire that is connected to the positive terminal of the battery turned green, and white foam appeared around the negative one. When the wires are removed from the potato, you will notice a darkening of the wire to which the minus was applied. If there are no changes on the cut of the potato, then the twisted-pair conductors are open or shorted to each other.
For the sake of interest, I poked the wires into a slice of an apple. Not so obvious, but that the wires are in order is obvious.

Using the described twisted pair test method, you can test wires of any type, cross section and length.


